メインコンテンツにスキップ

この分解は進行中です。 – 最新版を見るには定期的に再読み込みします。

必要な工具と部品

  1. DualShock 4 CHU-ZCT2U Gen 4 Teardown, Opening the controller: 手順 1、 3の画像 1 DualShock 4 CHU-ZCT2U Gen 4 Teardown, Opening the controller: 手順 1、 3の画像 2 DualShock 4 CHU-ZCT2U Gen 4 Teardown, Opening the controller: 手順 1、 3の画像 3
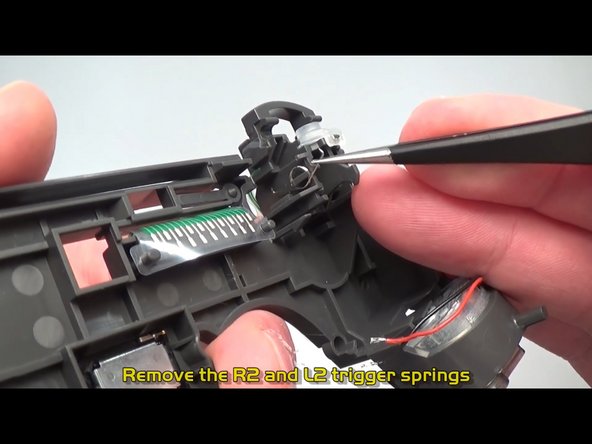
    • Remove 4 PH00 screws

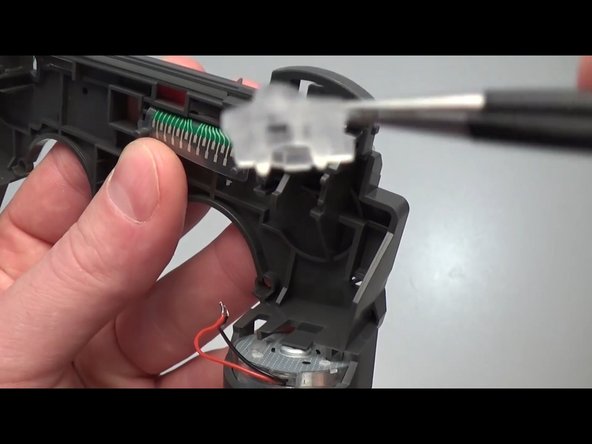
    • Use something hard to push in at the points shown, this will release the clips on the bottom of the controller. This will allow you to open the bottom of the case.

    • Carefully open up the shell, take care, there are a two further clips as the top of the controller that will pop open with reasonable ease. be cautious of the ribbon cable connection that connects the top of the case to the lower half.

  2. DualShock 4 CHU-ZCT2U Gen 4 Teardown, Detach ribbon cable: 手順 2、 1の画像 1
    • Undo the interface connecting the ribbon cable to the mainboard.

  3. DualShock 4 CHU-ZCT2U Gen 4 Teardown: 手順 3、 3の画像 1 DualShock 4 CHU-ZCT2U Gen 4 Teardown: 手順 3、 3の画像 2 DualShock 4 CHU-ZCT2U Gen 4 Teardown: 手順 3、 3の画像 3
    • Remove the top light bar

    • Remove the light carrying plastic.

    • Remove the light triangle.

  4. DualShock 4 CHU-ZCT2U Gen 4 Teardown, Remove USB Chip: 手順 4、 2の画像 1 DualShock 4 CHU-ZCT2U Gen 4 Teardown, Remove USB Chip: 手順 4、 2の画像 2
    • Unscrew the PH00 screw to Release USB Chip

    • This Generation 4 Controller uses a JDS-040. This board is authentic due to its colors and markings.

  5. DualShock 4 CHU-ZCT2U Gen 4 Teardown, Battery Removal: 手順 5、 1の画像 1
    • The battery is secured onto the Battery Bracket with a small amount of adhesive. Lack of adhesive is a red flag that this controller has been previously worked on by a third party.

    • The battery uses a friction fit interface with two pins. Use tweezers to remove.

    • Check the battery for authenticity. A real battery is needed. There are some repairs that replace the rectangular gray battery with a plastic battery that looks like it can be cut. Fake batteries are questionable in quality and detrimental to the controller.

  6. DualShock 4 CHU-ZCT2U Gen 4 Teardown: 手順 6、 1の画像 1
    • The battery brace is held by friction by pegs on either side of the brace. Use tweezers to remove the brace

  7. DualShock 4 CHU-ZCT2U Gen 4 Teardown, Remove Midframe: 手順 7、 3の画像 1 DualShock 4 CHU-ZCT2U Gen 4 Teardown, Remove Midframe: 手順 7、 3の画像 2 DualShock 4 CHU-ZCT2U Gen 4 Teardown, Remove Midframe: 手順 7、 3の画像 3
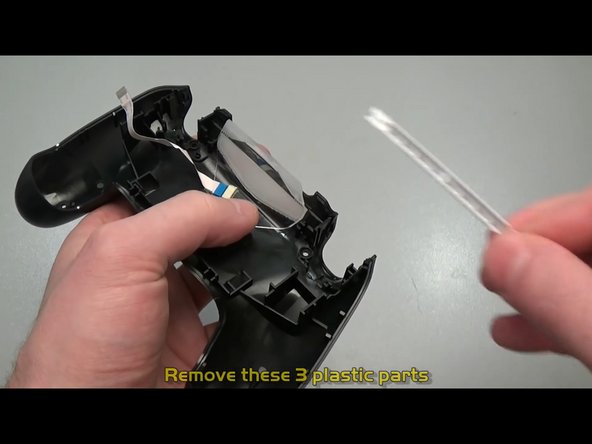
    • Detatch touch pad at its interface. Be careful.

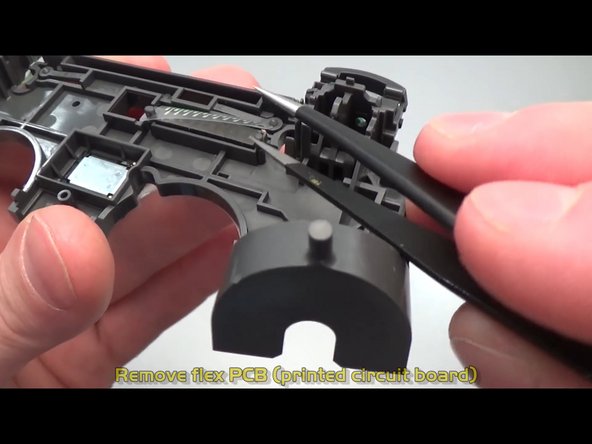
    • This Gen 4 controller features a mainboard with a PH00 screw towards the right side. Please remove the screw.

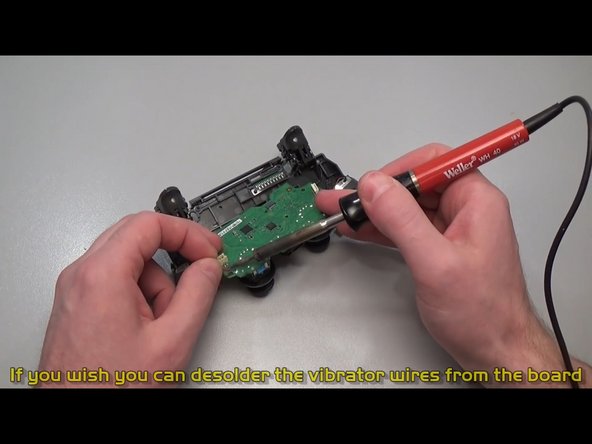
    • That’s all. Lift the Midframe right up on out of there. Always have the mainboard facing up. The Midframe May face down after the rumble motors are desoldered.

  8. DualShock 4 CHU-ZCT2U Gen 4 Teardown, Remove and disassemble touchpad: 手順 8、 3の画像 1 DualShock 4 CHU-ZCT2U Gen 4 Teardown, Remove and disassemble touchpad: 手順 8、 3の画像 2 DualShock 4 CHU-ZCT2U Gen 4 Teardown, Remove and disassemble touchpad: 手順 8、 3の画像 3
    • Lift the bottom of the touchpad towards you, as it is hinged near the top. Lift it away after undoing the hinge.

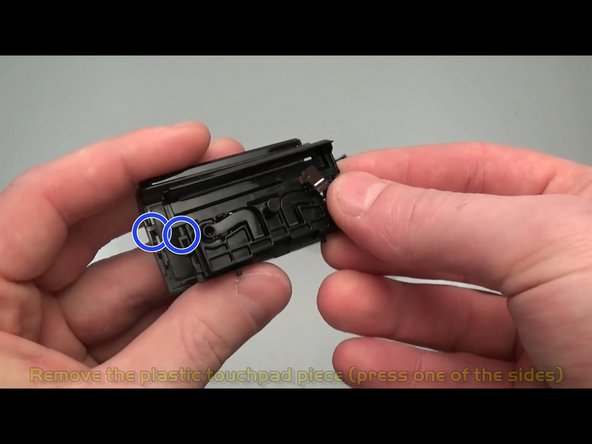
    • There are panels on either side of the touchpad. It isn’t glued, nor is it a friction fit. One side is disassembled and shown in blue. Use tweezers.

  9. DualShock 4 CHU-ZCT2U Gen 4 Teardown, Remove buttons: 手順 9、 2の画像 1 DualShock 4 CHU-ZCT2U Gen 4 Teardown, Remove buttons: 手順 9、 2の画像 2
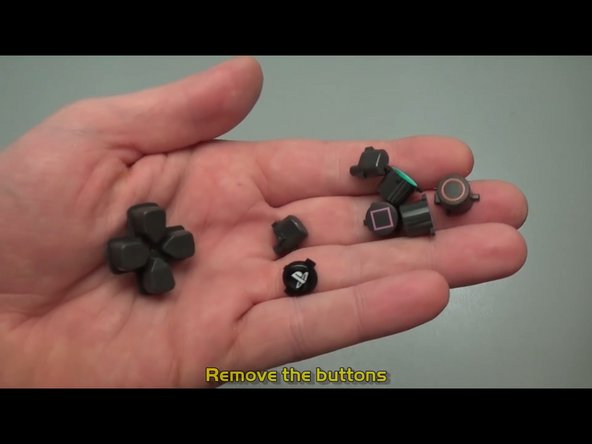
    • The pad membranes are friction fitted. Once they come off, the buttons can go everywhere, they’ll come out into your hand.

  10. DualShock 4 CHU-ZCT2U Gen 4 Teardown: 手順 10、 2の画像 1 DualShock 4 CHU-ZCT2U Gen 4 Teardown: 手順 10、 2の画像 2
    • Back to the Midframe. Lift away the mainboard. Mind the motor wires. They are fragile. This step to isolate the board is needed so desoldering heat doesn’t ruin the plastic Midframe.

    • Desolder the red and black wires at the Mainboard, noting their respective locations.

  11. DualShock 4 CHU-ZCT2U Gen 4 Teardown, Remove bumpers: 手順 11、 1の画像 1
    • Pull the bumpers right off. Be careful, you’ll hear a click.

  12. DualShock 4 CHU-ZCT2U Gen 4 Teardown: 手順 12、 3の画像 1 DualShock 4 CHU-ZCT2U Gen 4 Teardown: 手順 12、 3の画像 2 DualShock 4 CHU-ZCT2U Gen 4 Teardown: 手順 12、 3の画像 3
    • Here’s the panel work to undo.

    • it should come right off.

    • The spring should come out with the tweezers.

  13. DualShock 4 CHU-ZCT2U Gen 4 Teardown, Remove pads for bumpers and Triggers.: 手順 13、 1の画像 1
    • This pad should slide right out. Use the tweezers.

  14. DualShock 4 CHU-ZCT2U Gen 4 Teardown, Removing the front Mylar: 手順 14、 2の画像 1 DualShock 4 CHU-ZCT2U Gen 4 Teardown, Removing the front Mylar: 手順 14、 2の画像 2
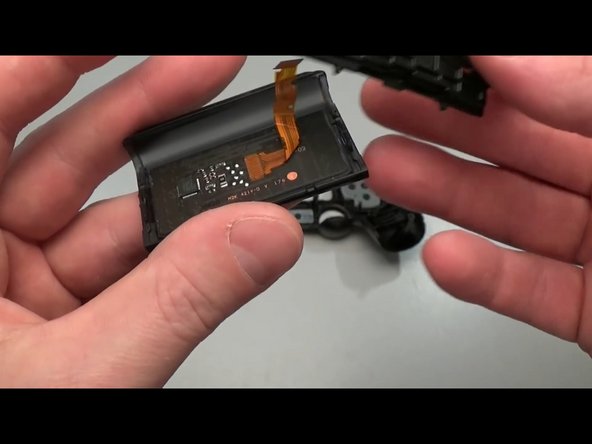
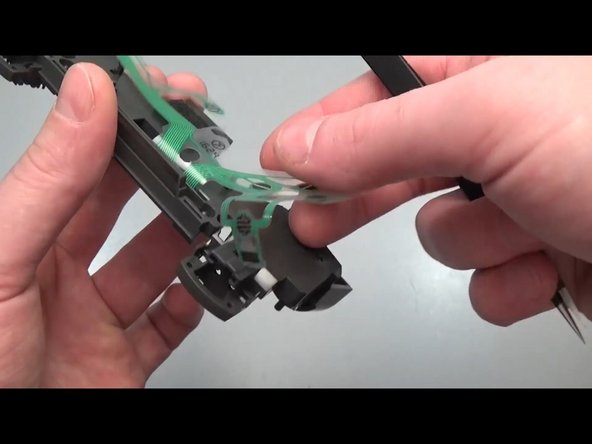
    • There’s a piece of Mylar with a circuit on it to detect the buttons. Use the tweezers as shown.

  15. DualShock 4 CHU-ZCT2U Gen 4 Teardown, Finish it off: 手順 15、 3の画像 1 DualShock 4 CHU-ZCT2U Gen 4 Teardown, Finish it off: 手順 15、 3の画像 2 DualShock 4 CHU-ZCT2U Gen 4 Teardown, Finish it off: 手順 15、 3の画像 3
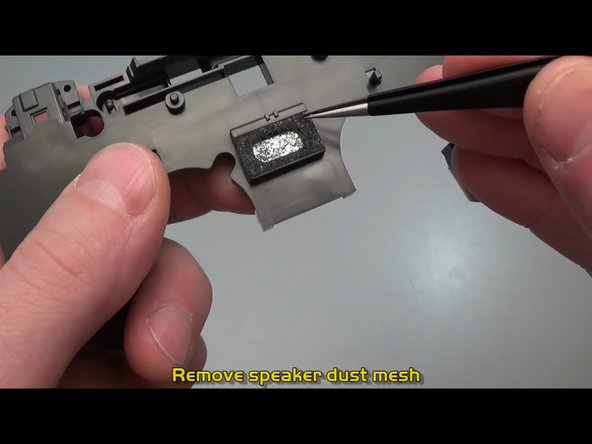
    • Use tweezers to remove speaker dust mesh. It is fixed on there with light adhesive.

    • The speaker itself is also fixed with light adhesive. Flip the Midframe over to remove it with the tweezers.

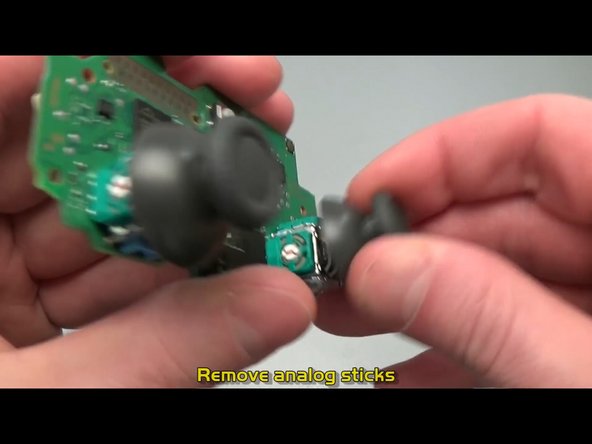
    • The thumb sticks pull straight off the rockers. Go ahead and do that.

作成者

3人の作成者と共同で作成されました。

Alexander Weinhart

メンバー登録日: 10/15/20

266 ポイント

1ガイドが承認済み

0 件のコメント

コメントを追加

統計データ:

過去 24時間: 0

過去 7 日: 15

過去 30 日: 77

今までの合計 2,370