メインコンテンツにスキップ

必要な工具と部品

この分解は修理ガイドでは ありません。 お持ちのDigital Caliperを修理する際は、iFixitの修理ガイドをご利用ください。

  1. Digital Caliper Teardown, Remove Battery: 手順 1、 2の画像 1 Digital Caliper Teardown, Remove Battery: 手順 1、 2の画像 2
    • Slide the battery compartment open.

    • Pull out the battery.

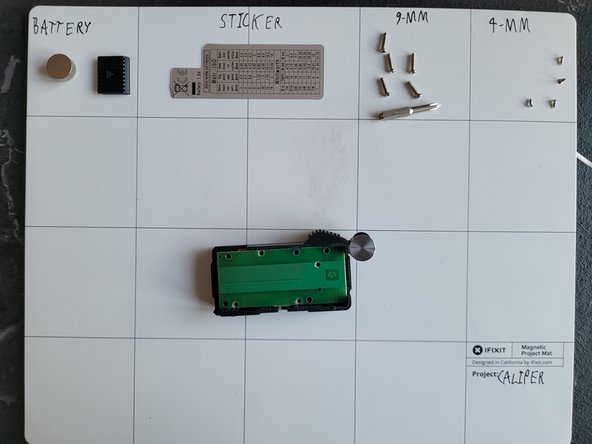
  2. Digital Caliper Teardown, Screw out the housing: 手順 2、 2の画像 1 Digital Caliper Teardown, Screw out the housing: 手順 2、 2の画像 2
    • Remove the sticker and place it on a clean sticker-friendly surface.

    • Screw out the 9-mm screws using the J0 Bit.

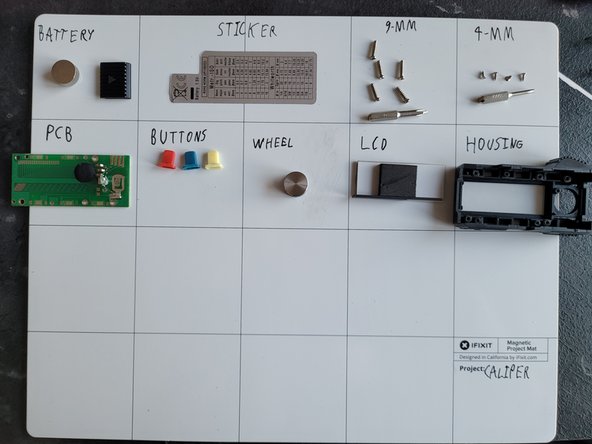
  3. Digital Caliper Teardown, Housing dissasembly: 手順 3、 3の画像 1 Digital Caliper Teardown, Housing dissasembly: 手順 3、 3の画像 2 Digital Caliper Teardown, Housing dissasembly: 手順 3、 3の画像 3
    • Screw out the 4-mm screws holding the PCB in place. Use the J000 bit.

    • Now take out all the parts from the housing.

  4. Digital Caliper Teardown, Body: 手順 4、 2の画像 1 Digital Caliper Teardown, Body: 手順 4、 2の画像 2
    • Remove the right/bottom 6mm screws.

    • Then the last 2 and the tightener screws. So you can pull it apart.

作成者

1人の作成者と共同作成されました。

Sebastian

メンバー登録日: 12/02/21

532 ポイント

2のガイドは作成済み

0 件のコメント

コメントを追加

統計データ:

過去 24時間: 4

過去 7 日: 22

過去 30 日: 106

今までの合計 1,515