メインコンテンツにスキップ

必要な工具と部品

この分解は修理ガイドでは ありません。 お持ちのDatatronics Discovery 2400CMを修理する際は、iFixitの修理ガイドをご利用ください。

  1. Datatronics Discovery 2400CM Teardown, remove front cover: 手順 1、 3の画像 1 Datatronics Discovery 2400CM Teardown, remove front cover: 手順 1、 3の画像 2 Datatronics Discovery 2400CM Teardown, remove front cover: 手順 1、 3の画像 3
    • The front is attached to the body with 2 latches.

    • Using the spudger, open a latch on one side.

    • Open the latch on the other side next to detach the front.

  2. Datatronics Discovery 2400CM Teardown, remove back cover: 手順 2、 2の画像 1 Datatronics Discovery 2400CM Teardown, remove back cover: 手順 2、 2の画像 2
    • The back cover is attached to the body the same way as the front.

    • Open both latches to detach to back cover.

  3. Datatronics Discovery 2400CM Teardown, remove board from housing: 手順 3、 3の画像 1 Datatronics Discovery 2400CM Teardown, remove board from housing: 手順 3、 3の画像 2 Datatronics Discovery 2400CM Teardown, remove board from housing: 手順 3、 3の画像 3
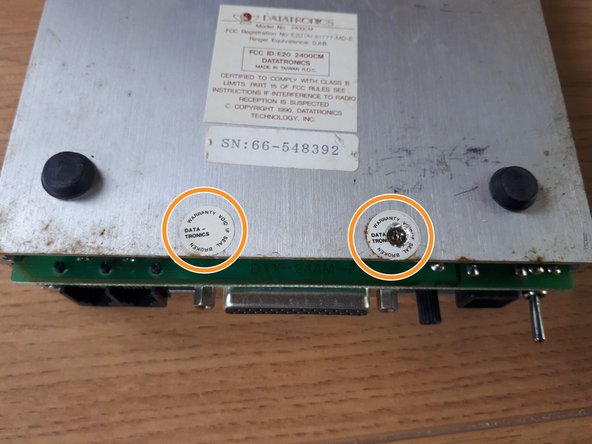
    • The board is attached to the body with 2 screws. The screws are hidden under "warranty voidance" stickers.

    • Remove the stickers so you can unscrew the screws.

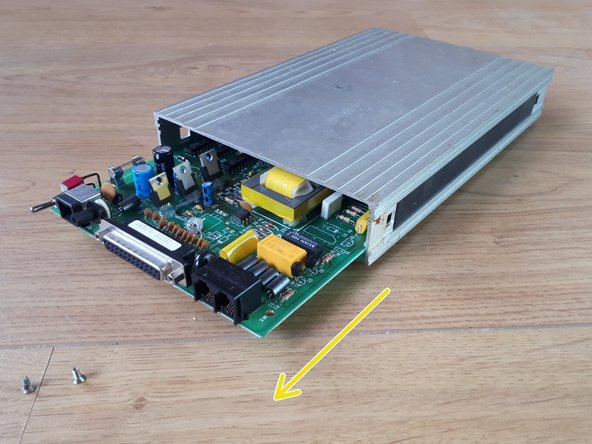
    • Slide the board from the body.

  4. Datatronics Discovery 2400CM Teardown, overview: 手順 4、 3の画像 1 Datatronics Discovery 2400CM Teardown, overview: 手順 4、 3の画像 2 Datatronics Discovery 2400CM Teardown, overview: 手順 4、 3の画像 3
    • Overview of the front and back of the board, as well as a detailed view of the label.

作成者

1人の作成者と共同作成されました。

knipwim

メンバー登録日: 09/01/18

8,517 ポイント

30のガイドは作成済み

0 件のコメント

コメントを追加

統計データ:

過去 24時間: 0

過去 7 日: 2

過去 30 日: 8

今までの合計 900