メインコンテンツにスキップ

必要な工具と部品

この分解は修理ガイドでは ありません。 お持ちのCar and Drivers Auto HandHeld Vacuum Baglessを修理する際は、iFixitの修理ガイドをご利用ください。

  1. Car and Drivers Auto HandHeld Vacuum Bagless Teardown, Car and Drivers Auto HandHeld Vacuum Bagless Teardown: 手順 1、 3の画像 1 Car and Drivers Auto HandHeld Vacuum Bagless Teardown, Car and Drivers Auto HandHeld Vacuum Bagless Teardown: 手順 1、 3の画像 2 Car and Drivers Auto HandHeld Vacuum Bagless Teardown, Car and Drivers Auto HandHeld Vacuum Bagless Teardown: 手順 1、 3の画像 3
    • Locate the four screws locate outer gray shelll

    • ''I REMOVED THE SCREWS WITH PH #OO SCREWDRIVER FROM (IFIXIT)

    • New PLace four screws to the side

  2. Car and Drivers Auto HandHeld Vacuum Bagless Teardown: 手順 2、 1の画像 1
    • Here are the four screws from vacuum

  3. Car and Drivers Auto HandHeld Vacuum Bagless Teardown: 手順 3、 3の画像 1 Car and Drivers Auto HandHeld Vacuum Bagless Teardown: 手順 3、 3の画像 2 Car and Drivers Auto HandHeld Vacuum Bagless Teardown: 手順 3、 3の画像 3
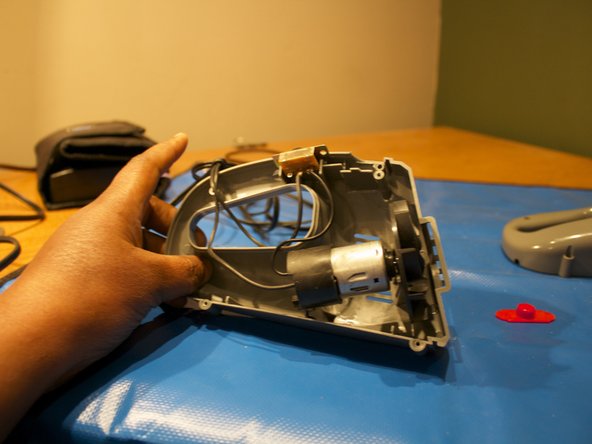
    • Remove the top grey shell of the vacuum

    • Place a red tab to the side

    • Let start looking at the 9volt motor with wire and on/off switch.

    • I remove the outer shell . I remove the motor and wires and on/off switch.

  4. Car and Drivers Auto HandHeld Vacuum Bagless Teardown: 手順 4、 1の画像 1
    • This it complete teardown on Car and Driver HandHeld Vacuum bagless!

作成者

1人の作成者と共同作成されました。

kempc8

メンバー登録日: 11/22/13

899 ポイント

7のガイドは作成済み

チーム

K and K Fixit K and K Fixit人のメンバー

Business

1 メンバー

11のガイドは作成済み

0 件のコメント

コメントを追加

統計データ:

過去 24時間: 1

過去 7 日: 4

過去 30 日: 8

今までの合計 1,011