メインコンテンツにスキップ

この分解は修理ガイドでは ありません。 お持ちのBrother P-Touch TZe Tape 12mmを修理する際は、iFixitの修理ガイドをご利用ください。

  1. Brother P-Touch TZe Tape 12mm Teardown, Cartridge Overview: 手順 1、 1の画像 1
    • Insert wisdom here.

  2. Brother P-Touch TZe Tape 12mm Teardown, Tape Flow: 手順 2、 1の画像 1
    • Top clear tape

    • Thermal ink tape

    • White backing with adhesive

    • Thermal printer zone

  3. Brother P-Touch TZe Tape 12mm Teardown, Printing Process: 手順 3、 3の画像 1 Brother P-Touch TZe Tape 12mm Teardown, Printing Process: 手順 3、 3の画像 2 Brother P-Touch TZe Tape 12mm Teardown, Printing Process: 手順 3、 3の画像 3
    • The clear top tape (light blue line) is usually completely clear.

    • The tape is empty and the zebra stripes indicates it to the user.

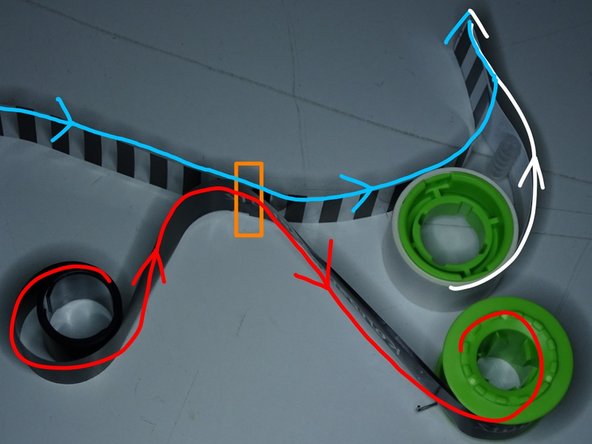
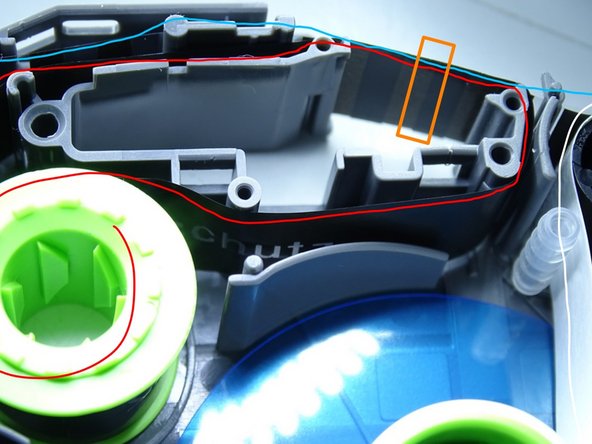
    • The thermal ink tape gets unrolled and again rolled onto another roller.

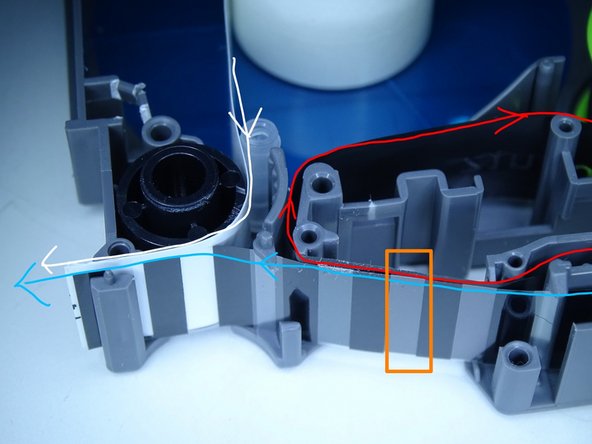
    • In the printing zone, a single column of heat "pixels" heats the thermal ink (red line) and sticks it to the clear top tape (blue line).

    • The clear top tape than gets laminated with the white backing (white line).

  4. Brother P-Touch TZe Tape 12mm Teardown, Inverted Image on Ink Tape: 手順 4、 1の画像 1
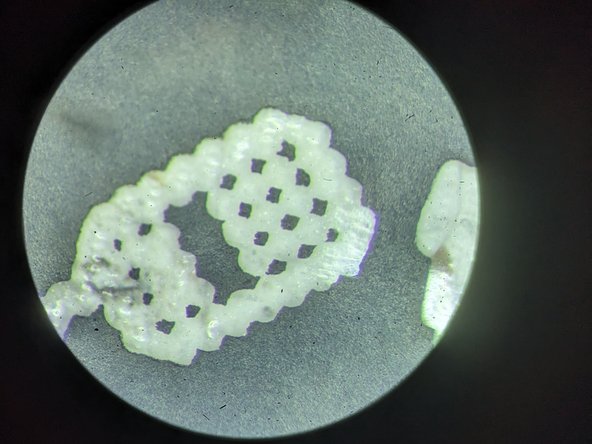
    • Since the ink from the printed spots is now on the label and not longer on the ink tape, you can see a inverted image of everything the cartridge ever printed.

    • Keep that in mind when printing sensitive information like passwords or PPI!

  5. Brother P-Touch TZe Tape 12mm Teardown, Resolution: 手順 5、 2の画像 1 Brother P-Touch TZe Tape 12mm Teardown, Resolution: 手順 5、 2の画像 2
    • The resolution of the text font seems to be lower than the icons (this icon should resemble a old mobile phone).

    • The small dots on the mobile phone are about 180 µm apart.

    • Both images are captured using the same magnification. The image circle has a diameter of approximately 2.5 mm.

作成者

1人の作成者と共同作成されました。

Quanten

メンバー登録日: 05/21/18

1,013 ポイント

5のガイドは作成済み

0 件のコメント

コメントを追加

統計データ:

過去 24時間: 4

過去 7 日: 17

過去 30 日: 86

今までの合計 444