はじめに
Use this guide for the following cases:
- You dropped the phone in water and need to dry it thoroughly
- You need to exchange the display for a working one
- You want to salvage parts
必要な工具と部品
-
-
Place the phone in front of you.
-
Turn it around and start by removing the holding clip.
-
-
-
Slide down the battery cover
-
Remove the battery by pulling on the two cables (green rectangle)
-
Use a torx screwdriver to remove four screws (red circles).
-
-
-
-
Pry open the phone from the side using a guitar pick or a spudger.
-
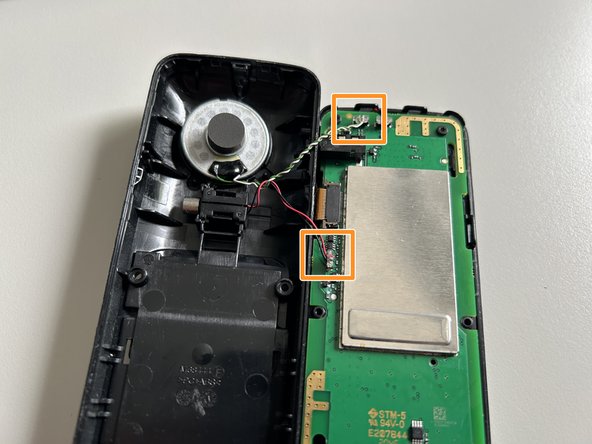
Be careful not to rip the two pieces apart because there are two connectors to be unplugged from the logic board (orange squares)
-
Use a pair of tweezers to accomplish this step and carefully remove the speaker as well as the headphone cable
-
Remove the two remaining torx screws that connect the logic board to the casing (red circles)
-
-
-
Use your tweezers to remove the remaining speaker cable on top
-
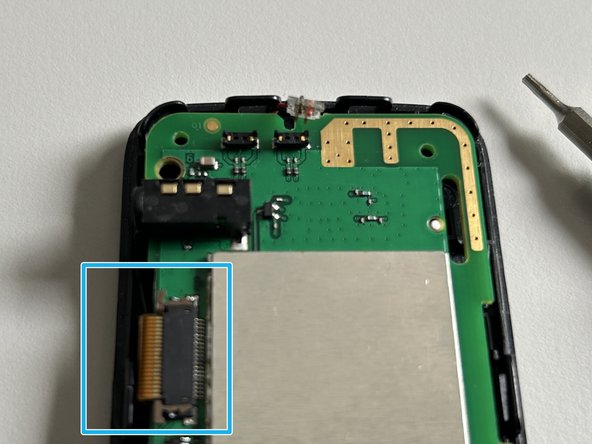
Then proceed to the ribbon cable for the display by rotating the phone by 90 degrees.
-
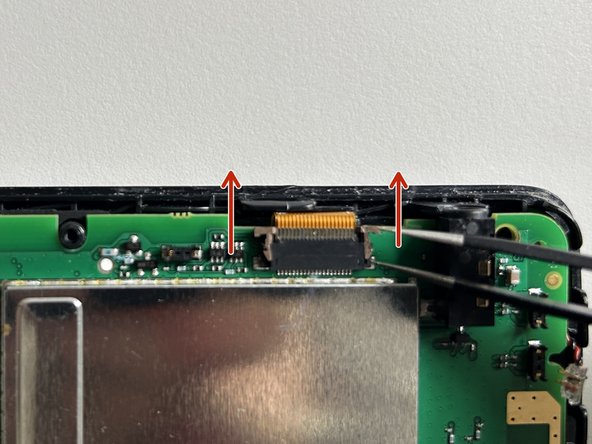
To remove the ribbon cable you must loosen the brown clip by gently pushing it up from both sides.
-
When the clip is loosened you may pull out the ribbon cable carefully.
-