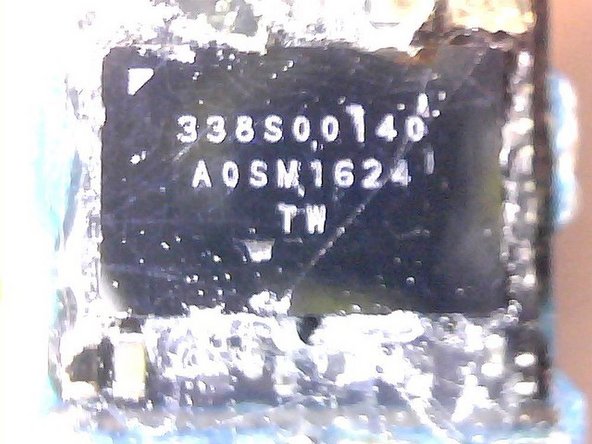
メインコンテンツにスキップ

必要な工具と部品

この分解は修理ガイドでは ありません。 お持ちのApple Lightning to Headphone Jack Adapterを修理する際は、iFixitの修理ガイドをご利用ください。

  1. Apple Lightning to Headphone Jack Adapter Teardown, Apple Lightning to Headphone Jack Adapter Teardown: 手順 1、 3の画像 1 Apple Lightning to Headphone Jack Adapter Teardown, Apple Lightning to Headphone Jack Adapter Teardown: 手順 1、 3の画像 2 Apple Lightning to Headphone Jack Adapter Teardown, Apple Lightning to Headphone Jack Adapter Teardown: 手順 1、 3の画像 3
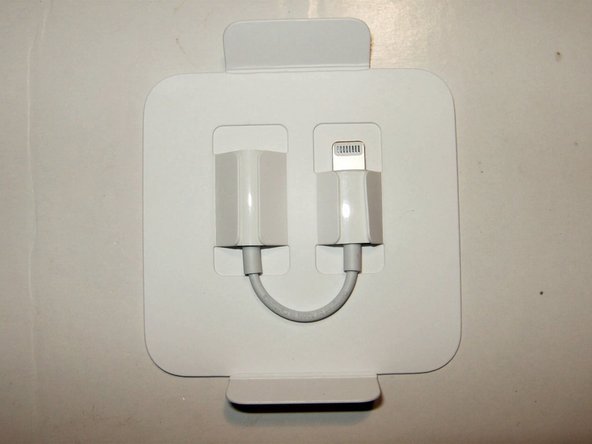
    • Typical Apple product packaging. Simple yet elegant

    • Backside of the package

    • Bottom of the package describes the adapter as a A1749

  2. Apple Lightning to Headphone Jack Adapter Teardown: 手順 2、 3の画像 1 Apple Lightning to Headphone Jack Adapter Teardown: 手順 2、 3の画像 2 Apple Lightning to Headphone Jack Adapter Teardown: 手順 2、 3の画像 3
    • Again, nice packaging for the adapter.

    • The total length of the adapter is 3 1/8 inches or 8cm. One side with the lightning connector and the other end is the 3.5mm headphone jack.

    • Checked to see if there was any way to remove the outside of the adapter by slipping some thin tools in between. No way on that.

  3. Apple Lightning to Headphone Jack Adapter Teardown: 手順 3、 3の画像 1 Apple Lightning to Headphone Jack Adapter Teardown: 手順 3、 3の画像 2 Apple Lightning to Headphone Jack Adapter Teardown: 手順 3、 3の画像 3
    • This is the business end that requires the removal of the covering.

    • The only way to do that is by cutting into it. Using a good scalpel does cut it with relative ease.

    • Careful while using a sharp instrument, not much room to hold onto the connector.

  4. Apple Lightning to Headphone Jack Adapter Teardown, Cutting the lightning connector open: 手順 4、 3の画像 1 Apple Lightning to Headphone Jack Adapter Teardown, Cutting the lightning connector open: 手順 4、 3の画像 2 Apple Lightning to Headphone Jack Adapter Teardown, Cutting the lightning connector open: 手順 4、 3の画像 3
    • Cutting length wise on one side

    • as well as the opposite site

    • Then flipping the two halves that were created by the cuts.

  5. Apple Lightning to Headphone Jack Adapter Teardown: 手順 5、 3の画像 1 Apple Lightning to Headphone Jack Adapter Teardown: 手順 5、 3の画像 2 Apple Lightning to Headphone Jack Adapter Teardown: 手順 5、 3の画像 3
    • This makes for an easy removal.

    • The next thing to be removed is the ground shield.

    • Using a pair of small side cutters that shield is easily removed as well.

  6. Apple Lightning to Headphone Jack Adapter Teardown: 手順 6、 3の画像 1 Apple Lightning to Headphone Jack Adapter Teardown: 手順 6、 3の画像 2 Apple Lightning to Headphone Jack Adapter Teardown: 手順 6、 3の画像 3
    • Just a matter of using the cutters on one end

    • and rolling it around the connector.

    • This shows the destructive nature of this teardown

  7. Apple Lightning to Headphone Jack Adapter Teardown: 手順 7、 3の画像 1 Apple Lightning to Headphone Jack Adapter Teardown: 手順 7、 3の画像 2 Apple Lightning to Headphone Jack Adapter Teardown: 手順 7、 3の画像 3
    • The connector is now left with another plastic covering.

    • Luckily the removal of the ground shield seems to have open slots lengthwise in the plastic covering.

    • Using these slots, the plastic needs to be carefully pulled away from the circuit board.

  8. Apple Lightning to Headphone Jack Adapter Teardown: 手順 8、 3の画像 1 Apple Lightning to Headphone Jack Adapter Teardown: 手順 8、 3の画像 2 Apple Lightning to Headphone Jack Adapter Teardown: 手順 8、 3の画像 3
    • Here is the business end with the cover removed.

    • This side shows what appears to be the DAC inside this adapter

    • Close-up of the circuit board shows Apple's fascination with adhesive and other sticky substances. Both sides of the circuit board are covered with it.

  9. Apple Lightning to Headphone Jack Adapter Teardown: 手順 9、 3の画像 1 Apple Lightning to Headphone Jack Adapter Teardown: 手順 9、 3の画像 2 Apple Lightning to Headphone Jack Adapter Teardown: 手順 9、 3の画像 3
    • A bit more of a close up of one side

    • as well as the other. As more information becomes available about the DAC this teardown will be edited to reflect those.

    • Here are the markings on the DAC 338S00140 A0SM1624 TW

  10. Apple Lightning to Headphone Jack Adapter Teardown, Cutting the headphone jack open: 手順 10、 3の画像 1 Apple Lightning to Headphone Jack Adapter Teardown, Cutting the headphone jack open: 手順 10、 3の画像 2 Apple Lightning to Headphone Jack Adapter Teardown, Cutting the headphone jack open: 手順 10、 3の画像 3
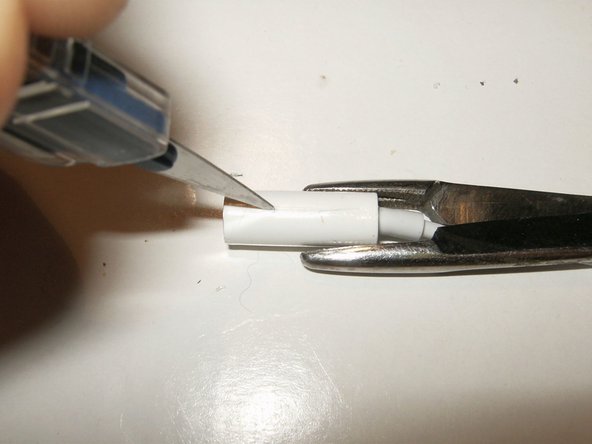
    • Carefully slice down the headphone jack connector with a sharp knife, being careful to not cut yourself.

  11. Apple Lightning to Headphone Jack Adapter Teardown: 手順 11、 2の画像 1 Apple Lightning to Headphone Jack Adapter Teardown: 手順 11、 2の画像 2
    • Insert wisdom here.

    • Repairability score: 0 out of 10

    • The device is clearly not meant to be opened or repaired in any way.

    • It is impossible to open the adapter without destroying it.

作成者

9人の作成者と共同で作成されました。

oldturkey03

メンバー登録日: 09/29/10

782,169 ポイント

119のガイドは作成済み

チーム

Global Fixers Global Fixers人のメンバー

Community

33 メンバー

537のガイドは作成済み

32 件のコメント

There seem to be a lot more wires than necessary going to the 3.5mm connector. By my count there appear to be 7 or 8 discrete wires?

At most there should be 4, TRRS, and maybe a shield ground. How are the other wires used here?

Mac 128 - 返信

Mac 128 excellent question and I will try and take the jack end off as well asap. There is a total of 7 wires....

oldturkey03 -

Perhaps it supports both standard pinout methods for mics/remotes, rather than just Apples flipped data/ground pin standard?

tipoo -

I am currently looking into modyfying an Apple TRRS connector so I can take some readings on what is what and how it may function. Only hold-up is that I do work for a living:-) so time is always an issue.

oldturkey03 -

Mac 128 mystery already solved. Check this teardown by Mason Dowell Apple Earphones with Remote and Mic (Lightning Edition) Teardown. It'll explain what each wire does.

oldturkey03 -

コメントを追加

統計データ:

過去 24時間: 21

過去 7 日: 148

過去 30 日: 592

今までの合計 107,601