はじめに
Use this guide to disassemble the ASUS MB169B+ portable monitor.
必要な工具と部品
-
-
In this guide you will be disassembling the ASUS portable monitor. Read Ahead and follow the directions to avoid damaging the display or clips holding it in place.
-
There are plastic clips that hold the cover in place. With a spudger insert the edge of the spudger between the faceplate and the rear cover of the monitor, as shown in the picture.
-
Slowly pry up on the faceplate starting at a corner and slowly prying along the outside edge of the faceplate and continuing around the entire cover.
-
-
-
Lift the cover away from the LCD and set off to the side.
-
Remove the 4 screws holding the LCD to the back cover.
-
Do not attempt to remove the display at this time, as it is attached to the main board.
-
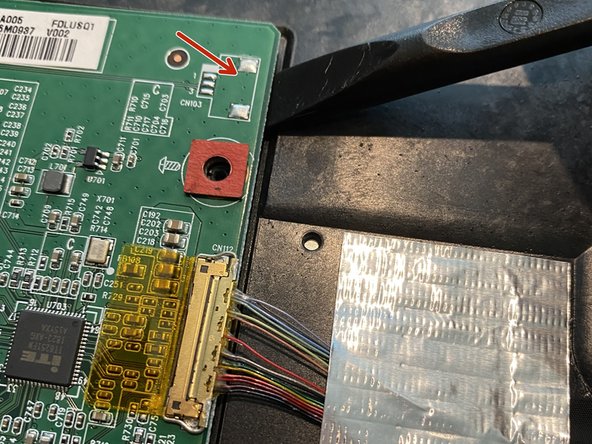
Turn the display over, you will see a cable connector attached to the display with yellow tape.
-
Pull up on the yellow tape to flip up the retaining bar holding the connector in place.
-
Pull the connector straight out away from the display.
-
-
-
-
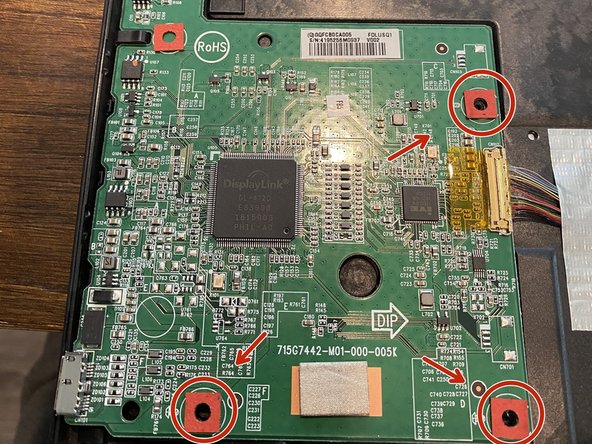
Remove the four screws holding the mainpower board to the rear cover.
-
Starting at a corner use a spudger to gently pry up the main board. Work the spudger around the edges of the main board until it lifts easily.
-
Before completely removing the main board, lift up on the grey tape holding down the wires and pull it away from the back cover.
-
*Optional* You can also disconnect the wire harness if necessary, the process is the same as in Step 2.
-
-
-
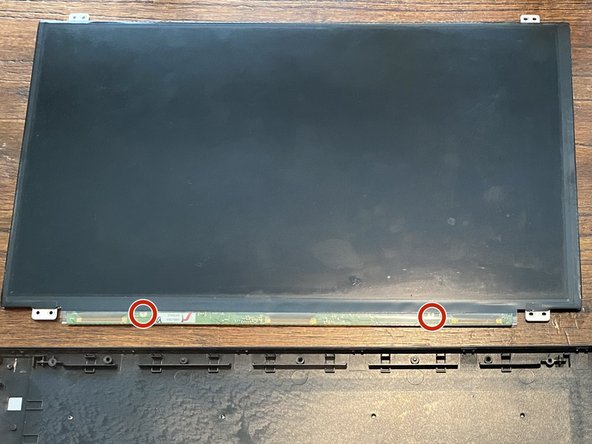
This concludes the disassembly, if you wanted to replace the LCD, there are two screws connecting the board on the monitor and a wire harness.
-
You would remove these two screws and disconnect the smaller wire harness at the bottom of the LCD and then attach the board on the new LCD.
-
To reassemble, follow these steps in reverse.
-
-
-
My LCD was dropped and the power connector lifted from the main board, I used a soldering iron to resolder the connector to the board.
-
However, this did not fix the problem because the pins inside the connector were damaged. Instead of trying to resolder a new connector, I found a main board on ebay that I will use to replace it.
-