メインコンテンツにスキップ

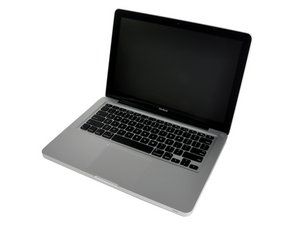
13インチアルミ製Unibody, 2.0 or 2.4 GHz Core 2 デュオプロセッサモデルです。

574回答 すべてを表示

MacBook unibody keyboard ribbon cable won't go in

It is only going in less than 1/16" and won't lock down. I have tried a bit of tape for leverage, I have a good angle on it, it just won't go in. I have the midwall off, and I have plenty of room, it just refuses to go in and lock. what am I doing wrong? Thanks.

回答がありました! 回答を表示 同じ問題があります

この質問は役に立ちましたか?

スコア 21
5 件のコメント

Did you release the locking tab?

さんによる

Yes I did release the locking tab

さんによる

thank you ifixit .!!! this thread totally saved my rebuild!!!

さんによる

so here's my problem i replaced the keyboard on a macbook pro 2010 13inch.

when i plug in the power it turns on... problem is my keyboard doesn't work, i think its because i dont have it in far enough so at this point im not sure what to do, i tried releasing the lock and pushing it in as well as i could and still the keyboard wont function

さんによる

Thanks for the answer! I used the tape method and it worked just fine! The only problem is that the ribbon doesn't go full inside the connector, and some keys are not working. It has to go all of it inside the zif connector? Sorry if my english is not correct, I'm from Argentina.

さんによる

コメントを追加

16件の回答

ベストアンサー

I finally figured it out, and maybe this will help someone else. The cable is a really tight fit, you have to use an uncomfortable amount of force for it to go in. I placed a piece of tape on the connector and then PULLED it in with that. Good luck!

このアンサーは役に立ちましたか?

スコア 50

27 件のコメント:

Agreed, pulling it in with tape is the way to go. I used to have trouble with that, too.

さんによる

Thanks so much for the pointer! I couldn't get it in using the spudger alone but the tape and brute force worked perfectly!

さんによる

Tape was perfect!!!

Thanks for the advice...

さんによる

Yes this helped me as well. Used tape and spudger. Thanks!

さんによる

The tape saved my life! Struggled with this on and off for the better part of an hour. Stuck a piece of tape on the ribbon and had it fixed in a few seconds. Marvellous!

さんによる

22件以上のコメントを表示

コメントを追加

Sounds like tape might be the best way to get the cable back in, but if you don't have any tape handy, what worked for me was tweezers. I carefully inserted one side of the cable into the socket, and then with tweezers, gently coaxed the other side of it into the socket. Once it was lined up, I nudged the cable forward until it was all the way in, and then locked it in place with the locking tab. I also use a lamp with a built-in magnifying glass for stuff like this...makes a big difference.

このアンサーは役に立ちましたか?

スコア 8

1件のコメント:

I agree. Using tweezers when working with ribbon cables and sockets is a must.

さんによる

コメントを追加

Here’s another fix. I replaced the trackpad, hard drive, and RAM chips on my early 2011 17” unibody. Had to take out fans motherboard and battery. I got the machine back together and booted up but found that neither the trackpad nor the keyboard worked. The trackpad does click to enter but does not control the mouse. For the keyboard I had the same problem with the connector. I also managed to break off the locking lever. I tried at least five different methods, tape, plastic shim, etc. the end of the keyboard tape was starting to look a bit beat up from all of my attempts. I could see that the row of metal contacts on the top of the wire tape was not going completely into the connector socket. I had resigned myself to getting an external keyboard and in desperation tried one last thing. I took a straight edge razor blade and with a small piece of wood (tongue depressor) underneath as a cutting board I cut off the end of the tape, somewhere between 1/64” and 1/32”. I inserted the trimmed wire tape into the connector and the top row of metal contacts now disappeared into the housing. I put the broken locking lever back in place, put a piece of scotch tape over the whole mess, booted up and it worked! Keyboard back in action! If anyone has an idea about how to get the trackpad mouse to work, let me know.

このアンサーは役に立ちましたか?

スコア 6

2 件のコメント:

I also broke off the lever by accident m. I could figure out which way does the lever suppose to go? I had the two sides that suppose to hold the lever chipped off (if that makes any sense), do you have any pictures of your contraption? It would be very helpful to see how you get it fixed? Thank you!

さんによる

Excellent tip! I just cut a small slice from the ribbon and now it goes back in to connector and keyboard working again.

さんによる

コメントを追加

I put a piece of spaghetti (thin and uncooked) under the cable which gives a bit more to push on and you can roll it in. This was after 3 hours of trying other methods though,

このアンサーは役に立ちましたか?

スコア 3
コメントを追加

Bringing this thread back to life. I’m not sure if I damaged the cable or not, but once I was able to get the Mac turned on I am not able to use various keys - shift, command, option, caps lock, up, down, left, right, and a few others. Could this be caused by a damaged cable?

このアンサーは役に立ちましたか?

スコア 3

3 件のコメント:

im having the same problem...however it is the top row of letters...

さんによる

I have the same problem. I got a replacement keyboard from China, and when I put everything back in place and turned my MacBook Pro on, three adjacent keys don't work. The ribbon is pressed by the trackpad metal cover and I think this causes the ribbon to break.

さんによる

Just don't have the cale in all the way, hence the missing keys

さんによる

コメントを追加

My problem (during replacement of the keyboard) was this: I took off the coloured piece of plastic (blue or red) at the end of the ribbon cable on the replacement keyboard (DON’T DO THAT), thinking it was some protective isolation. It was far enough in the socket but just too thin to hold for the socket lock. Magically worked after putting that piece of plastic back on. Didn’t need much for at all (or the tape for that matter which I tried as well). Hope it helps anyone, leave the plastic on!


このアンサーは役に立ちましたか?

スコア 3

2 件のコメント:

Thank you very very much! I had exactly the same problem. My New Chinese replacement keyboard had the same blue plastic thing on the cable like the backlight has so I thought I have to take it off which was really not a good idea. After putting it back, all my keys on the keyboard started working again :).

さんによる

Thanks Kasper. I too thought that the blue tape was there for protection.

さんによる

コメントを追加

Thanks for this. The new battery I used, moved this cable caused me to think I had a failed logic board. But I found that this ribbon cable was the culprit.

このアンサーは役に立ちましたか?

スコア 1
コメントを追加

Oh, my god. It worked. I wish I had discovered this before I actually fried my motherboard trying to fix it.

To those who don't understand, I didn't get it either, but it's exactly what it sounds like. Put the ribbon cable where you wanted to go, put a long piece of sticky tape on the back and press it down with your finger and then pull the tape in the direction that you want the ribbon cable to go.if you move the tape around and do this side-by-side, you will see, it will slide the ribbon cable into the harness, even though it seems like that would never work.

このアンサーは役に立ちましたか?

スコア 1
コメントを追加

I broke off the locking tab on mine. Is there a way to unlock it with some microscopic tools?

このアンサーは役に立ちましたか?

スコア 0

1件のコメント:

me too. be really careful when you force the cable in.

さんによる

コメントを追加

I tore the locking tab. Any other ways to secure the ribbon in the port?

このアンサーは役に立ちましたか?

スコア 0
コメントを追加

Same problem.

I had to change the magsafe board because it wasn’t charging. Everything seemed to go okay, but now the MB doesn’t boot. The charging light comes on when the magsafe charger is connected, so that problem might be solved.

I’ve tried the suggested tape method to slide the keyboard cable into the connector better, but still no go. So, I want to ask just HOW FAR the cable has to be inserted? I can just see a thin line of metal contacts on the cable when it is inserted. Should it go in far enough so that you DON’T see the contacts?

On the iFixit page about changing the top case, the foto in the take apart shows the thin line of contacts just before removing the cable. See STEP 14 here: MacBook Unibody Model A1342 Upper Case Replacement

I’ve fixed a fair number of MacBooks, but if the problem here is not the cable then I guess I fried the motherboard.

このアンサーは役に立ちましたか?

スコア 0

1件のコメント:

My A1278 keyboard ribbon has what appears to be a thin plastic film over the end contacts. Should I peal this film off before insertion? I believe the film is meant as protection for the end contacts. Please advise.

さんによる

コメントを追加

I don’t think the plastic tape is to be removed - I removed mine and wish I hadn’t. I think it’s there to add structural integrity when connecting. I’m still working on getting mine to work. Good luck.

このアンサーは役に立ちましたか?

スコア 0
コメントを追加

Pushed the flat cable into the connector, then locked the tab. The second line of keys did not work. SO took the flat cable out, checked it and seemed to have all the lines, one end was bent, tried to put it back in, same problem. Ordered a top case/ keyboard/ trackpad and will put that on and be careful about the flat cable. I’ve done many of these, this time I forgot to move the lock piece up. Hope the new stuff will solved the problem.

このアンサーは役に立ちましたか?

スコア 0

2 件のコメント:

Carl, what did the top case/keyboard/trackpad cost? I damaged the connector and taped the ribbon on. Enter key is not working. Nor is right Shift key. I can actually live with it. But will probably find need for enter key in future. Thought to go back in and reset it. Thanks.

さんによる

guess that connector...getting it fixed would cost some money.

さんによる

コメントを追加

The tape has not worked for me. The locking lever holds the tape too high off the connector so when I try to pull the tape it just lifts the cable over the connector. I have not been able to get it started into the connector, at all.

このアンサーは役に立ちましたか?

スコア 0

1件のコメント:

More clarification. the edge of the cable curls each time I try to insert it. It is too flimsy to get any type of push on it. The tape is a good idea, but again, the edge just curls up and rolls out of the connector due to the lever holding the tape too high from the connector.

I have struggled the last 3 hours trying to get i back in and am doing my best not to tear up the cable, but it is difficult.

I think a big clamp might be in order. One that goes across the width of the cable in order to get any type of push into the socket. I do not know at this point.

さんによる

コメントを追加

Can we trim the ribbon? I think i damaged my ribbon!

can i trim the blue thing and then re-insert it?

このアンサーは役に立ちましたか?

スコア 0

1件のコメント:

No! You'll need a new cable.

さんによる

コメントを追加

Hey guys, Easiest way to do this. Add duct tape to the back of the cable and wiggle it in. It will work. Best way to do it and easiest. That cable is durable and do not be afraid it will break. Good luck

このアンサーは役に立ちましたか?

スコア 0
コメントを追加

回答を追加する

boo さん、ありがとうございました!
統計データ:

過去 24時間: 1

過去 7 日: 6

過去 30 日: 64

今までの合計 47,923