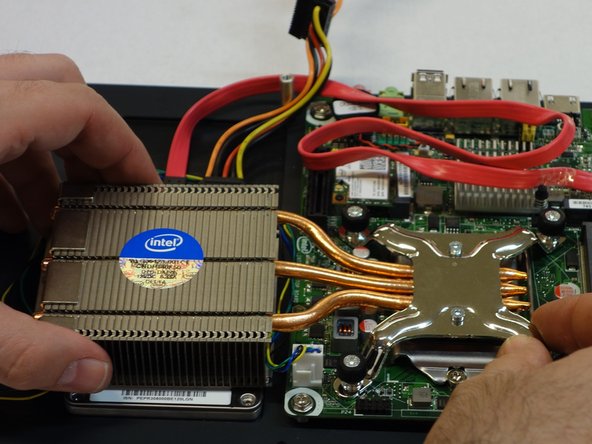
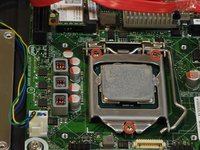
メインコンテンツにスキップ

why! WDi7SSD Replace processor (CPU)

必要な工具と部品

  1. why! WDi7SSD Replace processor (CPU), why! WDi7SSD Opening procedure: 手順 1、 3の画像 1 why! WDi7SSD Replace processor (CPU), why! WDi7SSD Opening procedure: 手順 1、 3の画像 2 why! WDi7SSD Replace processor (CPU), why! WDi7SSD Opening procedure: 手順 1、 3の画像 3
    • Make sure the computer is disconnected from the power source.

    • Flip the computer over.

    • Remove the six screws with a 2 mm Allen key.

    • Carefully remove the back panel, as well the left and right panel.

  2. why! WDi7SSD Replace processor (CPU): 手順 2、 1の画像 1
    • Now flip up the base panel to which all components are attached.

  3. why! WDi7SSD Replace processor (CPU), Processor (CPU): 手順 3、 3の画像 1 why! WDi7SSD Replace processor (CPU), Processor (CPU): 手順 3、 3の画像 2 why! WDi7SSD Replace processor (CPU), Processor (CPU): 手順 3、 3の画像 3
    • Loosen the 4 PH2 Phillips screws of the heat sink.

    • Now remove the heat sink.

  4. why! WDi7SSD Replace processor (CPU): 手順 4、 2の画像 1 why! WDi7SSD Replace processor (CPU): 手順 4、 2の画像 2
    • Use the screwdriver to unscrew the three PH2 slotted screws to release the CPU holder.

    • Press down the spring on the right side of the CPU and pull it carefully to the side.

    • Put the CPU aside.

    • To remove the thermal paste, you can use isopropanol. The thermal paste must be completely removed from the heatsink and CPU.

終わりに

To reassemble the unit, follow the instructions in reverse order.

ある他の人がこのガイドを完成しました。

以下の翻訳者の皆さんにお礼を申し上げます:

de en

100%

oldturkey03さんは世界中で修理する私たちを助けてくれています! あなたも貢献してみませんか?
翻訳を始める ›

作成者

4人の作成者と共同で作成されました。

Felice Suglia

メンバー登録日: 06/15/13

31,100 ポイント

264のガイドは作成済み

0 件のコメント

コメントを追加

統計データ:

過去 24時間: 1

過去 7 日: 10

過去 30 日: 14

今までの合計 148