メインコンテンツにスキップ

why! W670SZQ1 Replacing the LCD screen

必要な工具と部品

  1. why! W670SZQ1 Replacing the LCD screen, The Batteries: 手順 1、 3の画像 1 why! W670SZQ1 Replacing the LCD screen, The Batteries: 手順 1、 3の画像 2 why! W670SZQ1 Replacing the LCD screen, The Batteries: 手順 1、 3の画像 3
    • Unlock the lock latch on the left.

    • Unlock the lock latch on the right.

    • Remove the battery while holding the lock latch unlocked.

  2. why! W670SZQ1 Replacing the LCD screen, LCD screen: 手順 2、 3の画像 1 why! W670SZQ1 Replacing the LCD screen, LCD screen: 手順 2、 3の画像 2 why! W670SZQ1 Replacing the LCD screen, LCD screen: 手順 2、 3の画像 3
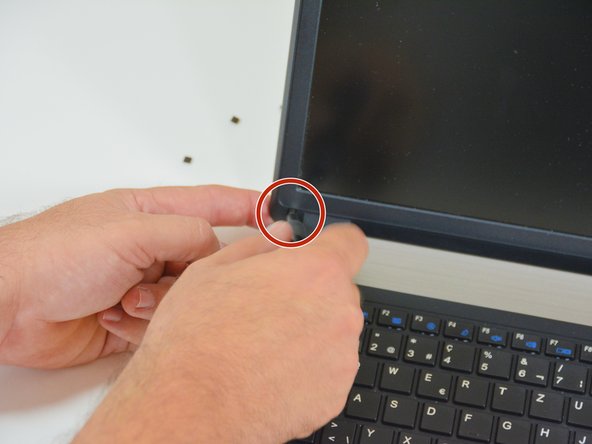
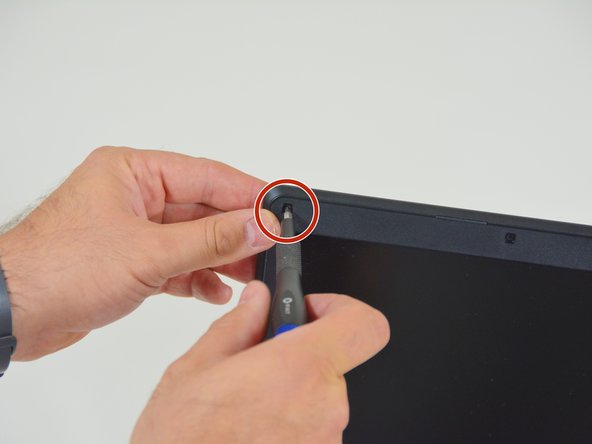
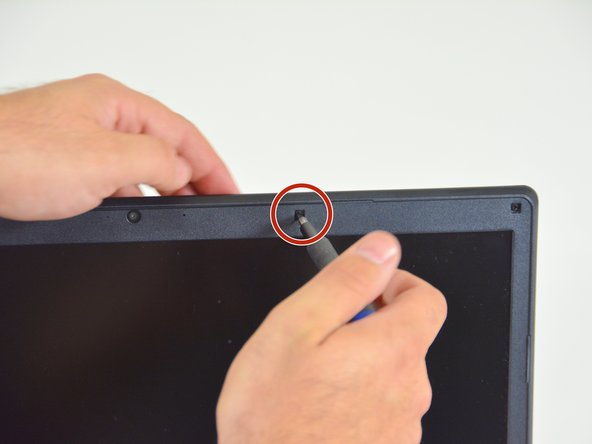
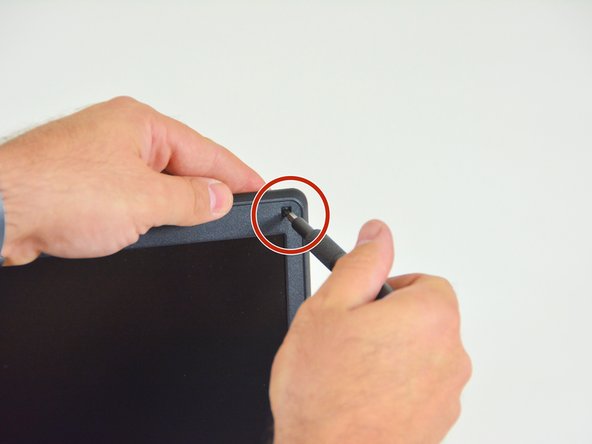
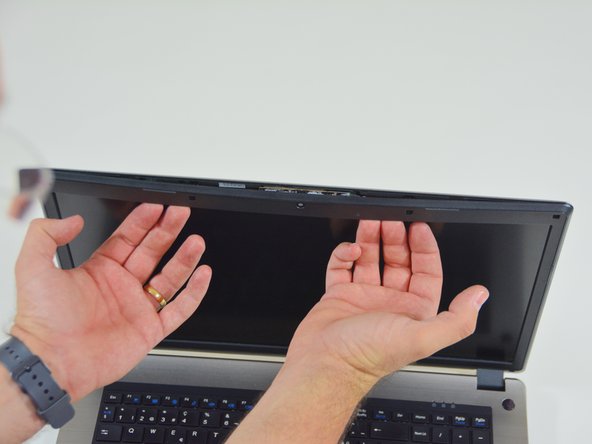
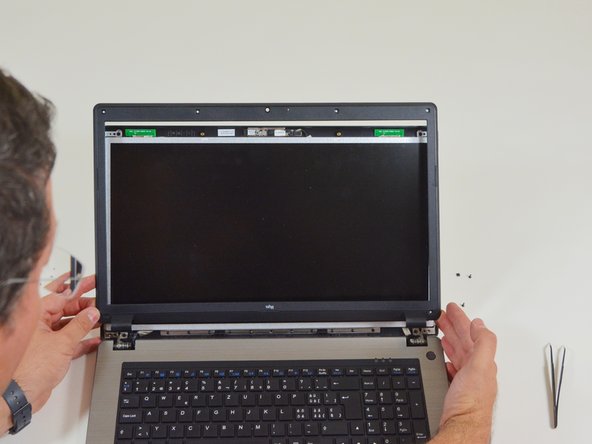
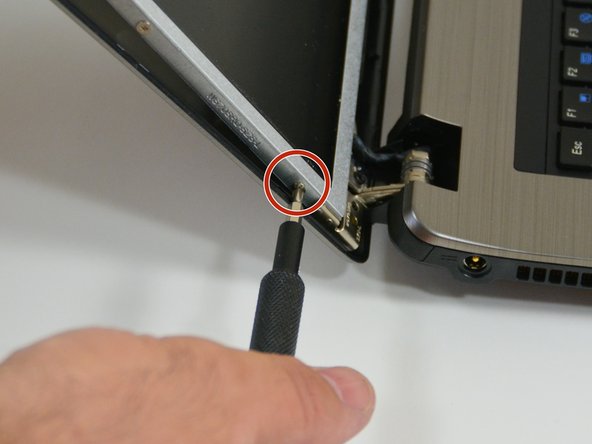
    • Start by locating the two screw caps on the left side of the screen.

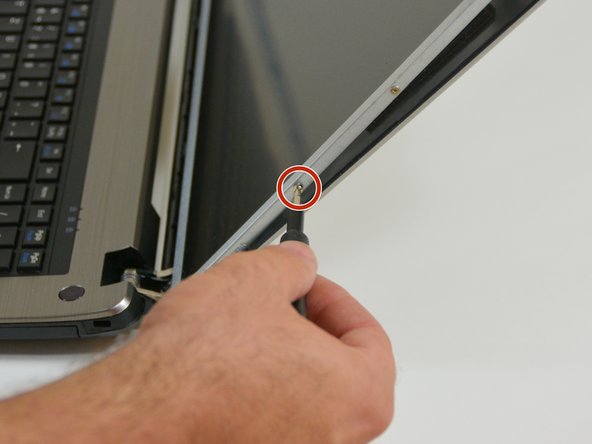
    • Remove the lower screw cover.

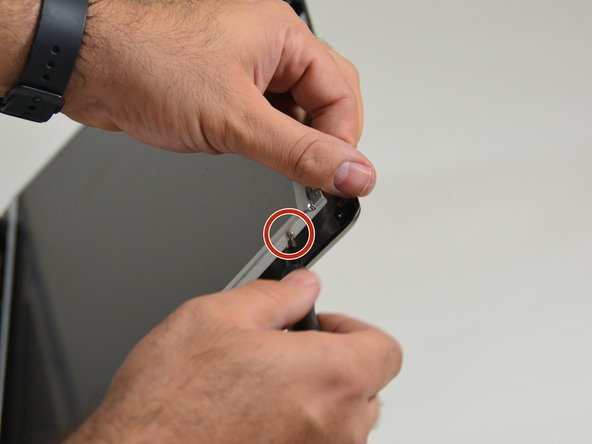
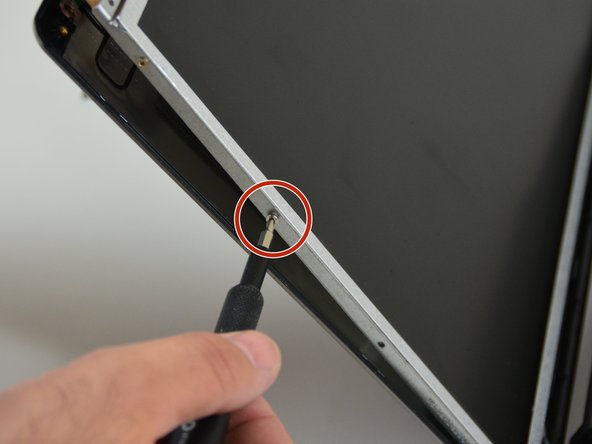
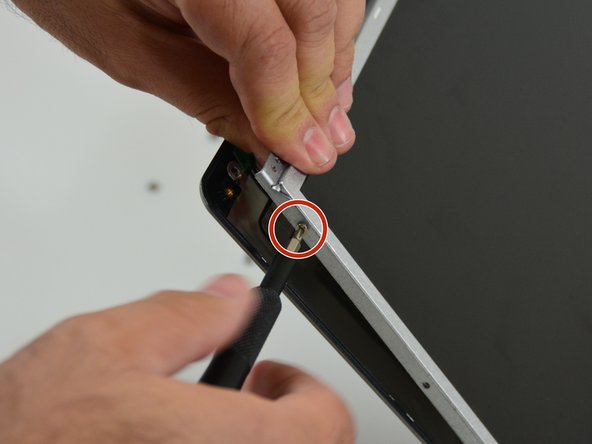
    • Then the top screw cover.
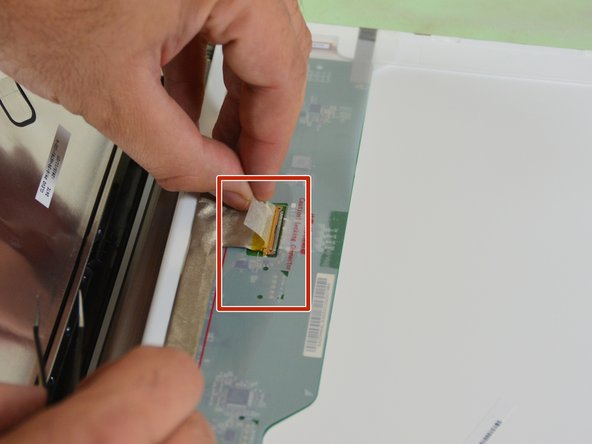
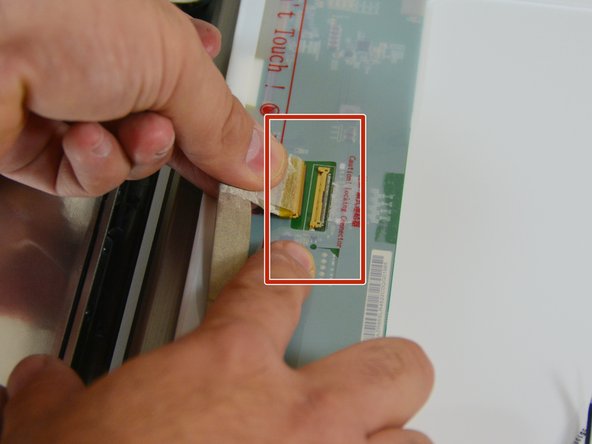
  3. why! W670SZQ1 Replacing the LCD screen: 手順 3、 3の画像 1 why! W670SZQ1 Replacing the LCD screen: 手順 3、 3の画像 2 why! W670SZQ1 Replacing the LCD screen: 手順 3、 3の画像 3
    • Locate and then remove the first center screw on the top of the screen frame.

    • Then the second central cap on the top of the screen frame.

    • Then locate and remove the screw cap on the upper right side of the screen frame.

  4. why! W670SZQ1 Replacing the LCD screen: 手順 4、 3の画像 1 why! W670SZQ1 Replacing the LCD screen: 手順 4、 3の画像 2 why! W670SZQ1 Replacing the LCD screen: 手順 4、 3の画像 3
    • Then finally the bottom right screw cap of the screen frame.

    • Then unscrew the screws behind the screw caps, starting with the one at the bottom left of the frame.

    • Then at the top left.

  5. why! W670SZQ1 Replacing the LCD screen: 手順 5、 3の画像 1 why! W670SZQ1 Replacing the LCD screen: 手順 5、 3の画像 2 why! W670SZQ1 Replacing the LCD screen: 手順 5、 3の画像 3
    • Then the first central screw on the top edge of the frame.

    • Then the second central screw on the top edge of the frame.

    • Then the one in the upper right corner of the frame.

  6. why! W670SZQ1 Replacing the LCD screen: 手順 6、 3の画像 1 why! W670SZQ1 Replacing the LCD screen: 手順 6、 3の画像 2 why! W670SZQ1 Replacing the LCD screen: 手順 6、 3の画像 3
    • And finally the one on the lower right side of the frame.

    • Then gently use your nails.

    • To remove the frame from the LCD screen.

  7. why! W670SZQ1 Replacing the LCD screen: 手順 7、 3の画像 1 why! W670SZQ1 Replacing the LCD screen: 手順 7、 3の画像 2 why! W670SZQ1 Replacing the LCD screen: 手順 7、 3の画像 3
    • Unscrew the screws on the front of the LCD screen.

    • Next, unscrew the screws on the right side of the LCD screen, starting with the first one.

    • Then the second.

  8. why! W670SZQ1 Replacing the LCD screen: 手順 8、 3の画像 1 why! W670SZQ1 Replacing the LCD screen: 手順 8、 3の画像 2 why! W670SZQ1 Replacing the LCD screen: 手順 8、 3の画像 3
    • Then the third.

    • And finally the fourth.

    • Repeat these operations then on the left side of the screen starting with the first screw.

  9. why! W670SZQ1 Replacing the LCD screen: 手順 9、 3の画像 1 why! W670SZQ1 Replacing the LCD screen: 手順 9、 3の画像 2 why! W670SZQ1 Replacing the LCD screen: 手順 9、 3の画像 3
    • Then the second.

    • Then the third. .

    • And finally the fourth

  10. why! W670SZQ1 Replacing the LCD screen: 手順 10、 3の画像 1 why! W670SZQ1 Replacing the LCD screen: 手順 10、 3の画像 2 why! W670SZQ1 Replacing the LCD screen: 手順 10、 3の画像 3
    • Then flip the LCD screen.

    • Then appears the connector to which is attached the connection cable of the LCD.

    • Then peel off the tape covering the connector.

  11. why! W670SZQ1 Replacing the LCD screen: 手順 11、 3の画像 1 why! W670SZQ1 Replacing the LCD screen: 手順 11、 3の画像 2 why! W670SZQ1 Replacing the LCD screen: 手順 11、 3の画像 3
    • then remove the cable from its connector.

    • Once the cable is disconnected you can release the LCD screen.

終わりに

to reassemble your device follow these instructions in reverse order.
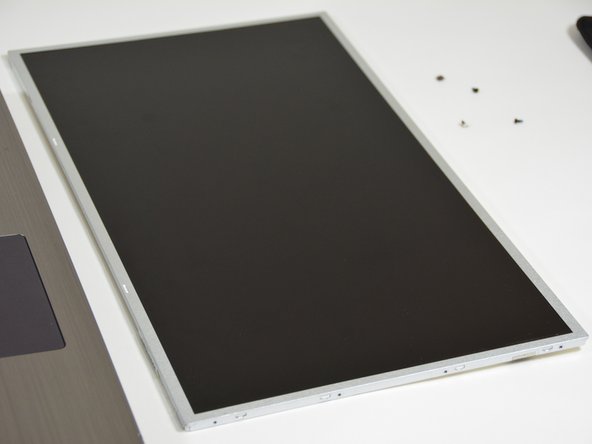
以下の翻訳者の皆さんにお礼を申し上げます:

fr en

100%

irlandaさんは世界中で修理する私たちを助けてくれています! あなたも貢献してみませんか?
翻訳を始める ›

作成者

1人の作成者と共同作成されました。

Felice Suglia

メンバー登録日: 06/15/13

31,100 ポイント

264のガイドは作成済み

0 件のコメント

コメントを追加

統計データ:

過去 24時間: 0

過去 7 日: 5

過去 30 日: 8

今までの合計 151