メインコンテンツにスキップ

ring Indoor Cam Speaker Replacement

必要な工具と部品

  1. ring Indoor Cam Speaker Replacement, Body: 手順 1、 3の画像 1 ring Indoor Cam Speaker Replacement, Body: 手順 1、 3の画像 2 ring Indoor Cam Speaker Replacement, Body: 手順 1、 3の画像 3
    • Place the cam with the base facing towards you.

    • Loosen the 21.6 mm silver screw using a Phillips #1 screwdriver.

    • Remove the base from the rest of the camera.

  2. ring Indoor Cam Speaker Replacement: 手順 2、 2の画像 1 ring Indoor Cam Speaker Replacement: 手順 2、 2の画像 2
    • Place the cam with the top facing toward you.

    • Insert the iFixit opening pick into the crease at the top of the camera.

    • Slide the pick along the crease until you can separate the top cover of the camera from the backing.

    • Leave the pick in the crease.

  3. ring Indoor Cam Speaker Replacement: 手順 3、 2の画像 1 ring Indoor Cam Speaker Replacement: 手順 3、 2の画像 2
    • Place the camera on its side where the horizontal crease is facing you.

    • Insert another iFixit opening pick into the crease between the front and back portions of the camera.

  4. ring Indoor Cam Speaker Replacement: 手順 4、 3の画像 1 ring Indoor Cam Speaker Replacement: 手順 4、 3の画像 2 ring Indoor Cam Speaker Replacement: 手順 4、 3の画像 3
    • Slide the pick along the vertical crease until you can remove the back cover of the cam, using the opening tool to pry the portions apart.

    • You may hear a popping noise when you pry it open.

  5. ring Indoor Cam Speaker Replacement, Motherboard: 手順 5、 3の画像 1 ring Indoor Cam Speaker Replacement, Motherboard: 手順 5、 3の画像 2 ring Indoor Cam Speaker Replacement, Motherboard: 手順 5、 3の画像 3
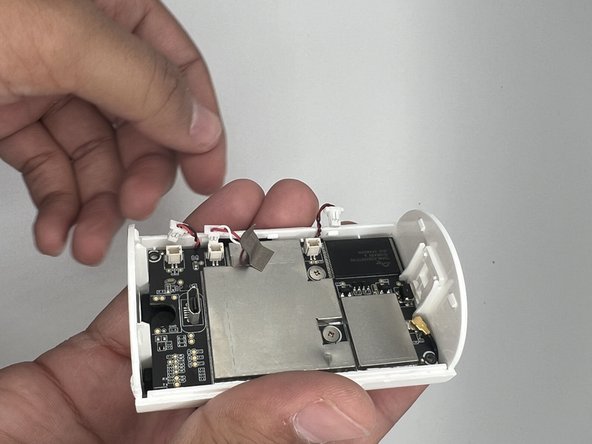
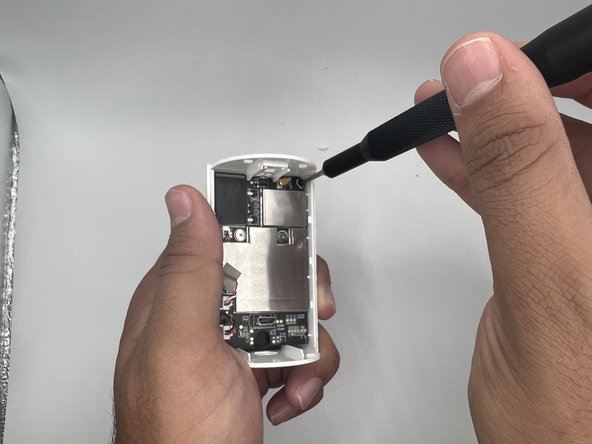
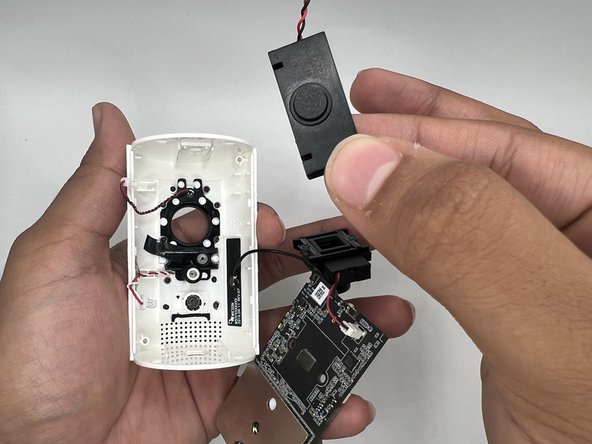
    • Gently remove the three white leads from their sockets on the top of the motherboard.

  6. ring Indoor Cam Speaker Replacement: 手順 6、 2の画像 1 ring Indoor Cam Speaker Replacement: 手順 6、 2の画像 2
    • Using a Phillips #00 screwdriver, remove the two 4.7 mm black screws located in the corners of the motherboard.

    • Using a Phillips #00 screwdriver, remove the two silver 5 mm screws in the center of the motherboard.

  7. ring Indoor Cam Speaker Replacement: 手順 7、 3の画像 1 ring Indoor Cam Speaker Replacement: 手順 7、 3の画像 2 ring Indoor Cam Speaker Replacement: 手順 7、 3の画像 3
    • Use the iFixit opening pick to pry the motherboard from the body of the camera.

  8. ring Indoor Cam Speaker Replacement: 手順 8、 2の画像 1 ring Indoor Cam Speaker Replacement: 手順 8、 2の画像 2
    • Detach the black wire connecting the motherboard to the body of the camera.

  9. ring Indoor Cam Speaker Replacement, Speaker: 手順 9、 3の画像 1 ring Indoor Cam Speaker Replacement, Speaker: 手順 9、 3の画像 2 ring Indoor Cam Speaker Replacement, Speaker: 手順 9、 3の画像 3
    • Gently remove the speaker using the spudger.

終わりに

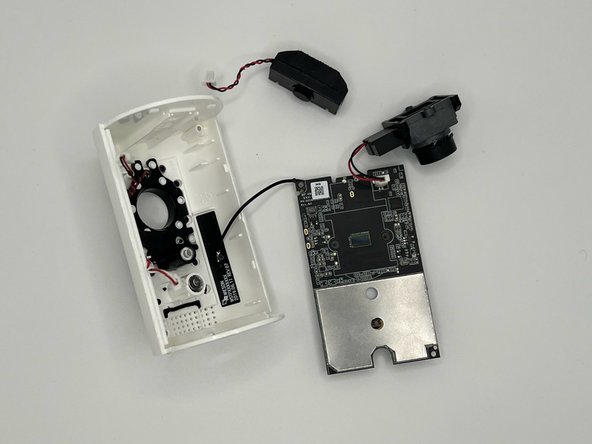
To reassemble your device, follow these instructions in reverse order.

作成者

2人の作成者と共同で作成されました。

John Bray

メンバー登録日: 09/12/23

411 ポイント

4のガイドは作成済み

チーム

University of North Texas, Team 4-13, Harold Fall 2023 University of North Texas, Team 4-13, Harold Fall 2023人のメンバー

UNT-HAROLD-F23S4G13

4 メンバー

4のガイドは作成済み

0 件のコメント

コメントを追加

統計データ:

過去 24時間: 2

過去 7 日: 11

過去 30 日: 21

今までの合計 131