メインコンテンツにスキップ

iRobot Roomba 890 IR Sensor Replacement

必要な工具と部品

  1. iRobot Roomba 890 IR Sensor Replacement, IR sensor: 手順 1、 1の画像 1
    • Use a Phillips #2 screwdriver to remove the two 11 mm screws.

    • Remove the battery cover.

  2. iRobot Roomba 890 IR Sensor Replacement: 手順 2、 2の画像 1 iRobot Roomba 890 IR Sensor Replacement: 手順 2、 2の画像 2
    • Pull directly up on the grey pull-tabs to remove the battery.

  3. iRobot Roomba 890 IR Sensor Replacement: 手順 3、 1の画像 1
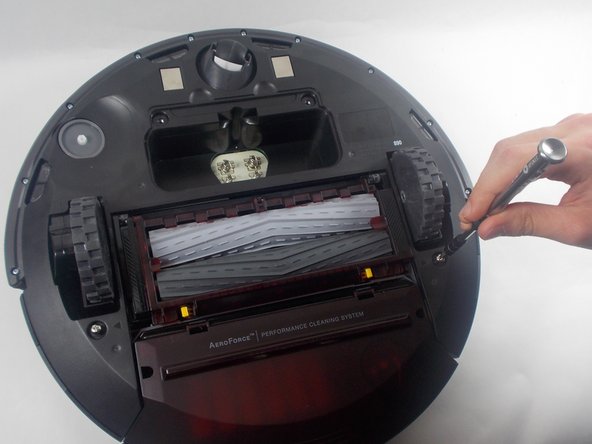
    • Use a Phillips #2 screwdriver to remove the one 7.7 mm screw.

    • Remove the yellow brush head.

  4. iRobot Roomba 890 IR Sensor Replacement: 手順 4、 3の画像 1 iRobot Roomba 890 IR Sensor Replacement: 手順 4、 3の画像 2 iRobot Roomba 890 IR Sensor Replacement: 手順 4、 3の画像 3
    • Use a Phillips #2 screwdriver to unscrew the two 11 mm screws.

    • Lift the baseplate up and off.

  5. iRobot Roomba 890 IR Sensor Replacement: 手順 5、 2の画像 1 iRobot Roomba 890 IR Sensor Replacement: 手順 5、 2の画像 2
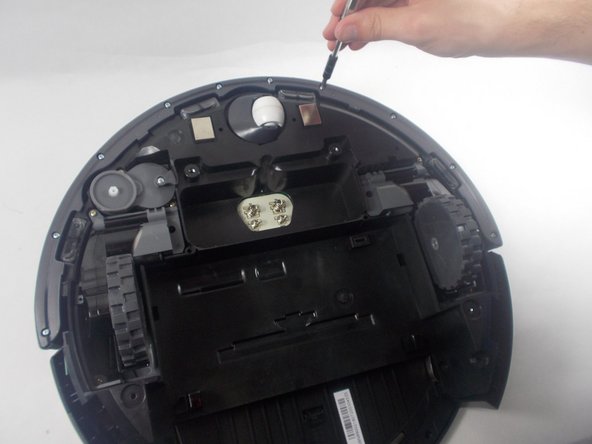
    • Use a Phillips #1 screwdriver to remove the ten 9.3 mm screws.

    • Remove the bumper retainer ring.

  6. iRobot Roomba 890 IR Sensor Replacement: 手順 6、 2の画像 1 iRobot Roomba 890 IR Sensor Replacement: 手順 6、 2の画像 2
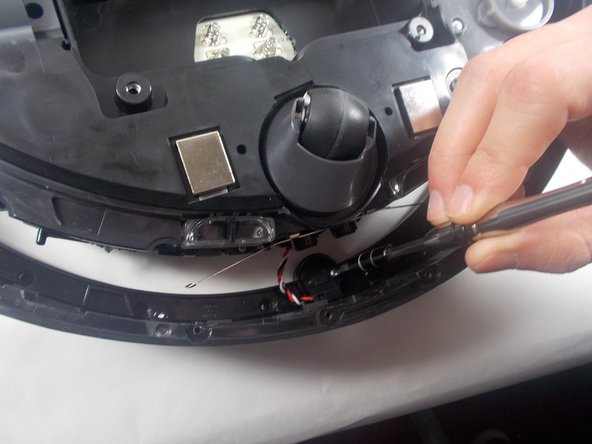
    • Use a Phillips #2 screwdriver to remove the two 7.5 mm screws holding the IR sensor in place.

  7. iRobot Roomba 890 IR Sensor Replacement: 手順 7、 2の画像 1 iRobot Roomba 890 IR Sensor Replacement: 手順 7、 2の画像 2
    • Use an iFixit opening tool to remove the outer plastic covering from the top of the Roomba.

  8. iRobot Roomba 890 IR Sensor Replacement: 手順 8、 3の画像 1 iRobot Roomba 890 IR Sensor Replacement: 手順 8、 3の画像 2 iRobot Roomba 890 IR Sensor Replacement: 手順 8、 3の画像 3
    • Use a Phillips #1 screwdriver to remove the two 9.5 mm handlebar screws; then remove the handle.

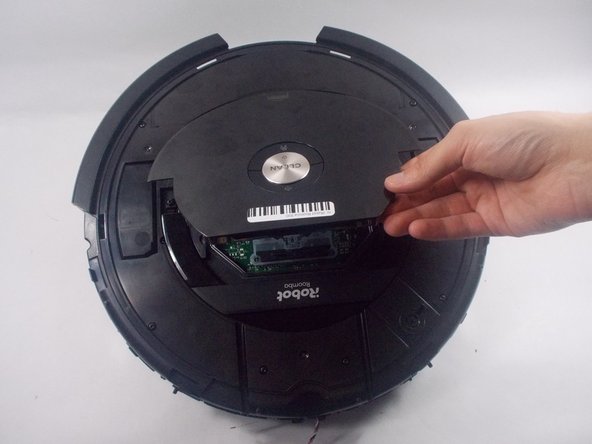
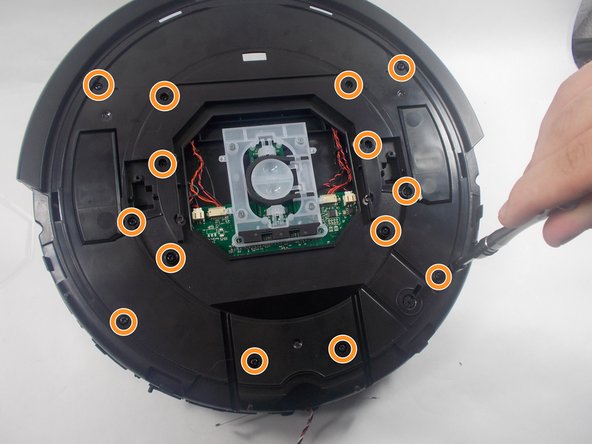
    • Use a Phillips #1 screwdriver to remove the fourteen 9.5 mm top plate screws.

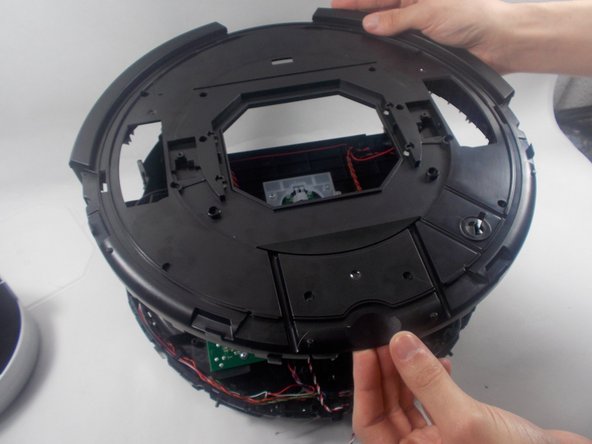
    • Lift off the top plate.

  9. iRobot Roomba 890 IR Sensor Replacement: 手順 9、 3の画像 1 iRobot Roomba 890 IR Sensor Replacement: 手順 9、 3の画像 2 iRobot Roomba 890 IR Sensor Replacement: 手順 9、 3の画像 3
    この手順で使用する道具:
    Tweezers
    $4.99
    購入する
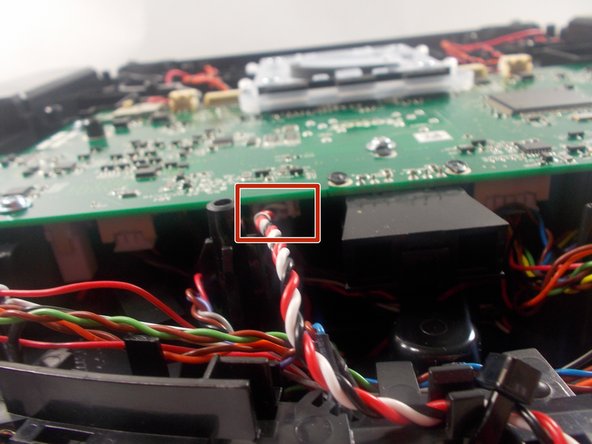
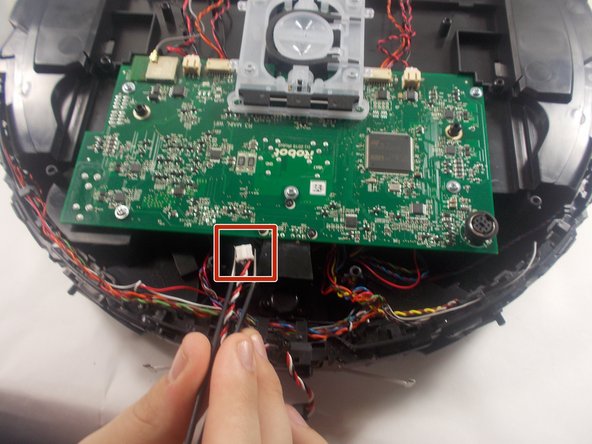
    • Use a pair of angled tweezers to firmly grip the IR sensor plug, and pull it directly backwards to release it from the motherboard.

終わりに

To reassemble your device, follow these instructions in reverse order.

ある他の人がこのガイドを完成しました。

作成者

2人の作成者と共同で作成されました。

Caeden Foxhoven

メンバー登録日: 03/28/22

331 ポイント

2のガイドは作成済み

チーム

UMass Dartmouth, Team 1-3, Petersen Spring 2022 UMass Dartmouth, Team 1-3, Petersen Spring 2022人のメンバー

UMASSD-PETERSEN-S22S1G3

3 メンバー

7のガイドは作成済み

0 件のコメント

コメントを追加

統計データ:

過去 24時間: 0

過去 7 日: 14

過去 30 日: 27

今までの合計 778