メインコンテンツにスキップ

このバージョンは誤った内容を含んでいる可能性があります。最新の承認済みスナップショットに切り替えてください。

必要な工具と部品

  1. この手順は未翻訳です。 翻訳を手伝う。

    : 手順 1、 2の画像 1 : 手順 1、 2の画像 2
    • With the Roomba upside down and turned off, use the Phillip's 02 screwdriver to remove the one 3.5 mm screw from the center of the side-brush.

    • Set the screw aside and pull the brush out.

  2. この手順は未翻訳です。 翻訳を手伝う。

    : 手順 2、 2の画像 1 : 手順 2、 2の画像 2
    • Unscrew the four screws that hold the bottom panel using the Phillips 02 screwdriver.

    • The screws will not come out of the bottom panel. They were designed to become loose but not be removed. This prevents you from losing them, and prevents the Roomba from sucking them up if they came out during cleaning.

    • Once you are sure that all the screws have been loosened as much as possible, then lift the bottom panel up off the Roomba.

  3. この手順は未翻訳です。 翻訳を手伝う。

    : 手順 3、 1の画像 1
    • Once the side brush and bottom panel are out of the way, simply grasp the battery by the two green flaps and pull it out.

    • In the unlikely event that the battery has leaked acid, avoid all contact with it and any surfaces it has affected. Wear protective gloves and wipe up any residue with a paper towel. Secure the battery in a plastic bag and dispose of it properly.

    • If you get battery acid on your skin or in your eye, flush immediately with water and seek medical attention.

  4. この手順は未翻訳です。 翻訳を手伝う。

    : 手順 4、 2の画像 1 : 手順 4、 2の画像 2
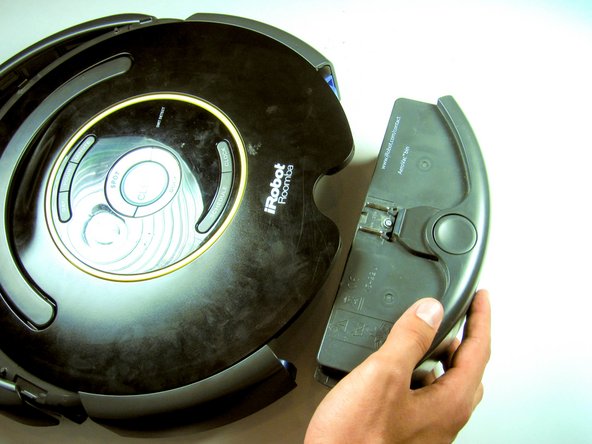
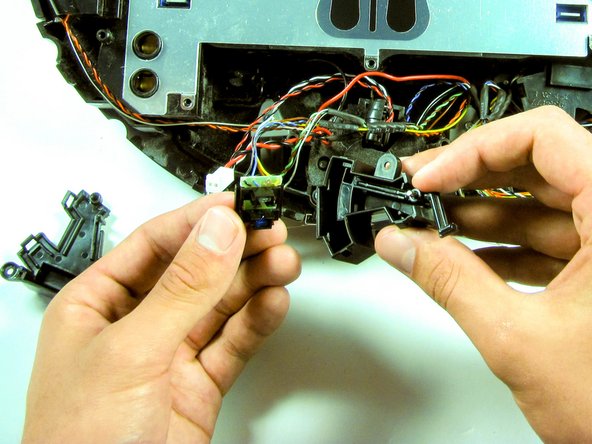
    • Remove the front bumper. You may remove it with your hands or a tool. It should snap off with some effort. It will still be attached to the Roomba by a couple of wires.

  5. この手順は未翻訳です。 翻訳を手伝う。

    : 手順 5、 2の画像 1 : 手順 5、 2の画像 2
    • Pull out the bin while pressing down on the release button. Set aside.

  6. この手順は未翻訳です。 翻訳を手伝う。

    : 手順 6、 3の画像 1 : 手順 6、 3の画像 2 : 手順 6、 3の画像 3
    • Remove the top plastic cover by first using a plastic opening tool or metal spudger around the edges. Then, carefully lift up from the back.

  7. この手順は未翻訳です。 翻訳を手伝う。

    : 手順 7、 2の画像 1 : 手順 7、 2の画像 2
    • Use the Phillip's Head #1 Screwdriver to take out the 10 5 mm screws.

    • Continue to take out the two 5.5 mm screws with the Phillip's Head #2 Screwdriver.

    • Finally, remove the last 7.5 mm screw with the Phillip's Head #1 Screwdriver.

    • Lift the panel off and set aside.

  8. この手順は未翻訳です。 翻訳を手伝う。

    : 手順 8、 3の画像 1 : 手順 8、 3の画像 2 : 手順 8、 3の画像 3
    • Remove the yellow ring and the two plastic control panel covers.

  9. この手順は未翻訳です。 翻訳を手伝う。

    : 手順 9、 3の画像 1 : 手順 9、 3の画像 2 : 手順 9、 3の画像 3
    • Use the Phillip's #1 Screwdriver to remove the four 7.5 mm screws that hold the control panel to the motherboard.

    • Lift the control panel off, then lift the clear plastic motherboard protecting sheet and set both aside.

  10. この手順は未翻訳です。 翻訳を手伝う。

    : 手順 10、 2の画像 1 : 手順 10、 2の画像 2
    • Use the Phillip's Head #1 Screwdriver to remove the five 5.5 mm motherboard screws.

    • Gently lift the motherboard up off the Roomba about half an inch.

  11. この手順は未翻訳です。 翻訳を手伝う。

    : 手順 11、 1の画像 1
    • Remove the round cliff sensor belt by pulling it up off of the front edge of the Roomba.

  12. この手順は未翻訳です。 翻訳を手伝う。

    : 手順 12、 2の画像 1 : 手順 12、 2の画像 2
    • Disconnect the three cables that attach the motherboard to the front of the Roomba.

    • Lift up the motherboard, cliff sensor belt, and front bumper up and out of the way.

  13. この手順は未翻訳です。 翻訳を手伝う。

    : 手順 13、 1の画像 1
    • Remove the rubber cover on the bumper sensor.

  14. この手順は未翻訳です。 翻訳を手伝う。

    : 手順 14、 3の画像 1 : 手順 14、 3の画像 2 : 手順 14、 3の画像 3
    • Use the Phillip's #1 screwdriver to remove the two 7.5 mm screws from the bumper sensor module.

    • Pry the module clips open with a spudger or your finger.

    • Open the sensor module.

  15. この手順は未翻訳です。 翻訳を手伝う。

    : 手順 15、 3の画像 1 : 手順 15、 3の画像 2 : 手順 15、 3の画像 3
    • Once the bumper sensor module is open, remove the small IR chip.

    • Pull off the black protector surrounding the chip.

  16. この手順は未翻訳です。 翻訳を手伝う。

    : 手順 16、 2の画像 1 : 手順 16、 2の画像 2
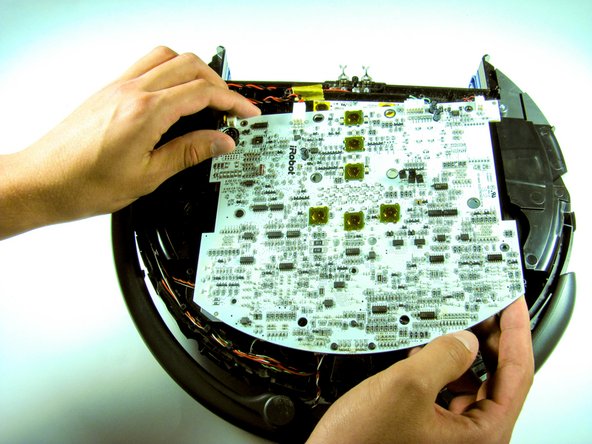
    • For this next step, it might be helpful to have another set of hands.

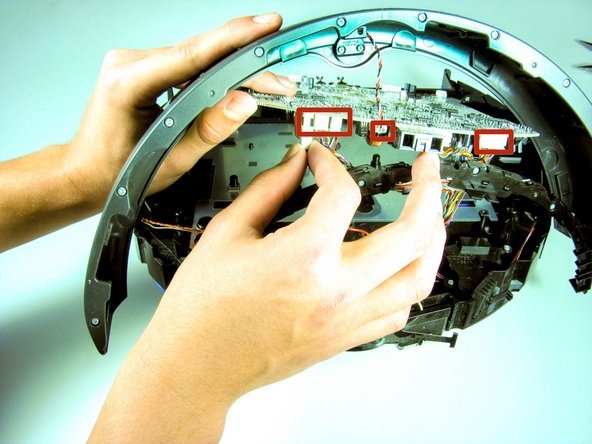
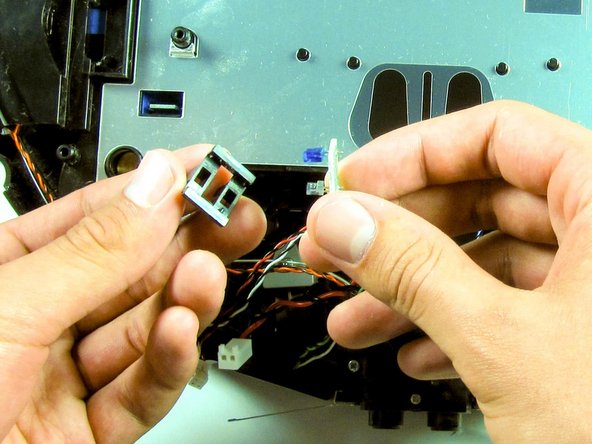
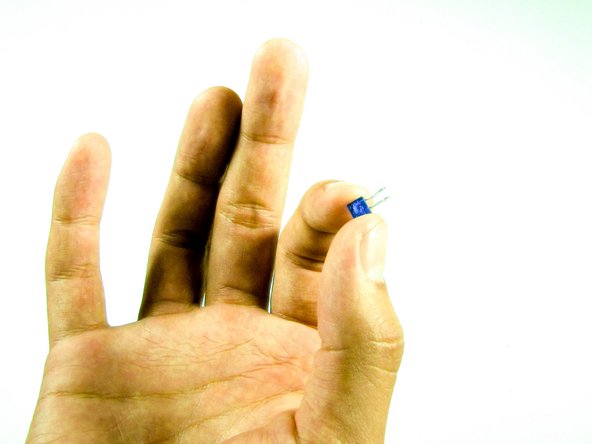
    • Use a soldering iron to desolder pins on the blue IR receiver. Try repeatedly warming each pin up and giving a tug on the receiver. It should eventually slide out.

    • You will need to then solder in a new receiver in the exact same place you took the old one out.

ゴール

4 の人々がこのガイドを完成させました。

作成者

4人の作成者と共同で作成されました。

Alex Schnorr

メンバー登録日: 01/22/15

628 ポイント

3のガイドは作成済み

チーム

Cal Poly, Team 19-7, Maness Winter 2015 Cal Poly, Team 19-7, Maness Winter 2015人のメンバー

CPSU-MANESS-W15S19G7

4 メンバー

6のガイドは作成済み

コメント 1 件

Hi, I am curious about this given what my 650 is doing... It turns on and runs for 2 minutes before I get the error about cleaning the wheels. Basically, the Roomba goes in a circle to the left and that's it. Occasionally, it will back up to the right, and then go in a faster circle to the left. If I hit the bumper it will go back to the right and then forward again to the left. I replaced the left wheel and it had no impact. Do you think it's the sensor? Thanks

Gordon Collins - 返信

コメントを追加

統計データ:

過去 24時間: 3

過去 7 日: 14

過去 30 日: 30

今までの合計 10,432