メインコンテンツにスキップ

iPod Touch 6th Generation Battery Replacement (UNCOMPLETED)

必要な工具と部品

  1. iPod Touch 6th Generation Battery Replacement (UNCOMPLETED), Power Down Device: 手順 1、 2の画像 1 iPod Touch 6th Generation Battery Replacement (UNCOMPLETED), Power Down Device: 手順 1、 2の画像 2
    • Press and hold the Sleep/Wake Button (Power Button) for about 4 or 5 Seconds.

    • The Slide to Power off

  2. iPod Touch 6th Generation Battery Replacement (UNCOMPLETED), Display Assembly: 手順 2、 1の画像 1
  3. iPod Touch 6th Generation Battery Replacement (UNCOMPLETED), Battery: 手順 3、 1の画像 1
    • Remove the covering over the battery by applying heat

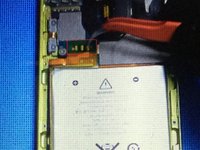
  4. iPod Touch 6th Generation Battery Replacement (UNCOMPLETED), Removing Battery: 手順 4、 2の画像 1 iPod Touch 6th Generation Battery Replacement (UNCOMPLETED), Removing Battery: 手順 4、 2の画像 2
    • There is a piece of tape over the battery connectors

    • Remove tape over battery connectors using a pair of tweezers.

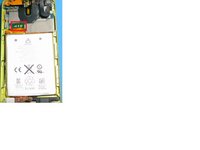
  5. iPod Touch 6th Generation Battery Replacement (UNCOMPLETED): 手順 5、 1の画像 1
    • In this step we will desolderer the battery from the logic broad.

    • I recommend using a desolder tool, you can buy one here Desoldering Braid (iFixit.com)

    • Apply Desolder paste or Braid to the 3 strips of solder

終わりに

To reassemble your device, follow these instructions in reverse order.

16 の人々がこのガイドを完成させました。

作成者

6人の作成者と共同で作成されました。

Aiden

メンバー登録日: 08/08/16

1,482 ポイント

2のガイドは作成済み

チーム

Aiden's Tech Repairs Aiden's Tech Repairs人のメンバー

Business

1 メンバー

3のガイドは作成済み

10 件のコメント

If you take too long desoldering the old battery or soldering the new one in, you might fry the chips on the other side of the board which can, at least in my case, damage the display in multiple ways, somehow.

anyway, refrain from extended contact with soldering iron.

Ace10102 - 返信

PRO TIP: ad a little bit of flux to all 3 pads. Then ad some solder to your soldering iron tip and build up the solder on the 3 contacts. Be careful to not damage the flex cable/ board by letting your soldering iron stay on the pads for too long (2-3 seconds each). My iron temp is set at 350F. Once that is complete, set your hot air gun on 350F and speed about half. Slowly wedge a spudger between the board and the battery flex. DO NOT PRY. You will damage the pads. Just let it sit there and hang out while you apply hot air, the soldier you added will liquify and the battery flex cable will pull itself up. When that occurs, you can remove the battery connector and replace with a new one. Make sure to ad a bit of flux to the pads on the board for attachment. For re-attachment: line up the 3 pads and use your soldering iron to put them down. Gently press down on the gold pad of the flex cable, and you will see the solder from the board liquify and come though the 2 holes. Repeat for the next 2 and YOUR DONE!

Jacob Bryan - 返信

I found this comment most helpful. Adding solder first helps. My only problem with this repair was accidentally letting the soldering iron touch the black plastic covering the back of the screen. This melted thru the screen backing. This is a reflective backing to the screen. The damaged area is very small and not as bright as the rest of the screen and is a little annoying when looking at picture on the screen now!

Larry Mathews -

Extremely helpful, would that be a micro pall worth of flux? Or some other Rosman repair measurement?

imark7777777 -

Just cut the connector and solder the new one over the old one. Stop messing around!

William - 返信

コメントを追加

統計データ:

過去 24時間: 11

過去 7 日: 106

過去 30 日: 353

今までの合計 37,063