はじめに
Use this guide to replace your iPod Touch's front-facing camera to restore Facetime functionality.
必要な工具と部品
-
-
With the heat gun set on "low", begin heating the lower portion of the Touch near the home button.
-
-
-
-
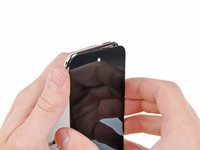
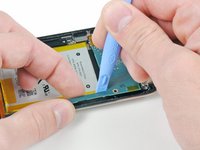
Insert the edge of an opening tool under the steel mid plate near the bottom left corner of the Touch.
-
Slowly pry upward to separate the plate from the adhesive securing it to the plastic inner case.
-
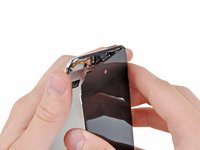
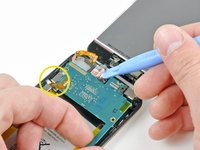
If the plate is still attached to the logic board, re-warm the area to loosen the adhesive, then slowly separate the plate from the logic board using the opening tool.
-
There is a thin, fragile ribbon cable underneath the plate. As you pry the plate up, be very careful not to rip the cable.
-
-
-
Remove the following three screws near the top edge of the logic board:
-
One 2.0 mm Phillips screw
-
Two 2.3 mm Phillips screws
-
-
-
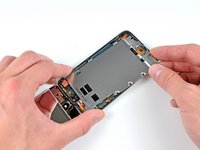
Use an iPod opening tool to slightly lift the edge of the logic board next to the battery enough to grab it with your other hand.
-
Be very careful not to lift too much as the volume control ribbon cable is still connected and will tear very easily.
-
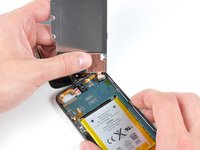
While gently lifting the logic board with one hand, use an iPod opening tool to lift the logic board near the copper tape at the logic board's top edge.
-
The logic board will be lifted adequately when the last display assembly connector has cleared the top edge of the rear case.
-
-
-
While gently lifting the top edge of the logic board, use an iPod opening tool to pry the front-facing camera connector out of its socket on the logic board.
-
Remove the front-facing camera from the Touch.
-


To reassemble your device, follow these instructions in reverse order.
To reassemble your device, follow these instructions in reverse order.
21 の人々がこのガイドを完成させました。
