はじめに
ガラス製フロントパネルを取り外して、お持ちのTouchの内部コンポーネントにアクセスしましょう。
必要な工具と部品
ビデオの概要
-
-
左の写真(フロントパネルは既に取り外し済み)は、プラスチックフレームに留められたメタル製クリップ(赤で表示)の位置を示しています。 次の手順では、これらのクリップ間の隙間からフロントパネルをこじ開けます。
 FixBotに聞いてみる
-
-
-
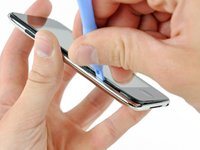
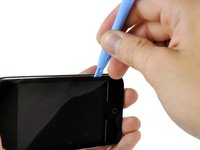
iPodの開口ツールをガラスのフロントパネルと音量調節ボタン周辺のプラスチックの間に差し込みます。
-
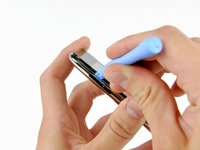
Touchからツールを回転させて、ガラスパネル上をこじ開けます。
-
-
-
-
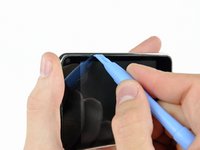
続けて上下端がTouch本体から持ち上がるまで、左側端をこじ開けます。
-
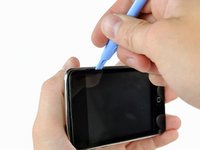
上下端がわずかに本体から持ち上がってきたら、開口ツールを使って、プラスチック周辺がクリップから外れているか確認してください。
-
-
-
こじ開ける作業を続けて、内部のメタルクリップから、プラスチックを外れているか確認します。
-
Touch上部端に沿ってフロントパネルをデバイス本体からさらに乖離します。
-


デバイスを再度組み立てるには、この説明書の逆の順番で組み立ててください。
97 の人々がこのガイドを完成させました。
以下の翻訳者の皆さんにお礼を申し上げます:
100%

これらの翻訳者の方々は世界を修理する私たちのサポートをしてくれています。 あなたも貢献してみませんか?
翻訳を始める ›

6件のガイドコメント
When prying up - make sure that you lift the black plastic frame. I got trouble because on side I managed to lift the glass of the plastic frame on one side, and lifted the plastic frame out of the clips on the other sides, making it very hard to get the panel out. When I at last succeeded it was because the plastic frame broke in the lower right corner – when I had lifted the panel off the right side of the plastic frame was still attached (it needed to break at the top too before I could lift of the panel completely).
will i because to put the panel back on easily?
Patience and a can of compressed air are mandatory. The inside of my iPod Touch was pretty dusty after two years in my pocket. Before putting on the new digitizer, everything needs to be clean.
Also, I used my spudger to pry half the broken frame out of the left gutter (see Michael above). Doing that without damaging the screen was the hardest part.
I'm getting ready to do this and have the old screen partially off to let things dry out. I am, however, unclear on what to pry on to release the ribbon. From past experience with other iPod products, I'm thinking it is a small clamp that needs to be pried up. Is that the case and, if so, is it located where the picture indicates? I think the clamp is under the small grey plastic cover.