はじめに
Use this guide to replace your Nano's logic board assembly.
必要な工具と部品
-
-
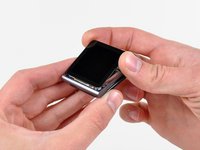
Use a heat gun or hair dryer to soften the adhesive securing the perimeter of the front panel assembly to the outer case.
 FixBotに聞いてみる
-
-
-
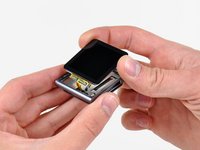
While the front panel is still warm, use the edge of an opening tool to pry it from the headphone jack side of the front panel assembly out of the Nano.
-
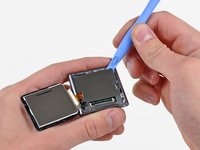
Continue prying the perimeter of the front panel assembly out of the outer casing, being careful not to damage the display data cable held under its left edge.
-
-
-
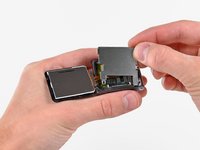
Lift the front panel assembly from the headphone jack side of the Nano.
-
Pull the front panel assembly slightly away from the left side of the Nano to clear the display data cable.
-
-
-
Lay the front panel assembly next to the Nano.
-
Remove the following two screws:
-
One 2.3 mm Phillips screw
-
One 2.6 mm shouldered Phillips screw
-
-
-
-
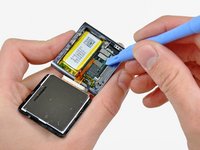
Use an opening tool to pry the steel shield out of the Nano by its upper right corner.
-
Remove the steel shield from the Nano.
-
-
-
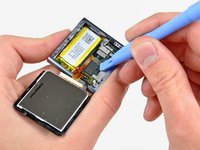
Use an opening tool to disconnect the display data and digitizer cable connectors up from their sockets on the logic board.
-
-
-
Use an iPod opening tool to lift the headphone jack assembly connector up and out of its socket on the logic board.
-
-
-
Remove the single 1.9 mm Phillips screw securing the logic board to the outer case.
-
-
-
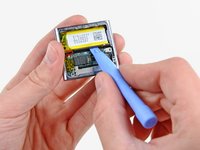
Use an iPod opening tool to gently pry the battery up from the adhesive securing it to the outer case.
-
Use your thumb to pull the battery toward the left side of the Nano as you pry the battery's other edge out of the outer case.
-
-
-
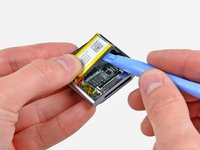
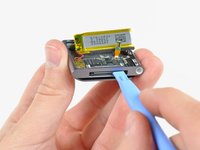
Use an iPod opening tool to gently pry the logic board off the adhesive holding it against the outer case.
-
-
-
Use your iPod opening tool to gently push the dock connector toward the center of the Nano.
-
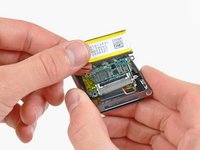
Remove the logic board assembly from the Nano, being careful not to damage the headphone jack assembly cable.
-


To reassemble your device, follow these instructions in reverse order.
65 の人々がこのガイドを完成させました。

9件のガイドコメント
Hi, i wonder if you could help me... I changed my cracked screen (my ipod worked even though the screen was broken) but then when I assembled the ipod ( I did everything you did) it doesn't work, nor does my computer recognize it anymore. Would you happen to know what might be the problem? Have I unintentionally somehow damaged it?
Thanks for the guide Andrew! I've just replaced my cracked screen and everything works flawlessly.
Hi..just to tell u about my ipod. It was accidentaly washed in my washing machine. I want to know..is the ipod still in function if i replace the battery only not the board. Im still hoping that my ipod still can be use. I love my ipod 6th generation. It has sentimental value to me..huhu
I did the very same thing, washed my 6th gen in the washer. when i realized what i had done, i immediately put the ipod in a tub of rice. now it works, but only when it’s plugged in. I’m pretty sure it’s the battery that needs replacing. I’ve not replaced the battery as all of the things i need from ifixit are out of stock. If everything on the ipod works except that it won’t hold a charge and stay on unless plugged in, then it’s most likely the battery and replacing it will probably fix the problem.
thefactory01 - 返信 共有