はじめに
お持ちの第5世代iPod Nanoに電力を取り戻しましょう。
必要な工具と部品
-
-
-
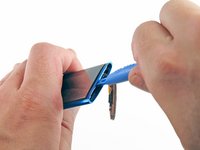
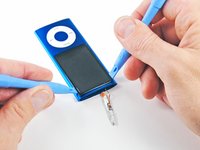
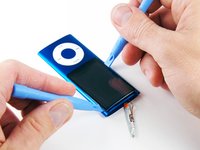
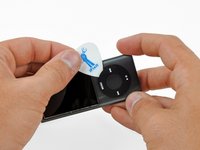
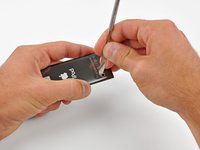
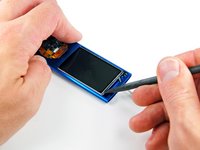
ヒートガンを使って、iPodの底側のプラスチック製ベゼルの下に留められた接着剤をほぐします。
-
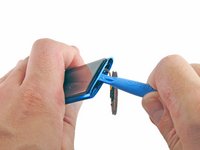
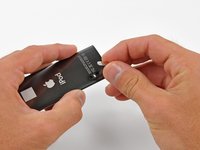
プラスチック製開口ツールを使って、iPodのケースからベゼルを持ち上げて外します。
-
-
-
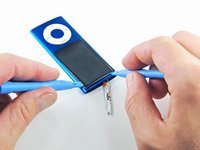
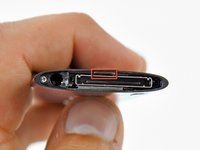
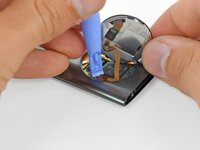
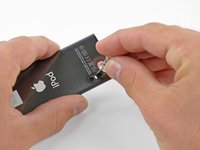
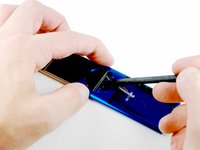
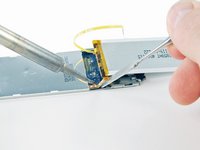
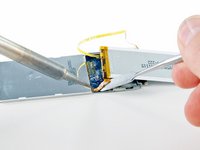
ヒートガンを使って、カメラ/マイクカバーの下に留められた接着剤を柔らかくします。
-
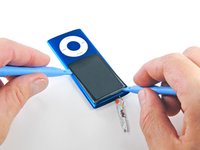
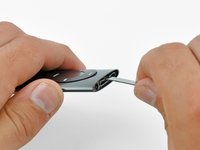
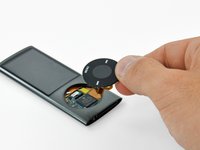
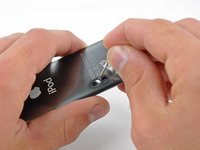
メタル製スパッジャーを使って、ケースからカメラ/マイクカバーをこじ開けて、取り外します。
-


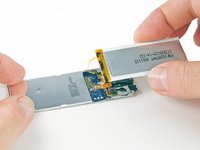
デバイスを再度組み立てるには、この説明書の逆の順番で組み立ててください。
118 の人々がこのガイドを完成させました。
以下の翻訳者の皆さんにお礼を申し上げます:
100%

これらの翻訳者の方々は世界を修理する私たちのサポートをしてくれています。 あなたも貢献してみませんか?
翻訳を始める ›

38件のガイドコメント
This it bs. I need to buy new device now. Nothing comes off that easy. My screen shattered when I was trying to pull it up. If you are not a pro, don't do it.
fwitkowski - 返信 共有
Obviously you weren’t careful enough.
You are supposed to push down from the top of the screen, not up. I managed to get mine out but I ripped the hold ribbon in the process. Luckily I have another one for spares. Good luck next time
I'm sure this can be done, but the tools included in the Ifixit kit are not up to the task. Spent about 45 minutes with the flimsy blue tools and distorted the LCD trying to remove the glass. Then took a heat gun and used the black nylon tool (which I suppose is the replacement for the metal spudger) in the kit. Had the glass out in a single minute. There is no tool in the kit long enough to dislodge the click wheel. I got out my dental tools and finished the disassembly. It is cheaper at this point to just buy another than replace the broken parts. It is a poor carpenter that blames his tools, but you can't cut down a tree with a fish. Use your own tools