メインコンテンツにスキップ

iPhone XS Rear Camera Lens Cover Replacment

必要な工具と部品

  1. iPhone XS Rear Camera Lens Cover Replacment, Rear Camera Lens Cover: 手順 1、 1の画像 1
    • To begin with, it will be necessary to remove the pieces of glass from the old broken camera lens.

  2. iPhone XS Rear Camera Lens Cover Replacment: 手順 2、 2の画像 1 iPhone XS Rear Camera Lens Cover Replacment: 手順 2、 2の画像 2
    • Once the glass shards from the camera lens are removed, thoroughly clean the camera bezel (the raised metal part around the camera).

  3. iPhone XS Rear Camera Lens Cover Replacment: 手順 3、 2の画像 1 iPhone XS Rear Camera Lens Cover Replacment: 手順 3、 2の画像 2
    • Adhere some double sided tape or two dots of glue on the new iPhone X rear camera cover.

    • Use tweezers to position the glass lens in its housing.

  4. iPhone XS Rear Camera Lens Cover Replacment: 手順 4、 1の画像 1
    • Lightly press down on the lens for a few seconds to create a good seal.

    • You can test your rear camera to verify the quality of your photos and videos.

終わりに

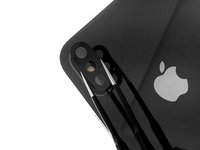
Congratulations ! You have repaired your iPhone XS, the lens is replaced, clean it with a microfiber cloth. You can now take photos and film normally.

5 の人々がこのガイドを完成させました。

以下の翻訳者の皆さんにお礼を申し上げます:

fr en

100%

これらの翻訳者の方々は世界を修理する私たちのサポートをしてくれています。 あなたも貢献してみませんか?
翻訳を始める ›

作成者

1人の作成者と共同作成されました。

cPix

メンバー登録日: 06/14/16

3,971 ポイント

8のガイドは作成済み

0 件のコメント

コメントを追加

統計データ:

過去 24時間: 0

過去 7 日: 2

過去 30 日: 22

今までの合計 3,635