はじめに
iPhone Xの基本的な分解の説明書
必要な工具と部品
ビデオの概要
-
-
下図で示されている5本のネジを#Y000 Y字ドライバーで外します。
-
これらのネジはすべて異なるサイズのためどのネジか見失わないようにしてください。
-
バッテリー/LCD/スクリーン/デジタイザー/イヤースピーカーのコネクタをスパッジャーで取り外します。
It’s an OLED screen, not LCD..
need the screw sizes if anybody has them
Hi Alan, you can find the screw sizes in step 13 of our screen replacement guide.
Hello, I need help please Is the same screwdriver used for all 5 screws? that is to say the Tri Point Y000
-
-
-
-
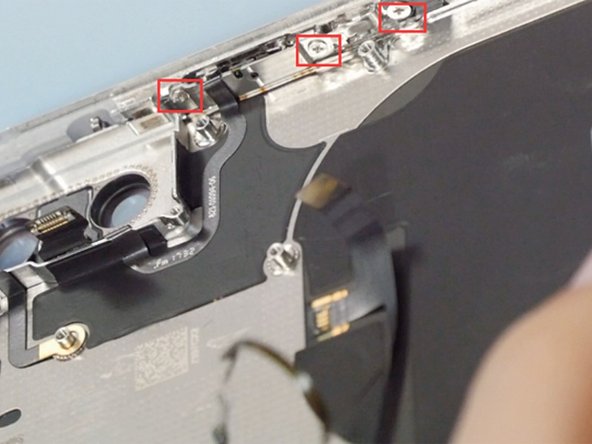
フィリップス#PH00のネジを2本外し、金属製プレートを取り外し、リアカメラのコネクタを取り外せる状態にします。
-
これらのネジもまたサイズが異なります。
WE need a picture of all the part that need to be removed here… if the rear cameras (the square silver shapes) need to be removed before the motherboard, direction as to that is needed.
liznewkirk - 返信
Motherboard does not need to come out yet
Notice the screw furthest left in picture. There is a connection to the front-facing cameras that need to be gently popped up to remove the antenna.
the leftmost screw in the picture is the longer one
-
-
-
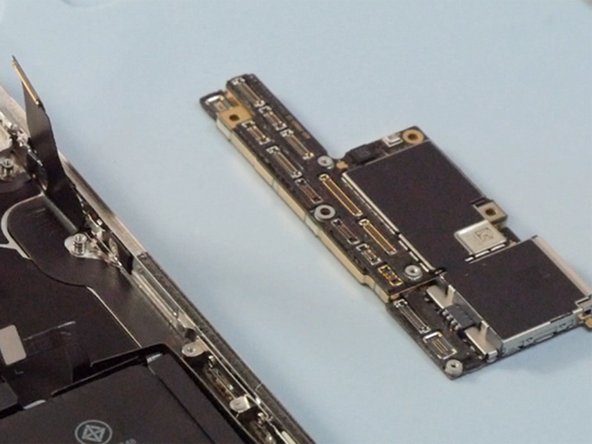
スパッジャーでマザーボードに接続しているすべてのコネクタを外します。
-
マザーボードのフィリップス#PH00ネジを3本外して、マザーボードを取り外します。
I feel like the last ribbon cable towards the top of the board needs to be addressed here. It's the cable right under the IR sensor for facial recognition in step five. It completely hid itself from my view and I feel like this can happen to someone else. It would be awful to destroy that cable or anything else.
I can’t get the motherboard off because of that hidden flat cable at the top of the phone! I see no way to disengage it. Am I screwed?
liznewkirk - 返信
So, yeah. This step in particular is missing about three more steps, without which you are in danger of tearing the IR sensor. So here’s the missing info. After releasing the connectors from the board:
* remove the two Phillips screws, under the top lip of the phone chassis, holding the front camera assy in place.
* Pull the camera assy forward just enough to loosen the IR cable that lays across the board. No need to un-stick the ribbon cables from the chassis.
* use a spudger to disconnect the antenna cable from the board, directly under the IR cable.
* gently remove the laminate board while carefully pushing the ribbon connectors out of the way with a spudger.
Jim Thorpe - 返信
the leftmost screw (in the picture) is longer than the rightmost one
-
-
-
リテーニングプレートのネジを8本外して、プレートを取り外します。Taptic engine の下にある小さなコネクタを傷つけないよう注意してください。
-
LoudspeakerとTaptic engineを取り外します。
-
-
-
図で示されているフレームのネジを4本外します。
-
充電ポートのフレックスケーブルをヒートガンで温めると、容易に取り外すことができます
What size and type of screw is the one on the side that holds the interconnect cable in?
-
-
-
Wi-Fiフレックスケーブルのネジを7本外します。
-
フレックスケーブルをヒートガンで温めると、容易に取り外すことができます。
need screw description, and tiny piece placement (three)
-
-
-
電源ボタンのネジを3本外します。
-
フレックスケーブルをヒートガンで温めると、容易に外すことができます。
-


デバイスを再度組み立てるには、この説明書の逆の順番で組み立ててください。
デバイスを再度組み立てるには、この説明書の逆の順番で組み立ててください。
129 の人々がこのガイドを完成させました。
以下の翻訳者の皆さんにお礼を申し上げます:
100%
これらの翻訳者の方々は世界を修理する私たちのサポートをしてくれています。 あなたも貢献してみませんか?
翻訳を始める ›

25 件のコメント
It's good
The iPhone X assemble video: https://youtu.be/E5jyuxgpE_g
What About the backside ? I heard that when the backside is shattered, it’s almost impossible to repair, because of the glue that holds the backside and parts together ?
Hi avdk, we don’t tear down the back glass but we will pay attention to this question. If there is a definite answer, I will reply to you .Thank you.
Mandy -
The back glass is heavily glued down, and sandwiched between the metal chassis and the rear camera cover (which are welded together). So far as we can tell, there is no practical way to replace the back glass. If it shatters, you’ll have to either live with it, or remove every component and replace the entire enclosure. If you take it to Apple, they will charge you for an out-of-warranty repair (roughly half the original retail price of the phone) and simply replace the entire phone. Check the teardown for some images of the back glass coming off.
You can replace the back glass cover of the iPhone X. We do it at work. It takes like 2 hours of heating though but its changeable.
Cristell -
Now there is a machine for remove the iPhone 8/8P/X back glass. Also there are many videos on YouTube about how to remove the back glass easily.
Mandy -
Where can I find your work surface? It looked really organized and had spots for your screwdrivers?
Hi Mike, you can get it in Etrade Supply. Here is the links you need:https://www.etradesupply.com/catalog/pro...
https://www.etradesupply.com/catalog/pro.... May this can help you!
Mandy -
What are the specs for each screw in the iPhone X?
Thank you. I love the resources that you guys put together and the detailed instructions.
While the E-Trade Supply video is fantastic, anybody tinkering with the phone may also want to have a look at the video on JerryRigEverything (https://www.youtube.com/watch?v=c97ILI7T...) to reinforce their understanding of the tear-down process.
Thank you for this. This is my first time to DIY with my iPhone. I wasn’t able to figure things out without the second video. One issue is that the tools recommended for this repair are incomplete. I ordered a toolkit that met the requirements - but it did not include the tool that has suction cups on both ends to open it easily. That wasn’t on the list. It was only in their video.
Not a complete guide to follow. Seeing other teardowns, I notice steps are out of logical order and / or missing. The descriptions lack clarity and left retracing my steps to remove parts not previously mentioned. Then there was not caution of the tweezers possibly poking the battery or by removing the volume flex cable from the wireless charging coil requires re-micro-soldering or replacing the charging coil + flex cable.
what about the bluetooth antenna
Hi,
Auf der Innenseite vom backcover, direkt unter dem Logic Board befindet sich eine schwarze klebe abschirmung.
Wozu dient diese genau? Bzw. handelt es sich dabei überhaupt um eine Art Abschirmung? Was für Auswirkungen hat es, wen bei einem komplettem back cover Tausch dieses klebe pad nicht übernommen wird? Strahlungs schutz folie? Oder doch abschirmung des logic Board bei verwendung der Induktions Ladestation?
Mfg marvin
I don't even understand some of the details in this article, but there is some amazing information for me. I am aiming to build an engaging attractive website named wordle unlimited wordle and I got some ideas after reading this article. Thank you.
Jimmy Dean - 返信
What type of heat gun do you use and what temperature is needed?