メインコンテンツにスキップ

iPhone 5s Display Assembly Replacement

アーカイブされたガイド
このガイドは将来的な使用のためにのみ保存されてます。ご自身の修理作業には更新バージョンをご利用ください。

必要な工具と部品

  1. iPhone 5s Display Assembly Replacement, Display Assembly: 手順 1、 1の画像 1
    • Remove pentalobe screws with torx screwdriver.

  2. iPhone 5s Display Assembly Replacement: 手順 2、 2の画像 1 iPhone 5s Display Assembly Replacement: 手順 2、 2の画像 2
    • After using spudger or suction cup to lift screen. Be careful not to pull screen completely up. The touch id sensor flex cable is attached near the home button. There is a small metal clip that needs to be carefully pry'd off before removing flex cable connector.

  3. iPhone 5s Display Assembly Replacement: 手順 3、 2の画像 1 iPhone 5s Display Assembly Replacement: 手順 3、 2の画像 2
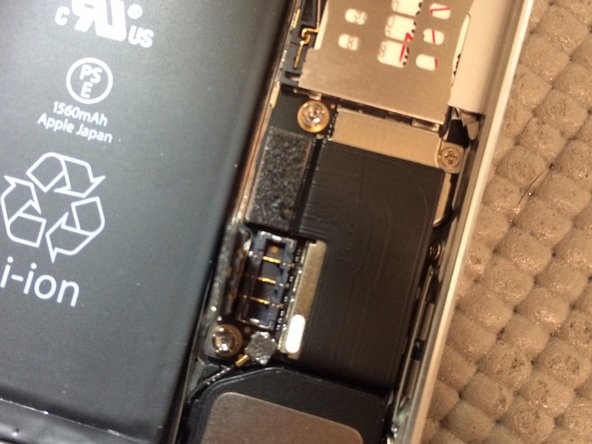
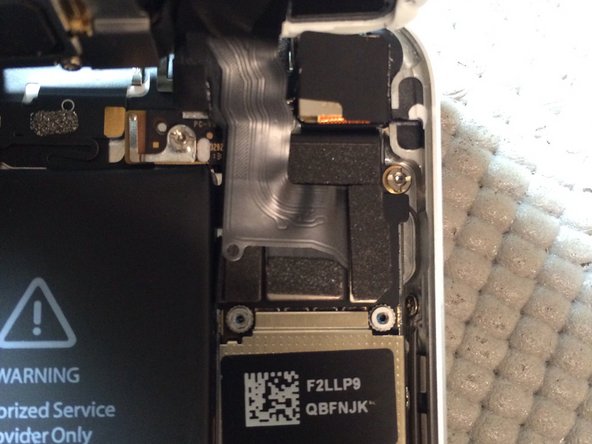
    • Disconnect battery before screen removal by removing 2 screws from shield. Once shield is removed, disconnect battery using nylon spudger. (DO NOT USE METAL TOOLS)

  4. iPhone 5s Display Assembly Replacement: 手順 4、 3の画像 1 iPhone 5s Display Assembly Replacement: 手順 4、 3の画像 2 iPhone 5s Display Assembly Replacement: 手順 4、 3の画像 3
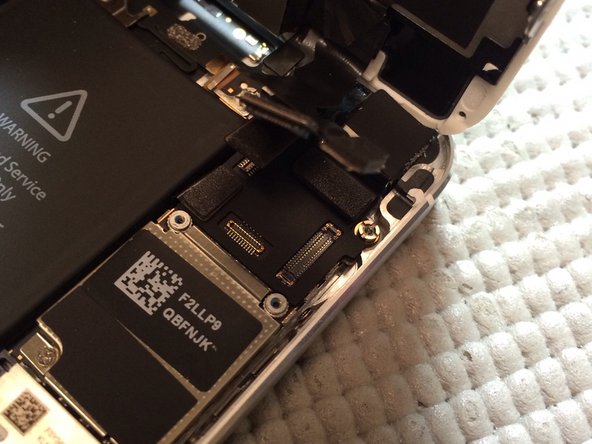
    • Remove four screws from shield covering display assembly connectors. Lift connectors using nylon spudger.

終わりに

Swap all parts from old display assembly to new assembly. Do not remove all at once, replace components one at a time. To reassemble your device, follow these instructions in reverse order.

57 の人々がこのガイドを完成させました。

作成者

2人の作成者と共同で作成されました。

Fausto Lebron

メンバー登録日: 10/25/13

4,119 ポイント

1ガイドが承認済み

0 件のコメント

コメントを追加

統計データ:

過去 24時間: 0

過去 7 日: 0

過去 30 日: 9

今までの合計 32,623