メインコンテンツにスキップ

iPhone 5s Display Assembly - Video Tutorial Replacement

アーカイブされたガイド
このガイドは将来的な使用のためにのみ保存されてます。ご自身の修理作業には更新バージョンをご利用ください。

必要な工具と部品

ビデオの概要

  1. iPhone 5s Display Assembly - Video Tutorial Replacement, Turn off the phone: 手順 1、 3の画像 1 iPhone 5s Display Assembly - Video Tutorial Replacement, Turn off the phone: 手順 1、 3の画像 2 iPhone 5s Display Assembly - Video Tutorial Replacement, Turn off the phone: 手順 1、 3の画像 3
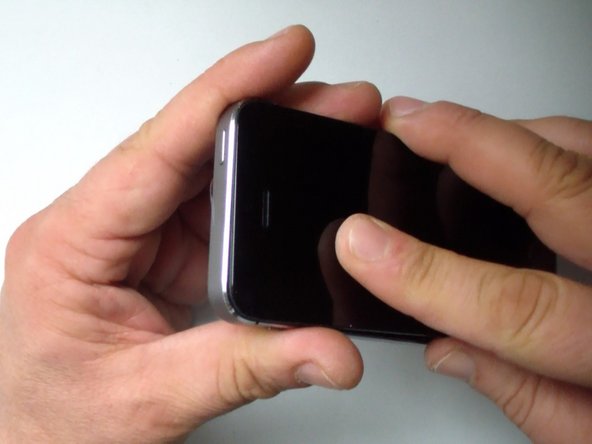
    • Turn off the phone.

    • If the touch screen is not working, press and hold the home button and the power button for 5 seconds.

  2. iPhone 5s Display Assembly - Video Tutorial Replacement, Pentalobe screws: 手順 2、 3の画像 1 iPhone 5s Display Assembly - Video Tutorial Replacement, Pentalobe screws: 手順 2、 3の画像 2 iPhone 5s Display Assembly - Video Tutorial Replacement, Pentalobe screws: 手順 2、 3の画像 3
    • With a pentalobe screwdriver remove the two security screws near to the charging connector.

    • Put the suction cup on the glass and with a cutter carefully lift a little the glass to make a room for the plastic tool.

    • With a plastic pick or other plastic tool separate the screen from the phone but not open it fully.

  3. iPhone 5s Display Assembly - Video Tutorial Replacement, The Home button flex cable: 手順 3、 3の画像 1 iPhone 5s Display Assembly - Video Tutorial Replacement, The Home button flex cable: 手順 3、 3の画像 2 iPhone 5s Display Assembly - Video Tutorial Replacement, The Home button flex cable: 手順 3、 3の画像 3
    • Disconnect the Home button flex cable.

    • Up on the connector there is a small metal bracket.

  4. iPhone 5s Display Assembly - Video Tutorial Replacement, The Battery connector: 手順 4、 3の画像 1 iPhone 5s Display Assembly - Video Tutorial Replacement, The Battery connector: 手順 4、 3の画像 2 iPhone 5s Display Assembly - Video Tutorial Replacement, The Battery connector: 手順 4、 3の画像 3
    • Remove the two Phillips screws.

    • Remove the metal bracket.

    • Disconnect the battery.

  5. iPhone 5s Display Assembly - Video Tutorial Replacement, Upper bracket: 手順 5、 3の画像 1 iPhone 5s Display Assembly - Video Tutorial Replacement, Upper bracket: 手順 5、 3の画像 2 iPhone 5s Display Assembly - Video Tutorial Replacement, Upper bracket: 手順 5、 3の画像 3
    • The display flex cable connectors bracket is secured by four Phillips screws.

    • Remove them and the remove the bracket.

  6. iPhone 5s Display Assembly - Video Tutorial Replacement, The display flex cables: 手順 6、 3の画像 1 iPhone 5s Display Assembly - Video Tutorial Replacement, The display flex cables: 手順 6、 3の画像 2 iPhone 5s Display Assembly - Video Tutorial Replacement, The display flex cables: 手順 6、 3の画像 3
    • Disconnect:

    • The front camera flex cable

    • The LCD flex cable

    • The touch screen flex

    • Now you can remove the display assembly.

  7. iPhone 5s Display Assembly - Video Tutorial Replacement, Display Assembly parts: 手順 7、 1の画像 1
    • From the old spare part we have to remove and install to the new spare part:

    • Home button assembly

    • Earpiece

    • Front camera and proximity sensor flex cable

    • LCD shield

  8. iPhone 5s Display Assembly - Video Tutorial Replacement, Home button assembly: 手順 8、 3の画像 1 iPhone 5s Display Assembly - Video Tutorial Replacement, Home button assembly: 手順 8、 3の画像 2 iPhone 5s Display Assembly - Video Tutorial Replacement, Home button assembly: 手順 8、 3の画像 3
    • Remove the 3x Phillips screws.

    • Remove the metal bracket.

    • Use a plastic tool and gently separate the Home button assembly.

  9. iPhone 5s Display Assembly - Video Tutorial Replacement, Earpiece: 手順 9、 3の画像 1 iPhone 5s Display Assembly - Video Tutorial Replacement, Earpiece: 手順 9、 3の画像 2 iPhone 5s Display Assembly - Video Tutorial Replacement, Earpiece: 手順 9、 3の画像 3
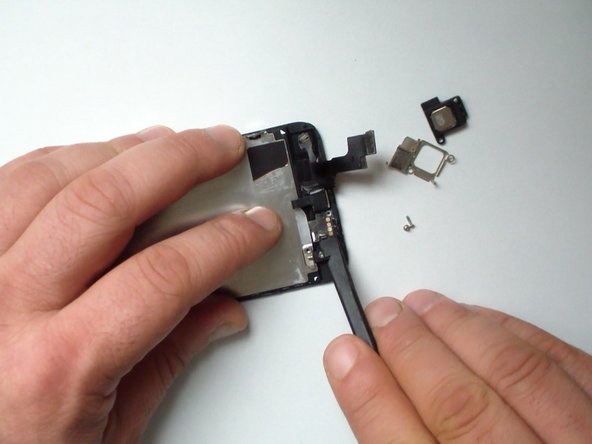
    • Remove the two Phillips screws.

    • The screws are different sizes.

    • Remove the earpiece bracket.

    • Remove the earpiece.

  10. iPhone 5s Display Assembly - Video Tutorial Replacement, Front camera and proximity flex cable.: 手順 10、 3の画像 1 iPhone 5s Display Assembly - Video Tutorial Replacement, Front camera and proximity flex cable.: 手順 10、 3の画像 2 iPhone 5s Display Assembly - Video Tutorial Replacement, Front camera and proximity flex cable.: 手順 10、 3の画像 3
    • Use a plastic tool and gently remove the flex cable.

    • Originally the flex cable is stuck to the LCD shield by a black sticker. Unstuck the sticker or remove the flex cable together with the LCD shield. Do this careful!

    • Inspect the new spare part and install on it all small missing parts from the old spare part (front camera bracket, light sensor bracket, etc.).

  11. iPhone 5s Display Assembly - Video Tutorial Replacement, LCD shield: 手順 11、 3の画像 1 iPhone 5s Display Assembly - Video Tutorial Replacement, LCD shield: 手順 11、 3の画像 2 iPhone 5s Display Assembly - Video Tutorial Replacement, LCD shield: 手順 11、 3の画像 3
    • The LCD shield is secured by 5x Philleips screws.

    • This is the final part that we have to remove from the old display assembly.

  12. iPhone 5s Display Assembly - Video Tutorial Replacement, Reassembling: 手順 12、 3の画像 1 iPhone 5s Display Assembly - Video Tutorial Replacement, Reassembling: 手順 12、 3の画像 2 iPhone 5s Display Assembly - Video Tutorial Replacement, Reassembling: 手順 12、 3の画像 3
    • Start with reassembling:

    • Install the LCD shield with 5x Phillips screws

    • Install the front camera flex and the earpiece with the bracket with two fillips screws (the screws are different).

    • Install the home button assembly - metal bracket and 3x Phillips screws

    • Connect the display assembly flex cables and install the bracket with 4x Phillips screws

    • Connect the battery and install the bracket with two Phillips screws

    • Connect the home button flex and put the small bracket up on it

    • Close the display assembly and and secure it with the two penatalobe screws

終わりに

To reassemble your device, follow these instructions in reverse order.

12 の人々がこのガイドを完成させました。

作成者

2人の作成者と共同で作成されました。

ZFix

メンバー登録日: 12/09/13

191,308 ポイント

330のガイドは作成済み

チーム

Master Techs Master Techs人のメンバー

Community

322 メンバー

2,535のガイドは作成済み

2 件のコメント

The display flex cable connectors bracket is secured by four Phillips screws, but they are diferent and i had read that, if you put in different place , you can make a damaged in the motherboard. Please said how is the right place for any of them, becouse i changed the lcd and appears 5 lines and dont work the digitaizer there. i was trying to cleaning the connectors and still same way.

maxi - 返信

you fail to show how you replaced the glass screen that was cracked.

Bob Sacco - 返信

コメントを追加

統計データ:

過去 24時間: 0

過去 7 日: 0

過去 30 日: 1

今までの合計 4,943