メインコンテンツにスキップ

iPhone 5c Logic Board Replacement

必要条件のみ
この修理ガイドは、他のガイドの前提条件として使用されます。それ自体は不完全で、単独で使用されることはありません。

必要な工具と部品

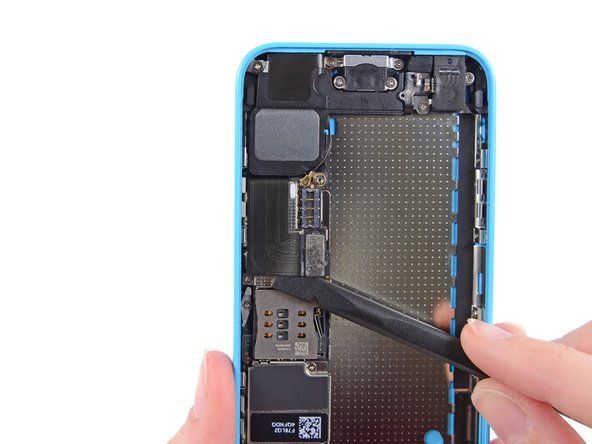
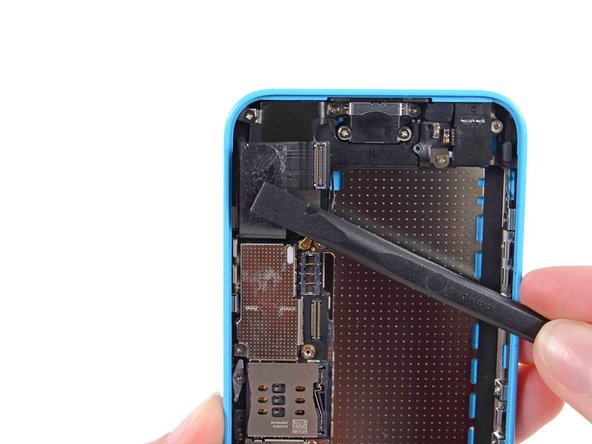
  1. iPhone 5c Logic Board Replacement, Logic Board: 手順 1、 3の画像 1 iPhone 5c Logic Board Replacement, Logic Board: 手順 1、 3の画像 2 iPhone 5c Logic Board Replacement, Logic Board: 手順 1、 3の画像 3
    • Use a spudger to disconnect the Lightning connector ribbon cable from its socket on the logic board.

    • The Lightning connector cable is lightly adhered to a shield on the logic board. Use the flat end of a spudger to gently peel the cable up.

  2. iPhone 5c Logic Board Replacement: 手順 2、 2の画像 1 iPhone 5c Logic Board Replacement: 手順 2、 2の画像 2
    • Flip the Lightning connector cable up out of the way of the logic board.

  3. iPhone 5c Logic Board Replacement: 手順 3、 1の画像 1
    • Disconnect the lower antenna connector from the base of the logic board.

  4. iPhone 5c Logic Board Replacement: 手順 4、 2の画像 1 iPhone 5c Logic Board Replacement: 手順 4、 2の画像 2
    • Use the flat end of a spudger to disconnect the audio control cable connector from its socket on the logic board.

    • Disconnect the rear-facing camera cable connector from its socket on the logic board.

  5. iPhone 5c Logic Board Replacement: 手順 5、 1の画像 1
    • A small piece of tape may obscure the logic board grounding clip. If so, use a pair of tweezers to remove the tape.

  6. iPhone 5c Logic Board Replacement: 手順 6、 2の画像 1 iPhone 5c Logic Board Replacement: 手順 6、 2の画像 2
    • Remove the following screws securing the logic board grounding clip to the rear case:

    • 1.2 mm Phillips #000 in the top side-wall

    • 2.5 mm Phillips #000

  7. iPhone 5c Logic Board Replacement: 手順 7、 1の画像 1
    • Use tweezers to remove the logic board grounding clip.

  8. iPhone 5c Logic Board Replacement: 手順 8、 1の画像 1
    この手順で使用する道具:
    Standoff Screwdriver for iPhones
    $5.49
    購入する
    • Remove the following screws securing the logic board to the rear case:

    • Two 2.3 mm Phillips screws

    • Three 2.7 mm standoff screws

    • Standoff screws are best removed with a standoff screwdriver or standoff driver bit. A small flathead screwdriver can also do the job—but use extra caution to ensure it doesn't slip and damage surrounding components.

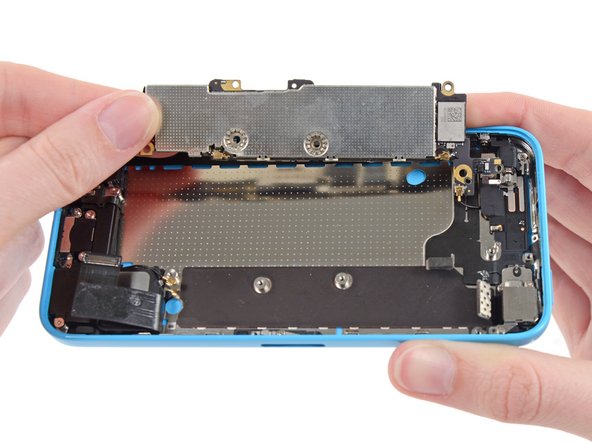
  9. iPhone 5c Logic Board Replacement: 手順 9、 3の画像 1 iPhone 5c Logic Board Replacement: 手順 9、 3の画像 2 iPhone 5c Logic Board Replacement: 手順 9、 3の画像 3
    • Holding the phone level, lift the bottom end of the logic board up enough to grasp it with your fingers.

    • Pull the logic board away from the rear-facing camera just enough to expose the gold contact cap under the top end of the board.

    • Remove the gold-colored contact cap from the threaded post in the rear case, and set it aside.

  10. iPhone 5c Logic Board Replacement: 手順 10、 2の画像 1 iPhone 5c Logic Board Replacement: 手順 10、 2の画像 2
    • Flip the logic board up toward the volume control buttons to expose the antenna connector.

    • Do not try to remove the logic board from the rear case yet, as it is still connected by an antenna cable on the back.

  11. iPhone 5c Logic Board Replacement: 手順 11、 1の画像 1
    • Disconnect the antenna connector from the back of the logic board.

  12. iPhone 5c Logic Board Replacement: 手順 12、 1の画像 1
    • Remove the logic board from the rear case.

終わりに

To reassemble your device, follow these instructions in reverse order.

作成者

4人の作成者と共同で作成されました。

Andrew Optimus Goldheart

メンバー登録日: 10/17/09

502,810 ポイント

407のガイドは作成済み

チーム

iFixit iFixit人のメンバー

Staff

135 メンバー

16,817のガイドは作成済み

0 件のコメント

コメントを追加

統計データ:

過去 24時間: 0

過去 7 日: 0

過去 30 日: 0

今までの合計 200