はじめに
iPhoneのメタル製外付けパワーボタンを交換するにはこのガイドをご利用ください。
必要な工具と部品
-
-
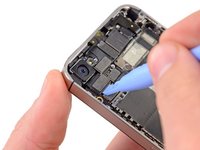
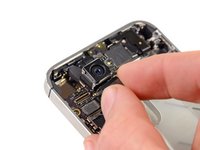
iPhoneの裏側をスライドして引き上げながら背面パネルを外します。背面パネルに付けられたプラスチック製のクリップに傷をつけないよう丁寧に作業を行ってください。
-
iPhoneから背面パネルを外します。
-
-
-
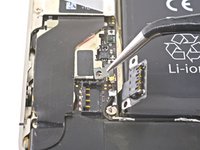
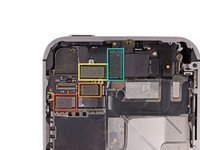
ロジックボードに付けられたバッテリーコネクターから次のネジを外します。
-
長さ1.7 mmプラスネジー1本(PH00)
-
長さ1.5 mmプラスネジー1本(PH00)
-
-
-
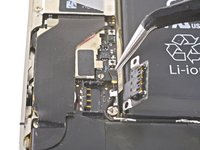
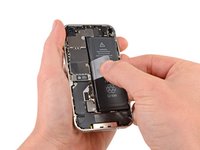
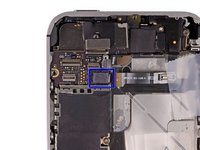
プラスチックの開口ツールを使って、ロジックボード上のソケットからバッテリコネクタを慎重に持ち上げます。
-
ツールの先端をラウドスピーカーの筐体とコネクタのメタル製カバーの間に差し込みます。そしてコネクタの底側端から、まず持ち上げます。
-
-
-
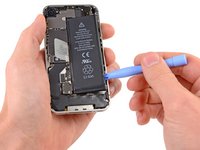
プラスチックの開口ツール先端をバッテリーとデバイス下部の外付けケースとの間に差し込みます。
-
プラスチックの開口ツールをバッテリー右端に沿って動かします。外付けケースにバッテリーを留めている接着剤から完全に剥がすまで数カ所でバッテリーを下から押し上げます。
-
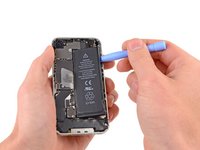
アルコール溶液が接着力を弱めるまで約1分待ちます。
-
プラスチック製のオープニングツールの平面側先端を使って、バッテリーをゆっくりと持ち上げます。
-
-
-
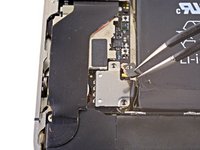
ロジックボードに留められたドックコネクターのケーブルカバーから次のネジを外します。
-
1.5 mm プラスネジー1本
-
1.2 mmプラスネジー1本
-
メタル製のドックコネクターケーブルのカバーを外します。
-
-
-
-
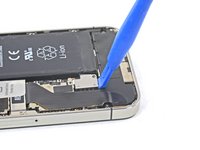
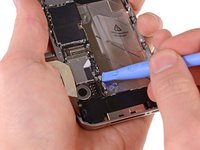
プラスチック開封ツールを使って、セルラーアンテナケーブルをロジックボード上のソケットから外します。
-
ロジックボードに取り付けられたメタルフィンガーの下からセルラーアンテナケーブルを反時計回りに回して外します。
-
-
-
ロジックボードに付けられたケーブルカバーから次の4本のネジを外します。
-
2.7 mmプラスネジー1本
-
2.6 mmプラスネジー1本
-
1.3 mmプラスネジー1本
-
1.2 mmプラスネジー1本
-
-
-
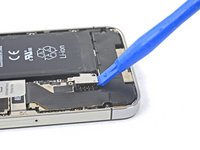
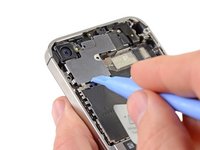
プラスチック製開封ツールの先端を使って、ロジックボード上のEMIシールドに入っている溝に差し込み、ケーブルカバータブをこじ開けます。
-
一番上部に近いケーブルカバー上部の端から持ち上げて、iPhoneから取り外します。
-
-
-
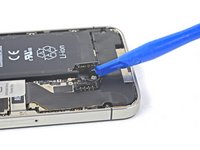
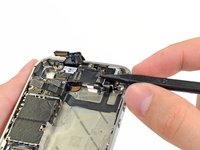
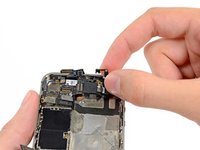
次の順番でロジップボード上部付近に装着された5つのケーブルを取り外します。
-
ヘッドホンジャック/ボリュームボタンケーブル
-
正面カメラケーブル
-
デジタイザーケーブル
-
ディスプレイデータケーブル
-
パワーボタンケーブル(2番目の画像に表示されているように、ヘッドホンジャック/ボリュームボタンケーブルの下に位置します)
-
-
この手順で使用する道具:Standoff Screwdriver for iPhones$5.49
-
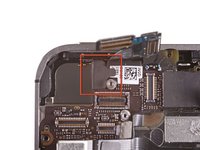
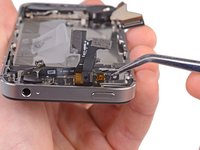
ヘッドホンジャック付近の4.8 mmスタンドオフネジを外します。
-
-
-
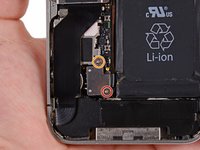
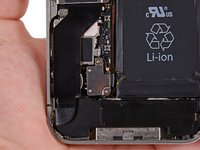
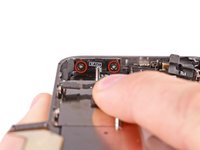
もしパワーボタン付近に隠れたネジを覆っている黒いテープがあれば、これを剥がしてください。
-
パワーボタン付近のロジックボードに留められた2.6 mmプラスネジを取り外します。
-
-
-
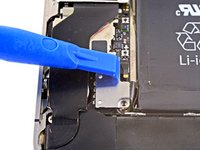
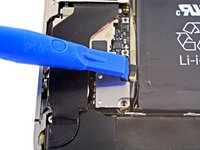
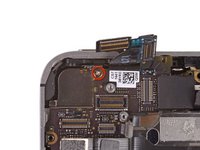
ロジックボードをケースに固定している次のネジを取り外します。
-
バイブレーターモニター付近の2.5 mmプラスネジー1本
-
2.4 mmプラスネジー1本
-
バッテリー開封口付近のロジックボード横に留められた3.6 mmのスタンドオフネジー1本
-
-
-
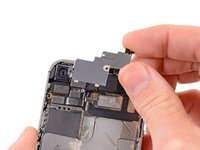
外付けケースに付けられたパワーボタンブラケットより1.6 mmプラスネジを2本外します。
-
外付けケースからパワーボタンブラケットを丁寧に引き、外します。
-


デバイスを再組み立てする際は、これらのインストラクションを逆の順番に従って作業を進めてください。
387 の人々がこのガイドを完成させました。
以下の翻訳者の皆さんにお礼を申し上げます:
100%

これらの翻訳者の方々は世界を修理する私たちのサポートをしてくれています。 あなたも貢献してみませんか?
翻訳を始める ›

18件のガイドコメント
This guide is marked as difficult. You are doing it at your own risk. Backup your device and make sure you have everything you need before attempting it. Otherwise, good luck and hope you succeed.
The biggest and hardest part of all this is keeping up with all the screws and brackets, as well as removing certain brackets.
I DID IT!!! But low and behold...It's the actual cable that is bad :S...on a lighter note, I have a shiny new button. Good guide
Javier Lopez - 返信 共有