このバージョンは誤った内容を含んでいる可能性があります。最新の承認済みスナップショットに切り替えてください。
はじめに
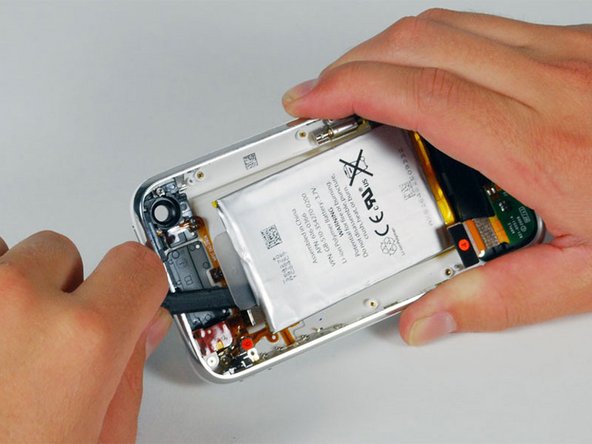
iPhoneのプラスチック製リアハーフです。
必要な工具と部品
-
-
ディスプレイのガラスにひびが入った場合は、ガラスをテープで留めて修理中にさらなる破損を防ぎます。
-
透明なガムテープをiPhoneをディスプレイの上に、全体が覆われるまで重ねておきます。
-
-
-
吸盤から金属ハンドルを取り外します。金属ハンドルでなく、吸盤ベースを握る方が簡単で安全です。
-
ホームボタンの近くにある小さな吸盤を使用し、iPhoneディスプレイアセンブリの下部をゆっくりと引きあげます。
-
-
-
片手でディスプレイアセンブリを持ち、もう片方の手でスパッジャーを使用して、1というラベルのついた黒いリボンケーブルを外します。(ケーブル1はディスプレイ用です。)
-
-
-
ディスプレイアセンブリはほぼ垂直になるまで、上げます。これによって、残りのケーブルを簡単に取り外せるようになります。
-
スパッジャーを使用して、2というラベルのついた黒いリボンケーブルを外します。(2は静電容量式タッチパネル用です。)
-
-
-
スパッジャーを使用して、ケーブル3を所定の位置に保持している白いプラスチックのタブを跳ね上げます。白いタブが垂直に上げられるとリボンケーブルが解放されます。
-
黒いリボンケーブルをコネクタからスライドさせて外し、iPhone からディスプレイアセンブリを取り外します。
-
-
-
付属のSIMピンまたは、ペーパークリップを使用して、ヘッドホンジャック横の小さな穴に挿入します。
-
SIMトレイが飛び出すまで、SIMピンまたは、ペーパークリップを押し下げます。
-
SIMトレイが飛び出したら、トレイを掴んでiPhoneから取り外します。
-
-
-
-
次の8本のネジを取り外します:
-
5 本の 2.3 mm #00 プラスネジ (部分ネジ付き) がロジックボードをリアケースに固定します。
-
ロジックボードとカメラを固定する全ねじの 2.3 mm #00 プラスネジ 2 本。
-
「剥がさないでください」ステッカーの下から 2.9 mm #00 プラスネジ 1 本を取り外します。
-
再組み立て時の注意点;
-
カメラ横にあるネジ(右下オレンジ色で強調表示されているネジ)にもカメラを所定の位置に保持する金属ストリップが付いています。
-
-
この手順は未翻訳です。 翻訳を手伝う。
-
Remove the two Phillips #00 screws securing the on/off switch to the front bezel.
-
-
この手順は未翻訳です。 翻訳を手伝う。
-
Remove the following 4 screws:
-
Three 1.8 mm Phillips #00 screws securing the headphone jack and GPS antenna to the rear case. Note the order in which you remove the screws, as the left one has a slightly larger head.
-
One 3.8 mm Phillips #00 screw in the plastic loop near the headphone jack.
-
-
この手順は未翻訳です。 翻訳を手伝う。
-
Remove the four Phillips #00 screws securing the volume and mute switch.
-
The mute switch assembly screws should be tightened with the switch in the off position. Check the protrusion of the switch when turned on, since it may not stick out far enough to operate if the switch assembly is incorrectly positioned. (Check the gap between the switch frame and the bezel (white gap showing between the two screws near the 6). The screw on the far right is slightly longer than the other 3 screws. When reassembling the phone, keep this in mind.
-


デバイスを再度組み立てるには、この説明書の逆の順番で組み立ててください。
デバイスを再度組み立てるには、この説明書の逆の順番で組み立ててください。
292 の人々がこのガイドを完成させました。

9 件のコメント
I did it, including the removing of the bezel from the old rear panel and gluing it again on the new one.
It would be helpful to indicate that it could be necessary to reactivate the iPhone when finished, by pressing the Home an Power button for 10 seconds... And also perhaps to precise that the connector 3 must simply be pushed forward, as it is just slipped into the connector, on some models at least.
This is an awesome and easy to follow guide. I just reassembled my 3GS and have a couple of issues to resolve. The touch screen is the main issue. The touch screen works, but the calibration is off. Takes a few swipes to get it out of sleep mode and the keyboard response is haphazard. Any ideas what can be done to fix this. The other issue is SIM slot. No problem inserting the card, but can not pop it out. I know this has to do with the spacer because my back cover did not have a pre-drilled hole. I drilled one, but had problems seating the part. I figure I will fill the hole with plastic epoxy and re-drill unless someone has a suggestion. Perhaps I should order a new back with the hole drilled.
I was a bit daunted by the 'very difficult' rating of this one but went ahead anyway. Complete success, took me about 2 hours altogether as I went pretty slowly through the teardown. I am 61 years old, a woman, and have never taken a phone apart before. Just thought this might encourage some others, but extreme care is needed.
sudayamail - 返信
Guide so should be completed all the way around for reassembly.
My iPhone 3GS had some issues with the mute button and on/off switch (not working properly) that I couldn't fix.
Also after reassembly the front metal bazel is not properly adherent as to the real panel as it was in origin.
Any suggestions?
Thanks iFixit!!!
I did it, thanks to you guys! Had to change the backcover, the power button and the mute button of an IPhone 3GS and thanks to you it was a success. Struggled a few times. Took me a long time to detach the battery from the old backcover. And the end of the disassembly there are a few steps missing in the tutorial since I had to transplant every little bit in the new backcover but I figured it out. When reassembling, steps 22-20 almost made me cry - $*&! mute button! Now the phone can be used again although some buttons do not work that good (tactile feedback is missing on the power and the volume buttons). By the way: it took me almost six hours to take the phone apart and put it back together. I'm still happy!