Attach the small suction cup to the iPhone, above the home-button.
Grip the suction cup, and start lifting the display slowly, and gently, making sure not to remove the display completely. There are still ribbon cables connecting the display assembly to the motherboard.
In some cases, the suction cup just won't adhere to the screen! You could use a heavy duty suction cup, or duct tape to pry off the screen. However, if you do not plan on replacing the screen, I do not suggest that you use duct tape.
After connectors 1, 2, and 3 are detached, you can lift the display assembly off completely, and set apart the case for the iPhone, you will only need the assembly for now.
It will be easy to locate the home-button assembly from here.
Make sure the cable that runs into the home button assembly is not damaged or loose. This cable is indicated in the image here with a rectangular marker.
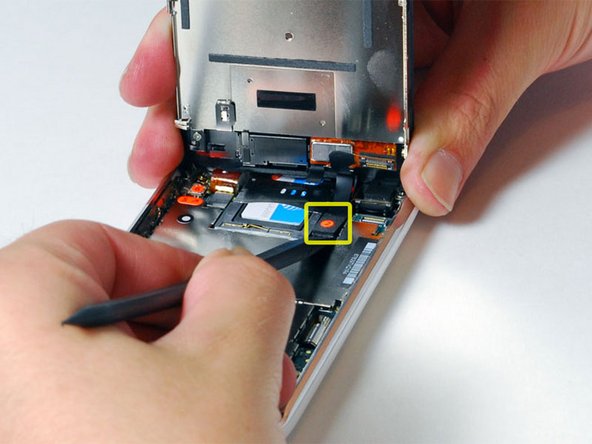
If the cables are all fine, or making sure the cables are firmly placed does not work, check the dock connector for any broken pins, especially the areas I highlighted with the circular red markers. If any pins are broken, you might want to buy new cables, because repairing these pins requires a lot of experience and precision tools.
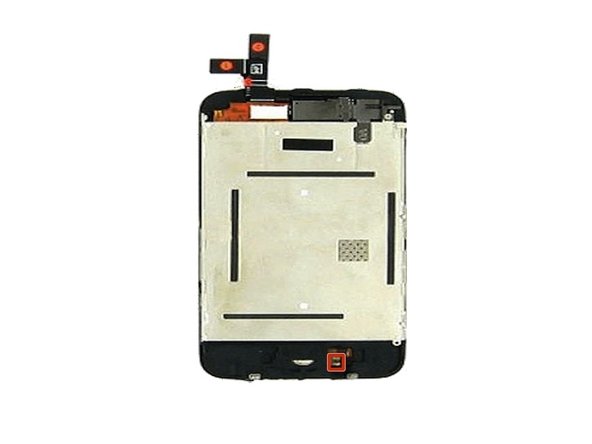
If this STILL doesn't work, check the pins on the cables connected to the home-button (marked with a red marker in second image.) Again, if any pins are broken, you might want to buy new cables, or a new home-button, because these pins are very fragile and hard to fix.
If any cables or pins are broken , you could buy new cables, as mentioned before. However, if the home-button screws are broken or missing, or the home-button is completely broken, you might want to buy a new home button assembly. This assembly is displayed on this step's adjoining image.
So following your instructions I found that one of the "springs" on the home button assy was missing. I ordered a replacement assembly but I can't figure out how to replace that assembly. Do I need to take the whole display apart?