このバージョンは誤った内容を含んでいる可能性があります。最新の承認済みスナップショットに切り替えてください。
はじめに
iPhoneケースをピカピカの背面にします。
必要な工具と部品
-
この手順は未翻訳です。 翻訳を手伝う。
-
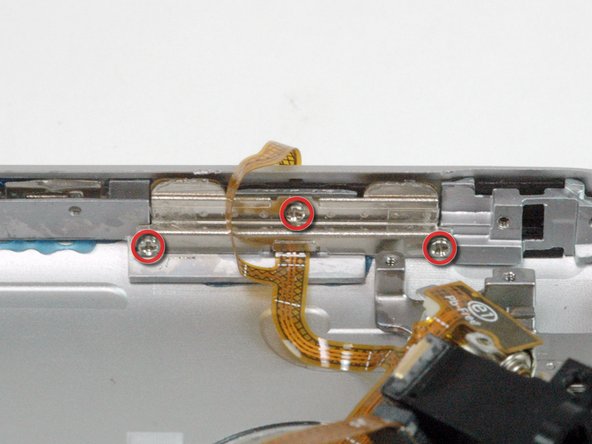
The small square hole is the location to insert the dental pick in the next step.
-
Insert the pointed end of a heavy-duty spudger into the space between the gray metal bar and the rear panel. Pry the panel up enough until you can get the tip of the iPod opening tool into the seam between the front bezel and rear panel.
-
-


デバイスを再度組み立てるには、この説明書の逆の順番で組み立ててください。
デバイスを再度組み立てるには、この説明書の逆の順番で組み立ててください。
53 の人々がこのガイドを完成させました。
以下の翻訳者の皆さんにお礼を申し上げます:
100%

これらの翻訳者の方々は世界を修理する私たちのサポートをしてくれています。 あなたも貢献してみませんか?
翻訳を始める ›
