はじめに
iPhone 13 Proの画面が割れている、タッチに反応しない、電源を入れたときに画像が表示されない場合は、このガイドを使用して、新しい画面(別名ディスプレイアセンブリ)を使用して iPhone を正常に動作するように復元します。
ご注意: Apple純正スクリーンを使用している場合でも、スクリーン交換後はTrue Toneおよび自動輝度機能が無効となります。また、iOS 15.2以降のソフトウェアをインストールしていない限りFace IDも無効になります。
必要な工具と部品
-
-
油性ペンでオープニングピックの先端から3mmの位置にマークを入れます。
Got to step 2 and realized the fix kit doesn't include an opening pick! Looks like a guitar pick, and I have those lying around. Is that expected? Looks like the pick is used in many steps below. There's a little blue crowbar that isn't mentioned in the instructions. Perhaps that replaces the opening pick?
Hi! I can't see which guide you were using when writing this comment. Can you reply here with which guide and fix kit you used?
I see you posted this in Meta. I hope it's resolved soon! In the meantime, a guitar pick may work well enough for your repair.
what fix kit?
My fix kit didn't include an opening pick either
My AliExpress refurbished screen came with a pick that has a coin-like circle that pops out, so no modification was necessary
-
-
-
iPhoneの画面の上に、透明な梱包用テープを重ね合わせます。
-
次の数ステップで吸盤がくっつかない場合は、強力なテープ(ガムテープなど)を持ち手に折って、代わりにそれでスクリーンを持ち上げてみてください。
-
-
-
青いハンドルをヒンジ側に引くと、リバースクランのアームを解除します。
-
iPhoneの左もしくは右側端に向けてアームをスライドします。
-
吸盤カップをiPhoneの下端付近に装着します。前面と背面に1つずつ取り付けます。
-
吸盤カップ両側をギュッと締め合わせると、標的の場所にしっかりと装着させることができます。
-
-
-
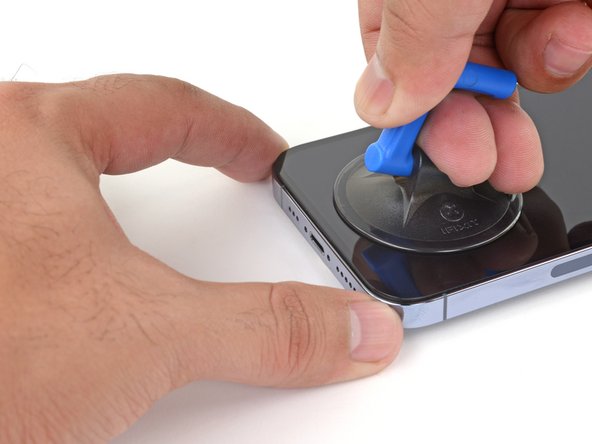
吸盤ハンドルをデバイスの下側端に装着します。ガラスの一番端の位置は避けてください。
-
吸盤カップをしっかりと引き上げます。リアケースとフロントパネルの間に僅かな隙間が生じるまで一定の力で引っ張ります。
-
隙間に開口ピックを差し込みます。
-
-
-
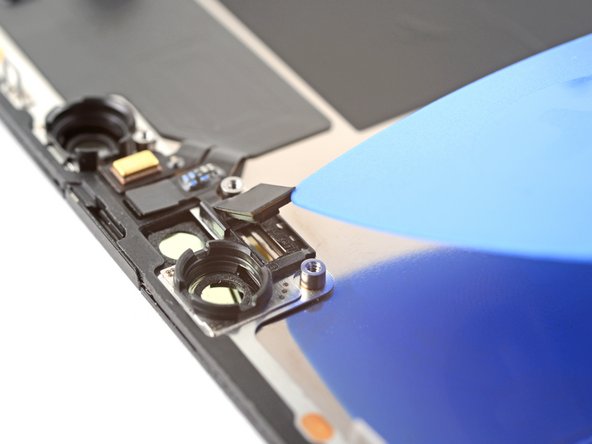
オープニングピックをiPhoneの右下あたりでスライドさせ、接着面を切り離します。
-
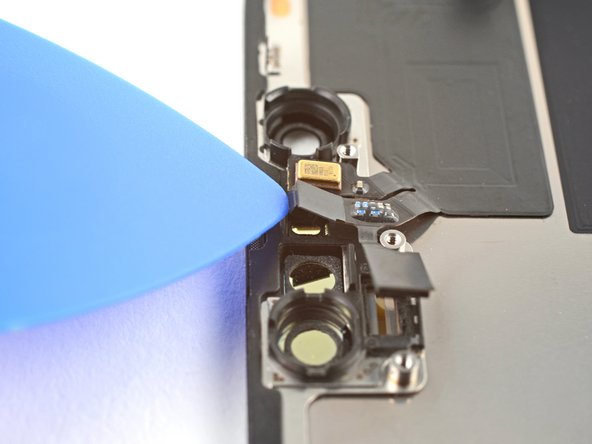
iPhoneの右端に沿ってスライドし、右上コーナーに達したところで止めます。
-
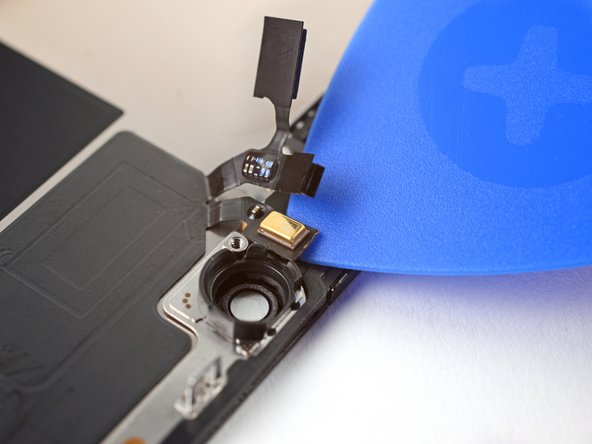
ピックを右上コーナーに残したまま、次の作業に移ってください。
-
-
-
-
スクリーンから吸盤ハンドルを取り外します。
-
iPhoneのディスプレイを右側から(本のページをめくるように)開きます。
-
作業中、ディスプレイが邪魔にならないよう、ディスプレイを立てかけるための衝立てを準備してください。
-
-
-
Y000ドライバーを使って、バッテリーコネクタカバーを固定している1.3mmネジを3本外します。
-
-
-
清潔な指先もしくはスパッジャーを使って、ロジックボード上のソケットからバッテリーコネクタをこじ開けて外します。
-
コネクタをロジックボードから少し離して曲げてください。修理中に誤ってソケットに接触してしまい、デバイスに電源が供給されるのを防ぎます。
-
-
-
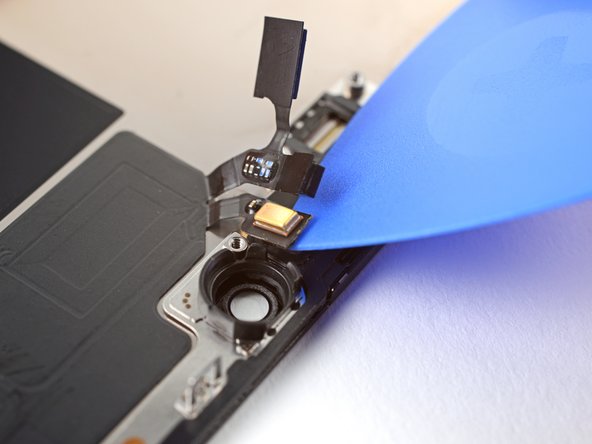
Y000ドライバーを使って、フロントセンサーコネクターカバーから長さ1.1mmネジを2本外します。
-
プラスドライバーを使って、カバーから残りのネジを2本外します。
-
長さ1.5 mmネジー1本
-
長さ1.8mmネジー1本
-


交換用のパーツとオリジナルのパーツを見比べてください。残りのコンポーネントを移植する必要があるか、パーツを取り付ける前に接着剤の裏張りを取る必要があります。
デバイスを再組立する際は、これらのインストラクションを逆の順番に従って作業を進めてください。
e-wasteを処理する場合は、認可済みリサイクルセンターR2を通じて廃棄してください。
修理が上手く進みませんか?トラブルシュートのヘルプには、iPhone 13 Proのアンサーコミュニティを参照してください。
交換用のパーツとオリジナルのパーツを見比べてください。残りのコンポーネントを移植する必要があるか、パーツを取り付ける前に接着剤の裏張りを取る必要があります。
デバイスを再組立する際は、これらのインストラクションを逆の順番に従って作業を進めてください。
e-wasteを処理する場合は、認可済みリサイクルセンターR2を通じて廃棄してください。
修理が上手く進みませんか?トラブルシュートのヘルプには、iPhone 13 Proのアンサーコミュニティを参照してください。
11 の人々がこのガイドを完成させました。
以下の翻訳者の皆さんにお礼を申し上げます:
100%

これらの翻訳者の方々は世界を修理する私たちのサポートをしてくれています。 あなたも貢献してみませんか?
翻訳を始める ›

7 件のコメント
True Tone and auto brightness functionality is disabled after a screen replacement, even when using an original Apple screen. Face ID is also disabled, unless the iPhone is running iOS 15.2 or newer.
Justin Lee - 返信
How True are these comments above
Unless it's done buy an authorized Apple service centre the True Tone doesn't work, I didn't realize what a hassle not having True Tone is until I didn't have it. I was charged $600 to replace my screen just to find out Apple only charges $400, I got my old screen back swapped the screens, taking the screen back to the repair place and taking my phone in to get the screen swapped properly. Was pretty !#^&@@ off when I found all this out.
What was the issue you had with your screen they necessitated a replacement? Was it the infamous white screen of death aka WSOD?
devexxis -
why the price of the screen is so high ?
Iphone X for exemple is 70$
The top of your ipro 13 guide calls for iPhone 13 Pro Display Assembly Adhesive and the bottom of your guide calls for the adhesive tape but does not mention what the mm width of the tape to order. Do I need both of these or these two items an either/or situation?