はじめに
iPhone 11のスクリーンがひび割れたり、タッチしても反応しない、もしくは電源が入っているのに画像が表示されないなどの問題がある場合は、このガイドを使って新しいスクリーン(別名、ディスプレイアセンブリ)を交換して回復させましょう。
交換用スクリーンの背面に薄いメタル製LCD シールドプレートが付いている場合は こちらの簡略版ガイドを参照してください。 プレートが付いていない場合は、下の修理ガイドを続けて読み、スクリーンを交換して、LCDシールドプレートをそのまま使用します。
ディスプレイ背面に搭載されているイヤホンスピーカー + センサアセンブリ両方は各iPhone用にペアで製造されています。そのため、ディスプレイ交換の作業では、必ず古いディスプレイから新しいディスプレイにこれらを移植しなければなりません。その中には、フラッドイルミネーター、すなわち生体認証をもつFace IDセキュリティ機能の一部も含まれます。このフラッドイルミネーターを交換したり、ダメージが入るとFace IDが機能しなくなりますのでご注意ください。この作業ではこれらのコンポーネントにダメージを与えないように特に注意しながら作業を進めてください。ダメージが入ってしまうと、AppleでのみしかFace ID機能を回復できません。
ご注意: True Tone機能はスクリーンを交換後、機能しません。これはオリジナルのAppleスクリーンをした場合も同様です。
必要な工具と部品
ビデオの概要
-
-
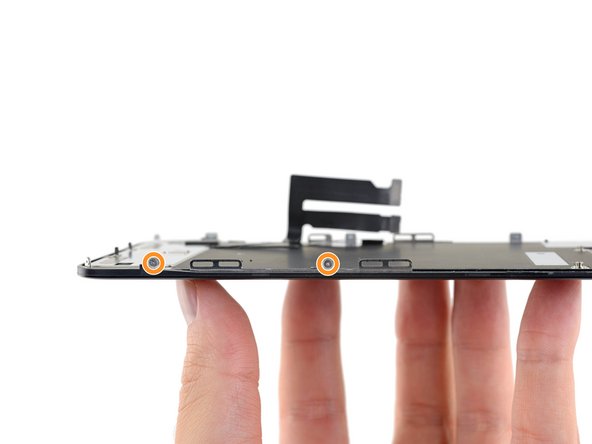
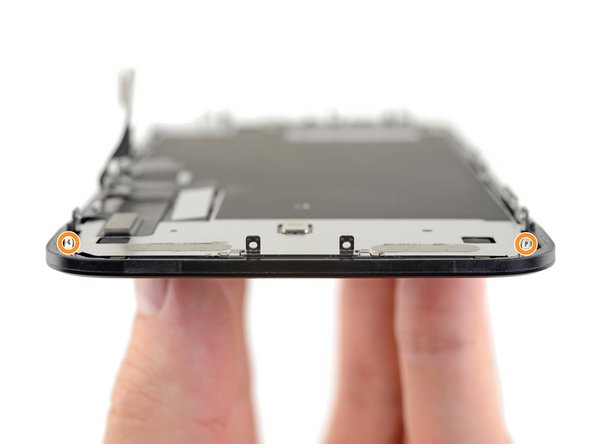
iPhoneのスクリーンにひび割れが入っている場合は状態が広がらないよう、また修理作業中怪我をしないようにガラス表面にテープを貼ります。
-
iPhoneディスプレイ上に透明の梱包用テープを貼り付けます。ディスプレイ表面全体を覆うようにしてください。
-
ひび割れの程度がひどく、次の手順で使用する吸盤カップがうまく装着できない場合は、3番目の画像のように強力なガムテープを真ん中で折り曲げて、ハンドル代わりに利用します。これで吸盤カップと同じようにディスプレイを持ち上げます。
How to detect my Iphone what screen it is, OLED or LCD?
It’s OLED. You can find the specs here, https://support.apple.com/en-us/HT201296
When you find your phone, at the bottom of the description click on, See the tech specs…
mcr4u2 -
The included suction cups were stiff and worthless. They would not lift the screen. Also, I tried every type of tape on the screen to help the suction cups stick without success. Heavy duty suction cups were for my bathroom also failed. However, I had an old GoPro mount with some preapplied double sided 3M VSB tape and stuck that on the screen near the bottom. Magic! This method had the added bonus of being able to use a GoPro attachment as a handle to lift the screen, and propped up the screen like a kickstand in step 12.
Very cool! Thanks
Antonio -
My screen was pretty stuck… would not budge. Heated, super glued the suction cup, tried gorilla tape. Ended up doing the GoPro mount with 3M VSB tape method mentioned. Worked great. That 3M tape is the bomb.
If you have flat feeler gauges (for adjusting engine valve tappet clearance, ignition points … old school) the .003 thick goes right in. Work your way up until you can get the pick or supplied pry tool in.
where can I buy 3M VSB plis!!
3M VHB tape is at auto stores and other big box stores, or online.
nicO -
-
-
-
iPhoneの画面の上に、透明な梱包用テープを重ね合わせます。
-
次の手順で吸盤がうまく装着しない場合は、強力なテープ(ガムテープなど)を持ち手に折って、代わりにそれでスクリーンを持ち上げてみてください。
-
-
-
青いハンドルをヒンジ側に引くと、リバースクランのアームを解除します。
-
iPhoneの左/右側の端に向けてアームをスライドします。
-
吸盤カップをiPhoneの下端付近に装着します。上部に一つ、下部に1つずつ取り付けます。
-
吸盤カップ両側をギュッと締め合わせると、標的の場所にしっかりと装着させることができます。
-
-
-
Heat an iOpenerを温めて、リバースクランプのアームの間にこれを通してください。
-
iOpenerを折り曲げて、iPhoneの下側端に当たるようにします。
-
1分ほど待機すると、接着剤が剥がれ始め、デバイスの間に隙間ができます。
-
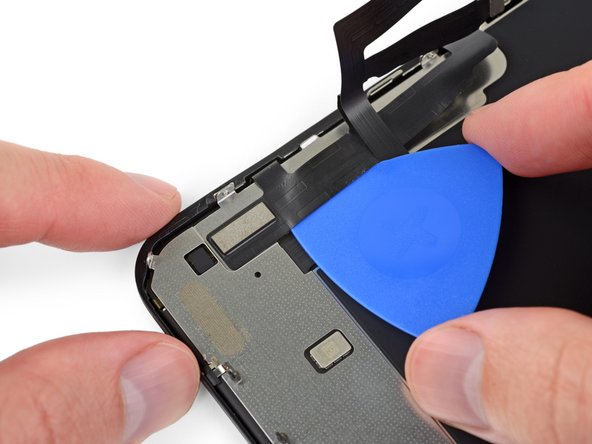
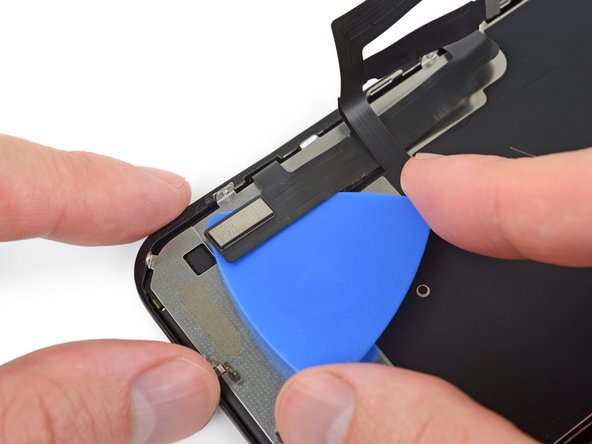
プラスチックベゼルとスクリーンの間の隙間にオープニングピックを差し込みます。スクリーン自体には差し込まないでください。
-
次の3つの手順はスキップしてください。
-
-
-
吸盤カップをしっかりと引き上げます。リアケースとフロントパネルの間に僅かな隙間が生じるまで一定の力で引っ張ります。
-
スクリーンとプラスチックベゼルの隙間に開口ピックを差し込みます。スクリーン自体には差し込まないでください。
This turned out to be the most difficult part for me. My old ifixit suction cup didn't suck hard enough to generate enough force to pry the display from the case. I ended up applying heat at least a dozen times, and I had to pull up on the suction cup forcefully over and over and over while repositioning it several times. I finally had success inserting my pick into the tiny gap after 30 or so rapid tugs on the suction cup.
I have the same question
-
-
-
iPhoneの下側端にオープニングピックを再度差し込みます。接着剤を切断しながら本体下側の右端より上部に向けてスライドします。
Instructions are confusing as the last step says not to insert at certain points, while this says to slide all the way up the right side - is it that sliding is ok but inserting isn't (whatever that might mean) or just not more than 3mm?
Peter Hill - 返信
Just slide slightly and the display will rise without problems on all iPhone models, sometimes if I have long nails I even insert a fingernail and lift the display.
Tonynox -
-
-
-
iPhoneのディスプレイを左側から右側に向けて(本のページをめくるように)開きます。
-
作業中、ディスプレイが邪魔にならないよう、ディスプレイを立てかけるための衝立てを準備してください。
-
-
-
-
Y000ドライバーを使って、バッテリーコネクタのブラケットを固定している1.1 mm Y000ネジを3本外します。
During reassembly, I had to connect my phone to the charger before it would power up.
Die Schrauben sind wahnsinnig kurz, tatsächlich winzig klein. Nach dem Herausdrehen könnte es im ersten Moment so aussehen, als habe man die Schrauben ausgebohrt anstatt herauszudrehen, sie sind jedoch sehr schnell gelöst und liegen dann entweder im Gehäuse oder sind neben dem Gehäuse herausgefallen. In jedem Fall sollten sie nie auf den Boden fallen, da sie dann kaum mehr auffindbar wären.
-
-
-
スパッジャーもしくは清潔な指先で、バッテリーコネクタをロジックボードのソケットからまっすぐ引き抜きます。
-
コネクタをロジックボードから離すように曲げて固定します。アクシデントでロジックボードに接続してしまい、作業中、電源が入らないようにするためです。
-
-
-
Y000ドライバーを使って、ロジックボードのカバーブラケットを固定している1.1 mmネジを5本外します。
Die Schrauben sind wahnsinnig kurz, tatsächlich winzig klein. Nach dem Herausdrehen könnte es im ersten Moment so aussehen, als habe man die Schrauben ausgebohrt anstatt herauszudrehen, sie sind jedoch sehr schnell gelöst und liegen dann entweder im Gehäuse oder sind neben dem Gehäuse herausgefallen. In jedem Fall sollten sie nie auf den Boden fallen, da sie dann kaum mehr auffindbar wären.
-
-
-
スパッジャーもしくは指先で、LCDパネルのケーブルコネクタの接続を外します。
-
このケーブルコネクタの隣にあるデジタイザーコネクタの接続も外します。
Be mindful when reconnecting LCD panel connector and digitizer connector. It’s looks very similar. These 2 ribbon connectors a slightly different.
Pay attention.
내 아이폰이 디스플레이 분리 단계를 거친 후, 전원이 들어오지 않습니다. 층전기를 꽂아도 배터리에 미세한 전기 반응이 느껴지지 않고, 탭틱 엔진도 작동하지 않게 되었습니다. cpu 온도는 여전히 뜨껍습니다. 내 마더보드가 디스플레이 분리 후 갑자기 고장난건가요?
Hast Du das Problem gelöst?
커넥터 핀을 빼거나 다시 넣기 위해 구부러졌을 수 있습니다. 핀이 구부러진 경우 돋보기 등으로 살펴보고, 그렇다면 적절한 매장에 가져가세요.
Hampter -
-
-
-
ディスプレイアセンブリを外します。
After this step its probably a good idea to test the new screen (you dont have to plug in the front camera assembly)
Not a technician, so correct me if I'm wrong: I think that it's at this step of reassembly (before you reattach the screen) that you apply waterproof glue, if you have it.
-
-
-
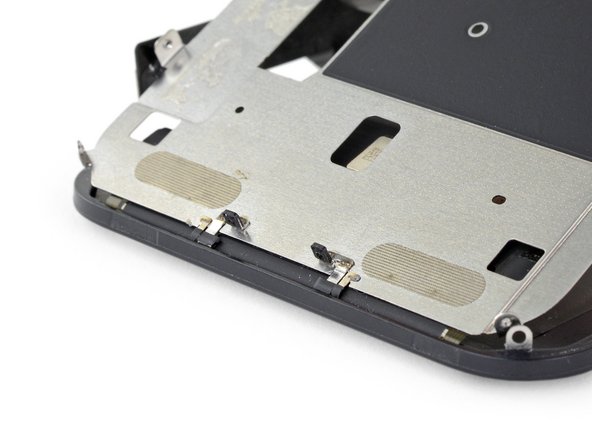
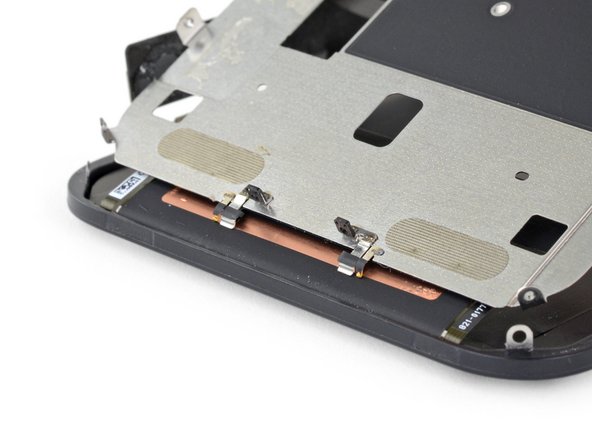
スピーカー/センサアセンブリを固定している4本のネジを外します。
-
1.6mmプラスネジー3本
-
1.3mm Y000ネジー1本
Correct me if I am wrong but you no longer need to do this as of IOS 15.2 as apple doesnt disable Face ID on 3rd party repairs
-
-
-
スパッジャーの先端を使って、スピーカーの上部端を慎重にこじ開けます。
-
スピーカーアセンブリを裏返します。裏向きにして、ディスプレイの上部端から離します。
-
-
-
ヘアドライヤーもしくはヒートガン、iOpenerを準備して、センサーに付けられた接着材を柔らかくするためにディスプレイフロント上部に約1-2分間あてます。
-
-
-
マイクロフォンの下にあるフレックスケーブルの底に開口ピックの先端を差込み、ゆっくりとスライドします。
-
フレックスケーブルに歪みや損傷を与えないように注意しながら、マイクを分離するようにゆっくりと丁寧にひねります。
-
必要に応じて、スパッジャーの先端を使ってフロントパネルのノッチ(切り欠き)部分からマイクを取り出します。
This step was a little bit confusing. I thought that the entire ribbon assm should be removed once the speaker was detached. The entire assm doesn’t actually come off until Step 30.
Be careful in the next few steps, as you can easily damage some parts. Make sure that you operate gently, and that you don't pull, twist or apply too much pressure on the components.
-
-
-
ピンセットを使って、環境光センサから小さなブラケットをまっすぐ持ち上げて、取り出します。
As you remove it, familiarise with its position. It will be hard to put it back into place. If you pay close attention to how it comes out, it will be easier to put it back
-
-
-
イヤピーススピーカーとフロントセンサーアセンブリを取り出します。
-
近接センサー
-
フラッドイルミネーター
-
モジュールは正しく装着しなければなりません。これらのコンポーネントが接着剤にブロックされないように注意してください。
-
-
-
Y000ドライバーを使って、LCDシールドを固定している1.1 mm ネジを外します。
-
ディスプレイケーブルに最も近い位置に搭載された3本のネジです。
-
さらに2本のネジが反対側に留められています。
L’appui sur les vis est réellement important, au risque de foirer celles-ci. N’hésitez donc pas à appuyer, en faisant contre-poids du côté opposé bien évidemment.
This is the bit that was difficult. The tri'point screwdriver y0000 barely fits this tricky size. It could have been the cheap screwdriver that came with the screen replacement kit. Stripped 2 screws, drilled out with an appropriate size drill bit ' frame still intact. I had more success using a size 0.7mm flathead screwdriver.
-
-
-
iOpener(もしくはヘアドライヤー/ヒートガン)をディスプレイ裏側に当てて温めて、ディスプレイケーブルとLCDシールドを固定している接着剤を柔らかくします。
-
-
-
開口ピックをディスプレイケーブルとLCDシールドの間に差し込みます。
-
ディスプレイの下側端に向けてスライドしながら、ケーブルを剥がします。
-
最初のケーブルに到達した時点で、作業を止めてください。
-
-
-
開口ピックを再度挿入します。今回は、2本のケーブルの間に差し込んでください。
-
開口ピックをディスプレイの下側端に向けてスライドしながら、2本のケーブルを乖離してください。
-
-
-
バックカバーに留められたままのディスプレイケーブルの残りが見える所まで、LCDシールドをさらに高い角度まで持ち上げます。
-
LCDシールドとディスプレイケーブルの間にスパッジャーをスライドして、完全に取り外します。
-
-
-
LCDシールドを持ち上げながら、下側端のメタル製突起があることを確認します。
hello whaty if one of the golden contact pins ( i guess it is) to be exact right one has freyed up a bit and looks messy. could it cause harm or it is not very important?
-


交換用のパーツとオリジナルのパーツを見比べてください。残りのコンポーネントを移植する必要があるか、パーツを装着する前に接着剤の裏張りを取る必要があります。
デバイスを再組み立てする際は、これらのインストラクションを逆の順番に従って作業を進めてください。
不要になった電子廃棄物は 認証済みリサイクルセンターで処分してください。
修理が上手く進みませんか?i FixitのiPhone トラブルシューティングライブラリもしくはiPhone 11の電源が入らない場合のトラブルシューティングページ、または ベーシックなトラブルシューティングのヒントをご覧ください。または、iPhone 11のアンサーコミュニティを検索ください。
172 の人々がこのガイドを完成させました。
以下の翻訳者の皆さんにお礼を申し上げます:
100%

Midori Doiさんは世界中で修理する私たちを助けてくれています! あなたも貢献してみませんか?
翻訳を始める ›


23 件のコメント
I am a repair technician from California, and I use your company’s tools and I gotta say that I love them. Very sleek, and the powerful magnetic bits help me get the job done. I did 5 repairs yesterday and each one finished was a good feeling of satisfaction. In the future, if you guys decide to make some sort of in-depth manual for the newer iPhones, that would be great because diagrams are not only a great way for me to sharpen my own skills, but will help make training new techs a breeze.
Cheers all the way from Fresno!
Hi, I replaced the display independently, not in the Apple service, to my disappointment I found a message in the device that warned me that the part is not original, consequently the FaceID was disabled. Can you tell me about ear? Thank you
Getting a message saying not genuine is known issue. there is no workaround yet. as far as face ID not working, you need to check for tear on the flex as you probably damaged it during transfer. If it’s broken, there is no way to fix.
The Important Display Message can be removed, check here: https://www.youtube.com/watch?v=bLo0_p7O...
Ricky LV -
Great repair guide. My only issues:
1. There are no instructions for removing the metal panel from the back of the old screen (nor how to reinstall it).
2. There are no instructions for removing the old, black adhesive from around the edge of the old case (nor the much needed instructions for reinstalling the new adhesive without damaging it or compromising the purpose of replacing this adhesive). This info is also missing from the adhesive replacement page for the iPhone 11.
I was able to patiently work my way through both of these issues and complete the repair on an iPhone 11. Covering these issues as additional steps of the repair guide would be very helpful for future iFixers.
Anyone have the phone randomly reboot after screen replacement? All aspects work on the phone after replacement. It just randomly goes black and then restarts
Maybe just a bad battery connection or a stained/bent connector
I am a repair tech at a repair shop we do more but thats what we are called and i love you’re tools, they are just perfect for everything and all i can say really is, be super careful with the screen and the prox flex, they can be eaisly ripped and really ruin you’re day because to restore the face id with a new prox requires micro sodering but other then that just be careful
Zach Mentz - 返信
I find the OEM screen looks more yellowish, is it me only?
OEM screens tend to have the colors a little bit off, could also be caused by disabled true tone.
Overall a very useful repair guide, there´s just one issue I came across:
Different display manufactors.
Been looking around, due to some issues and so far I´ve seen some different manufactors for the iPhone 11 (and the XR):
Toshiba (the print on the display starts with C11 or F7C, as seen on the last picture)
LG (DTP or C3F)
Sharp (DKH)
someone else stumbled across this?
Apple doesnt offer new displays, however afaik the original apple product manufacturer foxconn refurbishes original screens. Or you could just get a refurbished screen from somewhere else…
For iphone 11, on the flex if there is a square code QRC is DTP and a rectangle is C11
Didier -
Awesome guide, thank you very much! By the way, after the replacement the true tone function will most likely be disabled, which can as far as i know only be fixed by copying the firmware from the old screen over to the new one with a programmer (for example Qianli iCopy Plus). Also, the phone will notify you that the screen is not genuine after every restart and it will always show a notification in the settings. The only way to get around that is to swap the chip on the display cable with a hot air station and solder paste (not worth the hustle in my opinion, i dont mind the one notification in settings). https://www.youtube.com/watch?v=agq2HPK-...
Cheers!
Hi, since replacing my screen my ear speaker has been very muffed/static. Is there any way I can fix this? Thanks
I’d suggest checking the mesh under the earpiece for dirt and stuff that could be blocking the sound and maybe trying to refit it, maybe it’s not properly seated. Could also be fixed by just reseating the earpiece flex…
completed the guide. thx. my iphone claimed the screen is not original. anyway, seems to work correct
Hello I was wondering if anyone could help me. I recently replaced the screen of an iphone 11. The phone was good for the first couple of days but now the customer is having some issues. His display is something randomly scrolling up, mainly while watching videos and sometimes the screens just starts to act crazy and press random things. I’ve been doing some research and I found that something i could do is reset the phone to factory settings. However i’m unsure if this is like a software or a hardware issue. Any advice is helpful, thanks!
From my experience this sound like a ghost touch issue. Usually caused by a loose/broken/dirty connection or an overly tight screw somewhere. It's unlikely, but if you installed a screen protector afterwards, it may have a fingerprint or dirt between the protector and the phone screen. Same thing happened when we did my sisters phone at our store, a connection was loose and a screw was a little bit tight. Maybe a more experienced tech could offer more in-depth insight.
Teejay R -
Hello, I followed the guide and repairs. My phone will not come on. Unless sitting on the charger and then I only get the Apple logo for a few seconds and it does this repeatedly. Any guess on where I went wrong? Thanks
Coty Alred - 返信
Hi all, Im still trying to get a better understanding of the different types of "screen repair" that can be done.
From what I understand, it is possible to perform a replacement of ONLY the "front glass/screen" with 3rd party, non-OEM screens that you can purcahse online) OR you can replace BOTH the screen and digitizer.
ALot of 3rd party sellers sell a "screen replacement" but I am not sure exactly what I need to look for.
My front screen is cracked but the damage that is visible is purely physical (II don't see /experience any altered pixels, flashing colors etc, just dealing with a iphone with a cracked front screen). BUT in addition to the physical damage, the right side of my iphone 11 (specifically a small area that covers the "&" sign and letter "i" on my keyboard are non-responsive.
Now, is the item Im commenting on going to fix my touch issue? If not, which Ifixit replacement part(s) will resolve this? if at all.
thanks
The ribbon cables used on this screen are incredibly weak, when compared to the apple ones. Did this whole thing and had the phone fully working. Made sure the cables were in the right spot and started pressing the screen in just for the display cable to split in half from a couple pounds of pressure. Absolutely livid. Waste of money and time. You can really tear these cables apart with the tiniest fold.
the right screws wouldn’t come off
Yusef San Inocencio - 返信
ok one came of but my right wont come of either!!!!
Aisa Jawara -
Hello guys, I still haven't found away to power off the iphone without using the screen. Cheers!
danielaguirre93 - 返信
You can try this.
Quickly Press and release the volume up button.
then Quickly Press and release the volume down button.
then press and hold the power button and wait until it turns off.
worked for me :D
Benóný Egilson - 返信
Where does one get replacement seals? Is this the same as the display assembly adhesive?
Brian Baker - 返信
not of the screwdrivers i have seem to be able to turn the screws
Aisa Jawara - 返信