はじめに
このガイドの手順を参照して、iPad mini 4 Wi-Fiの故障したホームボタンを交換しましょう。
このデバイスのオリジナルのホームボタンは、ロジックボードと対になっています。新しいボタンに交換するとTouch IDの機能を失います。ご注意ください。
必要な工具と部品
-
-
鍋を十分な量のお湯で満たして、iOpener を完全に沈めます。
-
お湯を沸かして熱くなったら火を止めます。
-
iOpenerを熱湯の中に約2−3分間沈めます。iOpener全体が完全に浸かっているか確認してください。
-
トングなどを浸かって、温まったiOpenerをお湯から取り出します。
-
タオルでiOpener全体を拭き取ります。
-
iOpenerの準備は整いました。iOpenerを再度温める必要がある場合は、お湯を沸騰させて、火を止めてからiOpenerを2-3分間浸してください。
-
-
-
-
スパッジャーの鋭利な先端を使って、ロジックボード上のソケットからディスプレイデータコネクタの接続を外します。
-
スパッジャーの鋭利な先端を使って、ロジックボード上のソケットからデジタイザーケーブルコネクタの接続を外します。
-
-
-
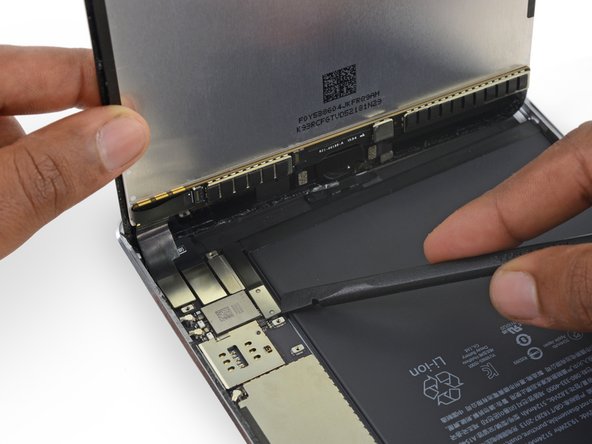
ディスプレイアセンブリを取り外します。
-
ディスプレイアセンブリを再装着するには、ディスプレイ接着剤を交換する必要があります。当社のディスプレイ接着剤の装着ガイドを参照して、ディスプレイ用接着剤を再塗布し、デバイスを再封印してください。
-


デバイスを再度組み立てるには、この説明書の逆の順番で組み立ててください。
デバイスを再度組み立てるには、この説明書の逆の順番で組み立ててください。
27 の人々がこのガイドを完成させました。

5 件のコメント
Is the piece of tape connecting the HB cable to the bracket important?
Home Button still does not work after home button transfer and digitizer replacement.
there is a tiny black circle on the actual button underneath the kapton tape. if that isnt properly lined up it will not depress properly. also if the collar isnt perfect the home button will not sit correctly and popout. its a pretty crappy design by apple.
jsox79 -
It took me several attempts - but I eventually got mine to work perfectly. I had put glue on the bracket - since there was glue on the old one - but that made the gap too wide, so it wasn’t seating the home button right. I also had a replacement that had a slightly bent plug for the touch - so it wasn’t seating properly and the touchscreen was not consistent. I eventually got it all seated (the connector and the home button). Then it worked like a charm. Thanks for the guide.