メインコンテンツにスキップ

iPad mini 4 LTE Battery Connector Replacement

必要条件のみ
この修理ガイドは、他のガイドの前提条件として使用されます。それ自体は不完全で、単独で使用されることはありません。

必要な工具と部品

  1. iPad mini 4 LTE Battery Connector Replacement, Battery Connector: 手順 1、 1の画像 1
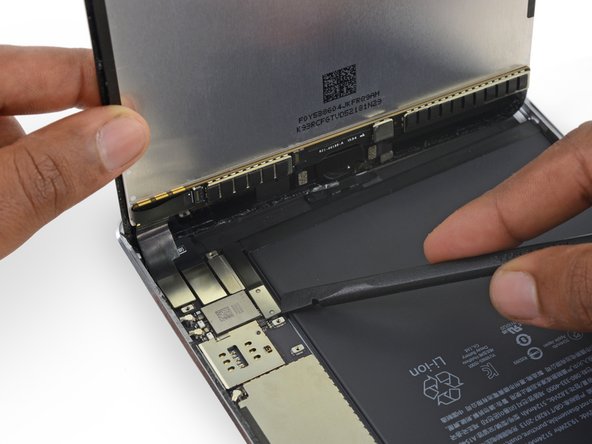
    • To avoid stressing any cables, hold the display assembly perpendicular to the body of the iPad until it is disconnected.

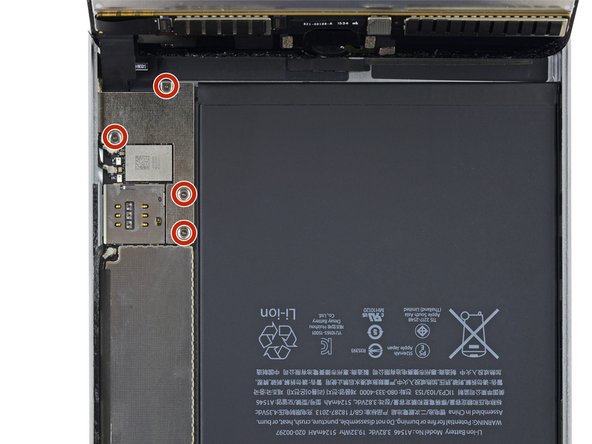
    • Remove the four 1.2 mm Phillips screws over the battery/display connector bracket.

  2. iPad mini 4 LTE Battery Connector Replacement: 手順 2、 1の画像 1
    • Remove the battery/display cable bracket.

  3. iPad mini 4 LTE Battery Connector Replacement: 手順 3、 2の画像 1 iPad mini 4 LTE Battery Connector Replacement: 手順 3、 2の画像 2
    • When disconnecting any press connectors from the logic board, be sure to lift the connector straight up to avoid ripping the socket off the board.

    • Use the flat tip of a spudger to disconnect the battery connector from its socket on the logic board.

    • Bend the battery connector ribbon cable up slightly to prevent it from making contact and powering on the iPad.

終わりに

To reassemble your device, follow these instructions in reverse order.
作成者

2人の作成者と共同で作成されました。

Evan Noronha

メンバー登録日: 02/05/15

223,469 ポイント

168のガイドは作成済み

0 件のコメント

コメントを追加

統計データ:

過去 24時間: 0

過去 7 日: 0

過去 30 日: 0

今までの合計 201