はじめに
Follow this guide to replace the battery in an iPad 6 Wi-Fi.
If your battery is swollen, take appropriate precautions.
Be very careful when you isolate the battery using a battery blocker. The battery contacts are easily damaged, resulting in irreversible damage to the logic board. If you choose to complete the guide without isolating the battery, avoid using metal tools except when completely necessary (like when removing screws) to prevent shorting the battery and damaging sensitive circuit components.
必要な工具と部品
-
-
Fill a pot or pan with enough water to fully submerge an iOpener.
-
Heat the water to a boil. Turn off the heat.
-
Place an iOpener into the hot water for 2-3 minutes. Make sure the iOpener is fully submerged in the water.
-
Use tongs to extract the heated iOpener from the hot water.
-
Thoroughly dry the iOpener with a towel.
-
Your iOpener is ready for use! If you need to reheat the iOpener, heat the water to a boil, turn off the heat, and place the iOpener in the water for 2-3 minutes.
-
-
-
If your display glass is cracked, keep further breakage contained and prevent bodily harm during your repair by taping the glass.
-
Lay overlapping strips of clear packing tape over the iPad's display until the whole face is covered.
-
Do your best to follow the rest of the guide as described. However, once the glass is broken, it will likely continue to crack as you work, and you may need to use a metal prying tool to scoop the glass out.
-
-
-
Pull the blue handle backwards to unlock the Anti-Clamp's arms.
-
Place an object under your iPad so it rests level between the suction cups.
-
Position the suction cups near the middle of the left edge—one on the top, and one on the bottom.
-
Hold the bottom of the Anti-Clamp steady and firmly press down on the top cup to apply suction.
-
-
-
Wait one minute to give the adhesive a chance to release and present an opening gap.
-
If your screen isn't getting hot enough, you can use a hair dryer to heat along the left edge of the iPad.
-
Insert an opening pick under the screen when the Anti-Clamp creates a large enough gap.
-
Skip the next two steps.
-
-
-
Take the first pick you inserted and slide it up toward the top corner of the iPad.
-
If you can see the tip of the opening pick through the front glass, don't panic—just pull the pick out just a little bit. Most likely, everything will be fine, but try to avoid this as it may deposit adhesive on the front of the LCD that is difficult to clean off.
-
-
-
Slide the lower left pick to the lower left corner to cut the adhesive on that corner.
-
Leave the pick at the corner. Do not pry any farther, and do not remove the pick from the iPad.
-
The following steps will direct you where to pry to avoid damage to these components. Only apply heat and pry where directed.
-
-
-
Use the flat end of a spudger to pry the LCD out of its recess just enough to grab it with your fingers. There may be glue around the screw holes that needs to be cut with a knife.
-
Flip the iPad LCD like a page in a book, lifting near the camera and turning it over the home button end of the rear case.
-
Lay the LCD on its face to allow access to the display cables.
-
-
-
-
Remove the front panel assembly.
-
If you experience "ghost" or "phantom" touch input issues with your new display, this can be resolved by adding a layer of very thin insulating tape, such as Kapton (polyimide) tape, to the highlighted areas on the back of the panel. iFixit panels come with the proper insulation, and should not require the addition of any tape.
-
-
-
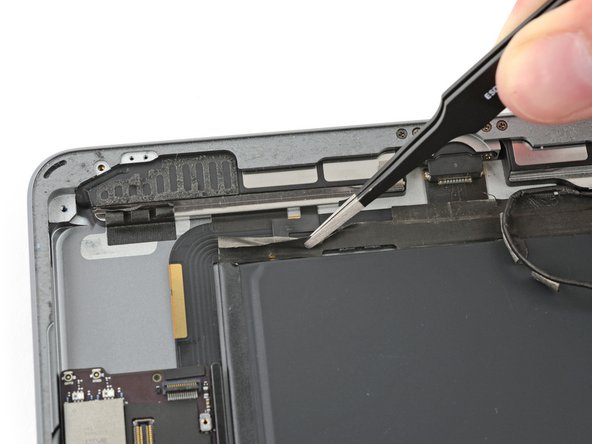
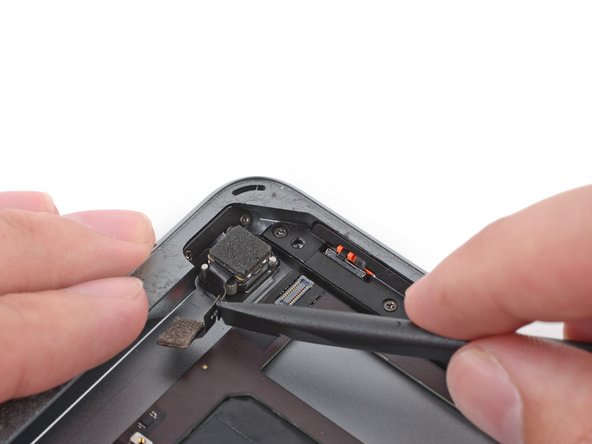
Insert a spudger under the antenna cable closest to the edge of the iPad and lift upward to disconnect the antenna cable connector.
-
-
-
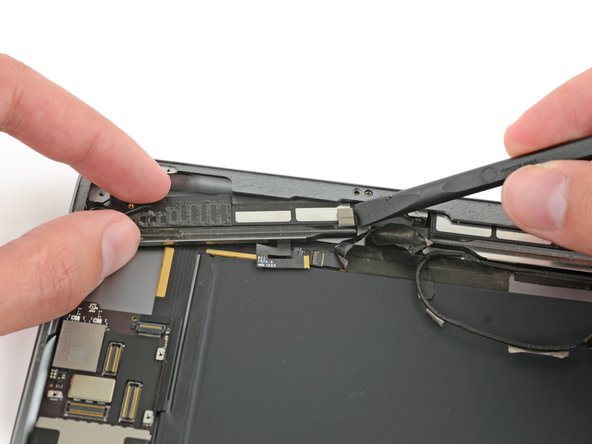
Insert a spudger under the left antenna cable and lift upward to disconnect the antenna cable connector.
-
-
-
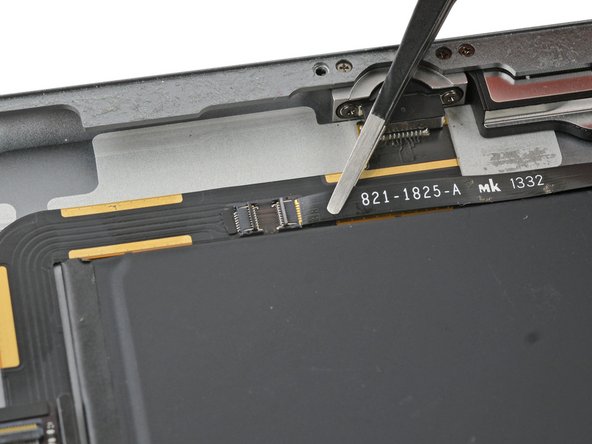
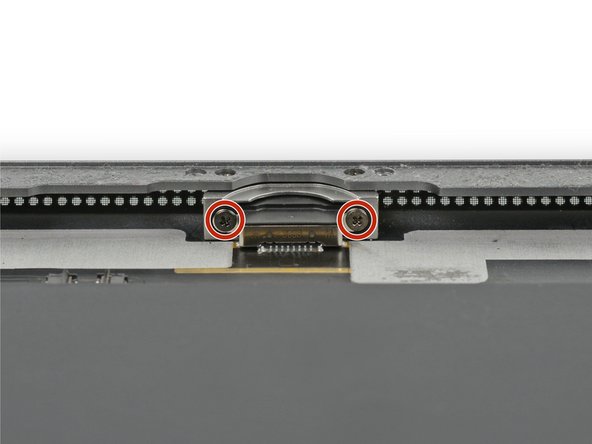
Remove the three 1.4 mm Phillips #000 screws securing the upper component cable bracket.
-
-
-
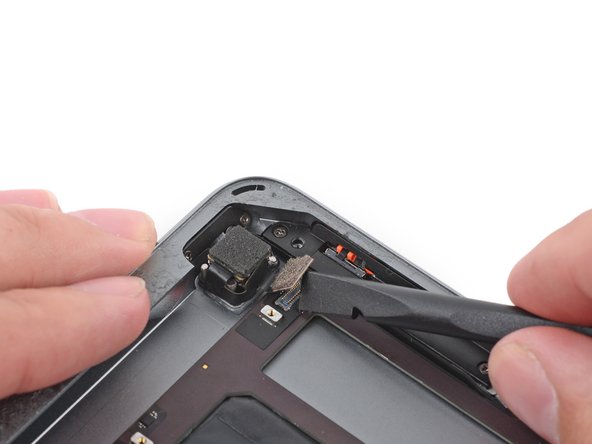
There are two remaining pieces of tape securing the left antenna cable to the rear case.
-
Peel the tape up from the rear case.
-
-
-
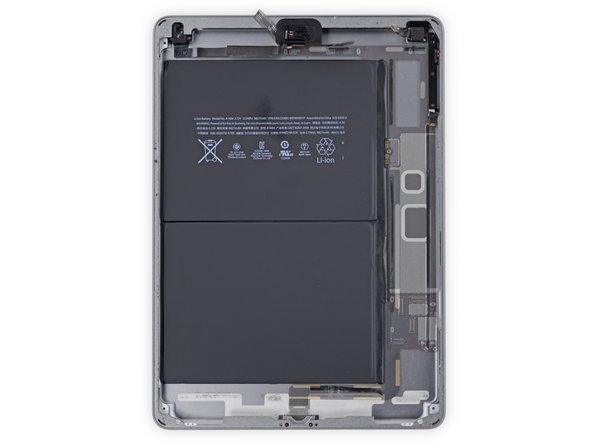
Insert a plastic opening tool in the rectangular gap in the upper area of the logic board, and pry the logic board up from the rear case.
-
While keeping the opening tool underneath the logic board, slide it down the length of the gap to free the upper end of the logic board from the adhesive.
-
-
-
Reheat the iOpener in the microwave for 30 seconds.
-
Place the heated iOpener in the center of the back of the iPad. Let it sit there for 90 seconds to soften the battery adhesive.
-
Move the iOpener to the right (away from the rear-facing camera), and let the iOpener sit for another 90 seconds.
-
Finally, move the iOpener to the right-hand edge of the iPad for 90 seconds.
-
-
-
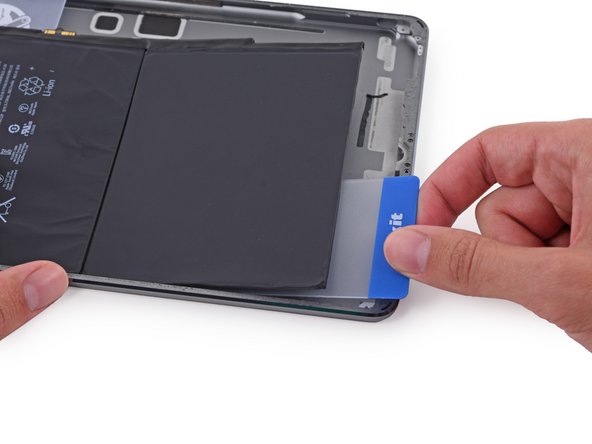
Insert a plastic card under the lower battery cell, at the lower right-hand corner.
-


To reassemble your device, follow these instructions in reverse order.
To reassemble your device, follow these instructions in reverse order.
35 の人々がこのガイドを完成させました。


9 件のコメント
analyzing the structure of the arrangement of the components, is it necessary to remove everything? I think you could only remove the battery without removing the logic card.
Hi Vik,
While it may not be necessary to remove the logic board to remove the battery, we found that it is the safest option. Removing the logic board first allows you to pry the battery around all the edges while keeping the bending to a minimum.
Thanks for a great guide! I left out steps 47 to 100 as some suggested and it worked fine for just replacing the battery. I was aware that the issue may be the bending of the battery and, therefore, iFixit does not recommend skipping these steps. However it worked fine for me. My tip is to allow yourself enough time to loosen the battery from the adhesive and keep the heated iOpener always underneath the section of the battery that you are working on. This way the adhesive softens and allows you to loosen the battery step by step. - It took me 3 hours of which the first hour was trying to figure out how to get Step 9 done. It took me a while to have the iOpener at the right temperature. So, be patient.
The guide worked perfectly, thanks! But now there is an issue with the battery after reassembling. The iPad can‘t be charged and it turns itself off every 5min.
Any ideas?