この翻訳は、ソースガイドの最新の更新を反映していない可能性があります。 翻訳の更新に協力してください。 または ソースガイドを参照してください。
はじめに
ディスプレイを外すには、スクリーン周辺の接着剤を切り離す必要があります。接着剤が切断した後、ディスプレイを再装着する際に再利用ができません。そのため、新しい接着ストリップに交換しなければなりません。
必要な工具と部品
-
-
現在使用中のディスプレイを再利用する場合は、ディスプレイの裏側から古い接着剤も剥がさなければなりません。
-
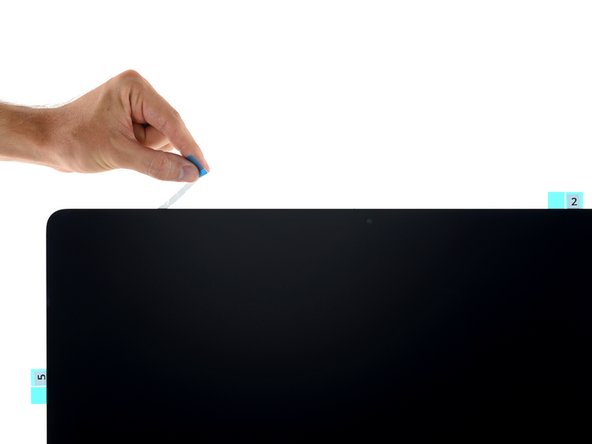
指先やピンセットを使って、古い接着ストリップを剥がします。デバイス下側から剥がし始めて、上部に向けて上向きに引きながら剥がします。
-
古い接着剤を剥がしたら、90%濃度以上のイソプロピルアルコールをメガネ拭きのようなリントフリーの布に含ませて、接着剤部分エリアを綺麗に拭き取ります。前後に拭かず、同じ方向に拭いてください。
Depending on what adhesive you are removing, I find that using something like Goo Gone Goop adhesive remover is very helpful.
If it is the original foam based adhesive, then that can usually be taken off without the adhesive remover, but with these after market glue strips, the adhesive remover is best.
Safer to stick with alcohol as recommended in the guide—a lot of adhesive removers can leave oils behind, which prevents the new adhesive from bonding properly. Weeks or months later, the whole screen falls out. If the adhesive is really stubborn and you must use something like Goo Gone, wipe it down thoroughly with alcohol afterward.
Welcome to the club!
I recommend using a white colored cloth and/or wearing gloves with the alcohol. My hand was all black after using a black cloth, not to mention dried out.
Max Romano - 返信
-
-
-
スパッジャーが接着ストリップ先端の穴に差し込んだまま、iMacのフレームに付いている穴に対応する留め金に押し込みます。
-
穴とスパッジャーを使ってストリップをディスプレイ右端に配置して接着ストリップの装着位置を固定し、ゆっくりとスパッジャーに対してストリップをぴんと張ってフレームに貼り付けます。
Don’t pull too hard at all at this or any step similar. The adhesive can stretch, and it will no longer align at the other hole. The goal is just to make sure it isn’t wrinkled.
-
-
-
接着ストリップの下側半分の位置を揃えたら、ストリップの裏側から長い方のシールを剥がしてください。
-
-
-
-
iMacの他の周囲にも同じ手順で他の接着ストリップを装着します。
-
ストリップ3から反時計周りに作業を進めます。
-
ストリップ2ー上部右
-
ストリップ1ー上部左
-
ストリップ5ー左側サイド
Please update this pic with newer model 2017, where you can see the wholes for the mic!!! These must not be covered! I hope the set of tapes 4R considering this issue, otherwise the mic will not work, as I used to have it!
-
-
-
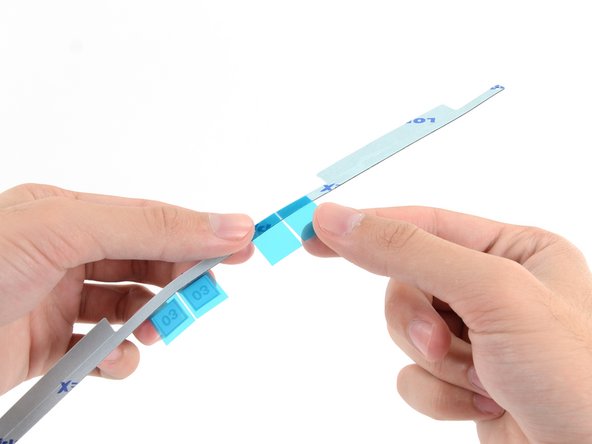
4R接着ストリップ上に付けられた赤色のフィルム製プルタブを掴んで、ストリップ裏の保護フィルムを剥がします。
-
リアエンクロージャーの下側端にストリップを揃えて、先端上の中央ネジの右側に向けてストリップを配置します。
-
接着ストリップの上に沿って指を滑らせて、シワなく、まっすぐ装着されているか押さえながら点検します。
when i pull the red tab at least one of the bottom strips always has the wrong side peel off. Poor design.
Yes, all of the other strips go on without problem, but every strip kit I’ve ordered has the 4L and 4R strips reversed (like in the picture). And pulling the red tab usually doesn’t work at all. Why aren’t they just made like the rest of the strips?
Brian Toth - 返信
Very important in case of iMac 2017 - 4R strip covers the microphone holes. With the kit provided you have to split 4R strip into two pieces, cut out part of it to leave space where the mic is - slightly on the right from the apple logo (you can see there very small holes) . If not, you will cover whole area and mic will not work properly. I was freaking out during the re-assembling my iMac as I thought I have demaged the mic’s gentle cable. Apparently I haven’t it was just the stripe.
This is true, and that’s why there are different instructions for the 2017 model.
The two bottom strips are perfectly simmetrical. Just invert their place (L to R, R to L) and leave the white part on top like all the others. This works especially well if you follow drgallo's alternate procedure at step 21.
NOTE: As said in other comments, the 2017 and newer iMacs need you to cut a section out of 4L, otherwise it will block the microphone hole and you will get no sound from the Mic. It’s easy enough to do but if you don’t know to do it, you’ll need a whole new set of adhesives to do this process all over again.
I now have spotlighting along the entire bottom of the screen after opening and re-sealing (21.5 2017 4k). Anyone have any suggestions?
-
-
-
4L用接着ストリップの装着方法については前の手順を繰り返してください。iMac下側端の左側半分に沿って取り付けます。
Unless my iMac was assembled incorrectly, the 4L and 4R strips are mislabeled and should be reversed . The right angles of the strips should be towards the outer bottom edges of the display. I have photos but not sure how to get them in here.
-
-
-
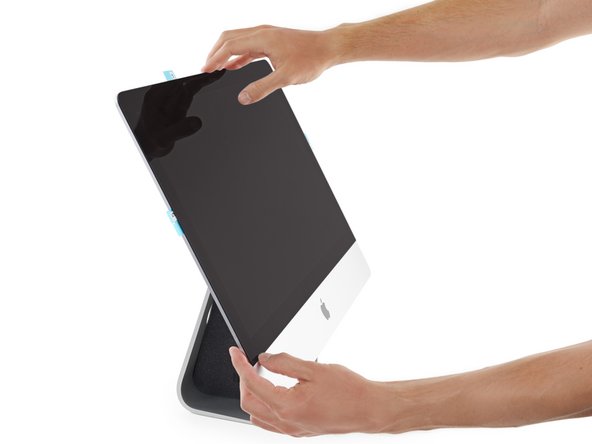
ゆっくりとディスプレイをiMac上に乗せて、丁寧に位置を揃えます。
-
-
-
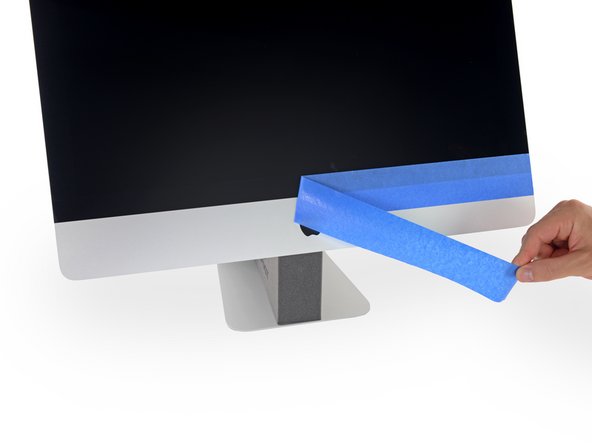
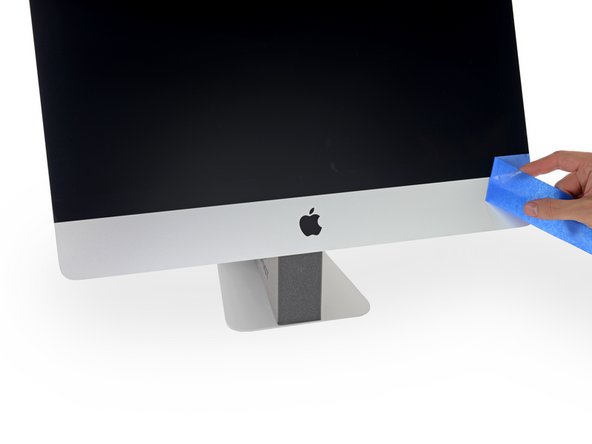
マスキングテープを使ってiMacのエンクロージャーとディスプレイ下側端を一時的に固定します。
Elastoplast also works
-
-
-
iMacが正しく稼働かどうか点検が終了して、すでにディスプレイを閉口している場合は、手順17までスキップしてください。
-
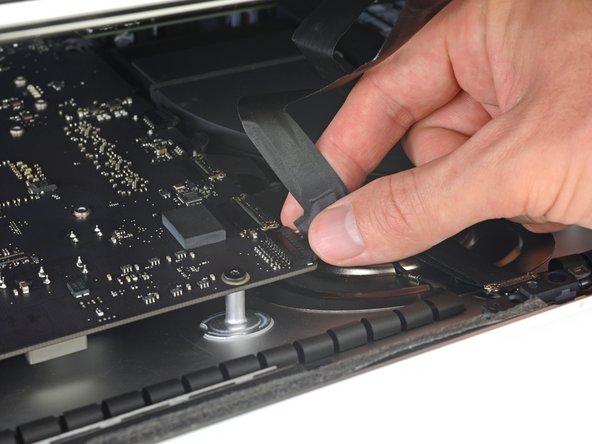
ディスプレイのパワーケーブルを基板上のソケットに差し込みます。
If replacing of the adhesive is part of a larger job, where you had to replace the RAM for instance, please make sure that you can plug in the peripherals into the USB, Thunderbolt and the Ethernet. It’s late when you seal the iMac and discover that you can’t plug anything into the USB, because the logic-board has moved 1mm! Also verify that your iSight camera, speakers, wireless, IR and Bluetooth work before sealing.
If you’re doing this as part of a SSD upgrade, don’t forget you have to erase it in Disk Utility before installing or restoring macOS. Don’t panic like I did and almost tear it all down again.
Max Romano - 返信
-
-
-
ピンセットを使ってディスプレイデータケーブルのコネクタを基板上のソケットに丁寧に差し込みます。
-
ディスプレイデータケーブル上のメタル製固定ブラケットを基板側に向けて下向きに装着します。
0. Put a loupe or magnifying glass on the list of tools and supplies.
1. It would be good to show an enlarged picture of the data cable connector to see how it works.
2. In my case, the metal retaining bracket did not hold the connector securely enough, so the connector kept popping out.
Click on any image if you need to see the high-res version. Most of these are 40+ megapixel photos, so you can blow them up to almost any level of detail you could possibly want.
-
-
-
iMacが正しく機能することが確認できたら、ディスプレイケーブルの接続を外して、ディスプレイを前側にゆっくりと倒します。
-
4R接着ストリップから保護フィルムを剥がし、ディスプレイ下側の端から真上に向けてタブを引き上げます。
It’s not a good idea to remove insert these two cables twice, when it can be done only once:
BEFORE reattaching the cables, open the screen up to 90 degrees to the machine, and carefully peel off the two bottom strips 4L & 4R.
Being careful not to close the machine any more than is necessary to be able to insert the cables, with the machine wedged & on its stand, wrap a large double loop of low-tack masking tape entirely around both machine & screen, effectively making two “straps” to retain the screen with about a 5” gap at the top enough to access the cables easily. Insert the cables, not forgetting the latch, then test. The two straps of masking tape can then be cut and peeled back out of the way, whilst supporting the screen, before peeling off the remaining plastic strips & closing up the machine. Much easier to get at 4L/4R this way, and you have only done the cable thing 1 time.
At this point, attach a sheet of paper to the screen reminding “Don't forget to connect the data and power cables to the screen!”. It's good for the distracted.
-
-
-
ディスプレイの電源とデータケーブルを最後に接続します。
Be careful with these cables, they are very very fragile and not at all designed for multiple disconnection / connection. be assured that they are correctly plugged in, the margin is fine. We can believe that it is well connected but the surpise can be very unpleasant once the screen back in place and glued! Thank you Apple with your glue !
Same here. Put it together before removing the tape cover and it wasn’t plugged in. Opened it up and realized the data cable wasn’t all the way in. I then noticed the cover isn’t just a cover; it’s a hook that flips over the other side of the connector to be sure they are all the way in, and won’t come apart - I was simply flipping it over the top as if it was just a simple flap to lay on top.
Now I know : )
-
-
-
次の手順で、接着ライナーを剥がす際には片手でディスプレイを固定してしてください。もしくはiMacの筐体に軽く立てかけてください。
At this step, make sure that the camera is correctly positioned in front of the opening of the window. Indeed, you may notice that the camera, although attached to the chassis, has a flexible mount and can move slightly from left to right and from top to bottom. This mounting allows, I guess, to properly wedge the camera when we plate the screen on the chassis.
In my case, although the screen was perfectly aligned at the bottom left and right corners, the camera had to be positioned incorrectly because the screen did not fit snugly on the chassis. It is almost invisible to the naked eye, but it does not plate perfectly.
Be sure to check this point before removing the protections from the adhesives by playing on the mounting bracket of the camera mount.
Excellent tutorial;))
If you're replacing the display, don’t forget to take out the pink film protecting the camera opening. I did, and I came out pink. I had to this all over again since I missed the pink film.
If this happened to you, and you don’t want to redo or just waiting for new adhesive strips to come to your mailbox, try using a CTO blue gel flash filter to counteract and balance the color, which actually worked great for me, unless you want to use a green screen, which I did, then CTO filters won’t work.
-
-
-
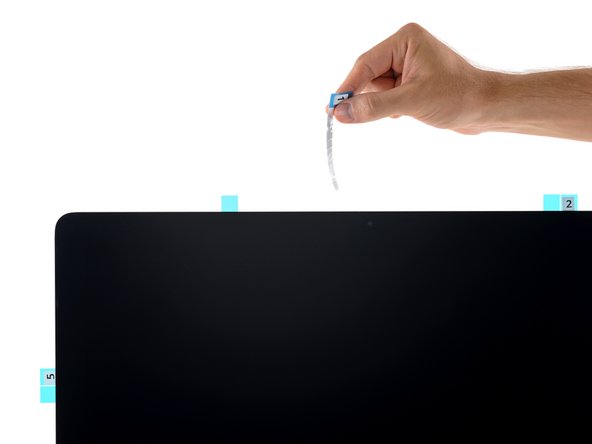
ストリップ1からタブをまっすぐ引いて保護フィルムを剥がします。
It is MUCH easier to just align the bottom edge, then use painters tape to attach the glass at the bottom. Flip the screen forward so that you can see both tabs 4L and 4R. Carefully expose the adhesive at the bottom. Connect the two top cables, clean the webcam. Finally peel tabs 5 and 3 from the bottom up. Lastly while you can see everything, peel both sides of tabs 1 & 2. Then just press everything down squarely. (The biggest issue is that the tabs do not come off easily and removing the tabs while you can see them is the key here.)
I did what drgallo suggested. Perfect.
Dr. Gallo is spot on. I actually just peeled 5, 3, 1, and 2 at the same time. So much easier. I can’t even wrap my head around how 1 and 2 can come before 3 and 5. So, just do 5&3 and then 1&2 or do all four simultaneously. Just make sure not to skip steps 19 and 20.
-
-
-
前の2つの手順を繰り返して、残りの接着ストリップのペア(ラベル番号2、3と5)から保護フィルムを剥がします。
-


38 の人々がこのガイドを完成させました。
以下の翻訳者の皆さんにお礼を申し上げます:
81%

Midori Doiさんは世界中で修理する私たちを助けてくれています! あなたも貢献してみませんか?
翻訳を始める ›


5 件のコメント
When I received the adhesive strip kit and pizza cutting tool, my initial thought was that it was overpriced. This turned out not to be the case, as the adhesive strips are cut perfectly and install with great predictability. The guide is an excellent step by step tutorial which, along with the pre-cut strips, enables a handyman to complete his first time repair with a professional outcome.
I did complete this process and turned out fine in the end but when I initially removed the blue tape there was about a 16th of an inch gap between the glass and bottom lip of the iMac case. When I had tilted the glass up using the tape like a hinge I guess the monitor either stretched the tape or something and when it had come down it landed in the wrong spot so be careful with the tape you use. I had not firmly pressed down the glass yet and I was able to separate the pieces and reattach the monitor in the right place. I did it without the tape and it wasn't very difficult although it did require a second person to hold a book along one side of the iMac so I was able to snug the glass against 2 sides (the book and the bottom lip of the iMac case) to get proper alignment. The guide and adhesive kit was indispensable. Thanks a ton.
Great kit and made a fine job of the repair. You would never know the case had been opened.
be careful not to stretch the stickers as you place them down, it’s easy to do if your not careful.
Same probem then jhweb522, : i strongly pressed to the screen to down before the last step in order to minimize this little gap, and the final result is quite good, but not perfect.
Joan Giral - 返信
2 Kitchen Paper Towel Rolls do the same job as the Wedge just fine .. :)
Stef999 - 返信