メインコンテンツにスキップ

iMac Intel 21.5" Retina 4K Display (2017) Adhesive Strips Replacement

必要な工具と部品

  1. iMac Intel 21.5" Retina 4K Display (2017) Adhesive Strips Replacement, Adhesive Strips: 手順 1、 1の画像 1
    • With the hinge free to move, the iMac will be unbalanced and hard to work on. Repairs can be completed as shown, but are faster and easier with an iMac service wedge.

    • If you are not using an iMac service wedge, be very careful when installing and working behind the display—it can easily fall out and break if the iMac moves unexpectedly.

  2. iMac Intel 21.5" Retina 4K Display (2017) Adhesive Strips Replacement: 手順 2、 2の画像 1 iMac Intel 21.5" Retina 4K Display (2017) Adhesive Strips Replacement: 手順 2、 2の画像 2
    • Before you start placing strips, remove all of the old adhesive around the perimeter of the rear enclosure.

    • If you are re-using your existing display, you must also remove the old adhesive from the back of the display.

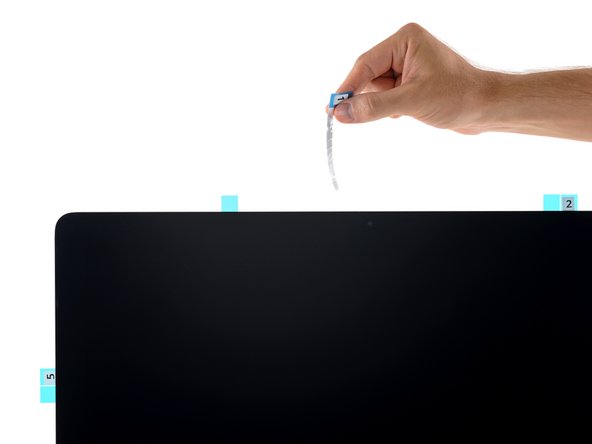
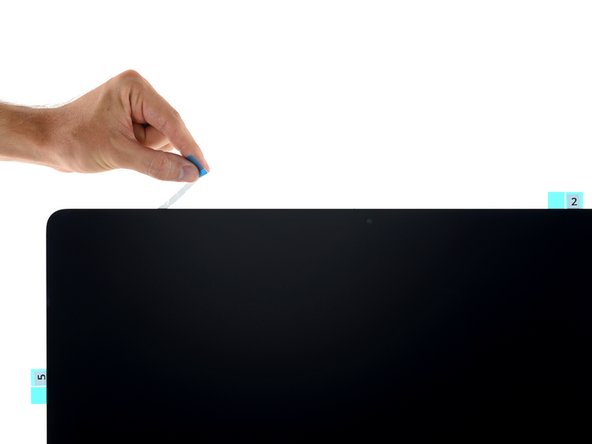
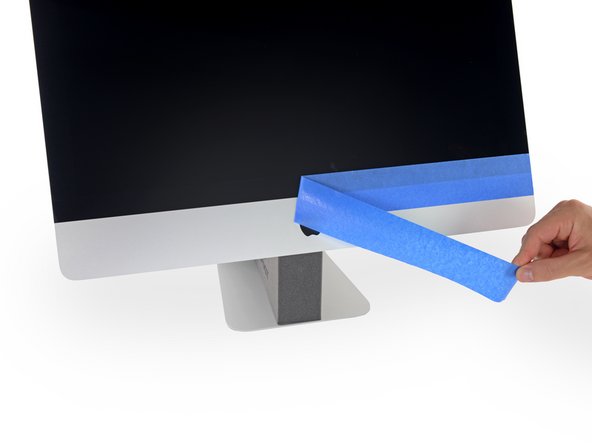
    • Peel off the old strips of adhesive using tweezers or your fingers. Start at the bottom and peel upward towards the top of the device.

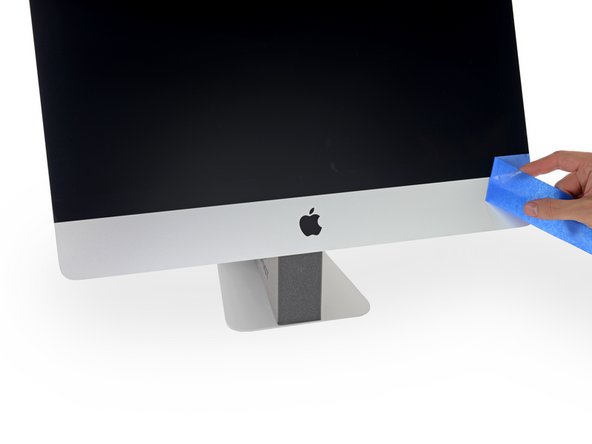
    • After all the old adhesive is removed, carefully clean the area under the adhesive with 90% (or greater) isopropyl alcohol and a lint-free cloth. Wipe in one direction, not back and forth.

    • Don't skip this step, or your new adhesive strips may not bond properly, and the display may fall out of your iMac.

  3. iMac Intel 21.5" Retina 4K Display (2017) Adhesive Strips Replacement: 手順 3、 3の画像 1 iMac Intel 21.5" Retina 4K Display (2017) Adhesive Strips Replacement: 手順 3、 3の画像 2 iMac Intel 21.5" Retina 4K Display (2017) Adhesive Strips Replacement: 手順 3、 3の画像 3
    • Start with the strip labeled 3 (or 03), which goes on the right vertical side of the rear enclosure.

    • Before peeling off any backing, line it up against the frame of the iMac to get an idea of where it goes.

    • Peel the short piece of backing off the back of the strip.

  4. iMac Intel 21.5" Retina 4K Display (2017) Adhesive Strips Replacement: 手順 4、 2の画像 1 iMac Intel 21.5" Retina 4K Display (2017) Adhesive Strips Replacement: 手順 4、 2の画像 2
    • Insert the tip of a spudger into the hole at the end of the strip from the side that still has a backing on it.

  5. iMac Intel 21.5" Retina 4K Display (2017) Adhesive Strips Replacement: 手順 5、 3の画像 1 iMac Intel 21.5" Retina 4K Display (2017) Adhesive Strips Replacement: 手順 5、 3の画像 2 iMac Intel 21.5" Retina 4K Display (2017) Adhesive Strips Replacement: 手順 5、 3の画像 3
    • With the spudger still poking through the hole in the adhesive strip, push the spudger tip into the corresponding hole in the frame of the iMac.

    • Using the hole and spudger to anchor the position of the adhesive strip, line the strip up against the right edge, gently pulling up against the spudger to ensure the strip is taut, and stick it onto the frame.

  6. iMac Intel 21.5" Retina 4K Display (2017) Adhesive Strips Replacement: 手順 6、 2の画像 1 iMac Intel 21.5" Retina 4K Display (2017) Adhesive Strips Replacement: 手順 6、 2の画像 2
    • Once you've aligned the bottom half of the adhesive strip, peel the longer piece of backing out from behind the strip.

    • If the bottom half isn't aligned properly, you can carefully peel it up and re-stick it before peeling off the lower backing strip. Be sure to use the spudger tip to anchor the top.

  7. iMac Intel 21.5" Retina 4K Display (2017) Adhesive Strips Replacement: 手順 7、 2の画像 1 iMac Intel 21.5" Retina 4K Display (2017) Adhesive Strips Replacement: 手順 7、 2の画像 2
    • Align the upper half of the strip with the right edge of the rear enclosure, and stick it down.

  8. iMac Intel 21.5" Retina 4K Display (2017) Adhesive Strips Replacement: 手順 8、 2の画像 1 iMac Intel 21.5" Retina 4K Display (2017) Adhesive Strips Replacement: 手順 8、 2の画像 2
    • Use your finger to smooth Strip 3 along the right edge. Make sure it is neatly aligned with the right side of the frame and that it sits flat.

    • Do not peel off the front adhesive backing yet.

  9. iMac Intel 21.5" Retina 4K Display (2017) Adhesive Strips Replacement: 手順 9、 1の画像 1
    • Work your way around the perimeter of the iMac, adding three more adhesive strips in the same manner.

    • Working counter-clockwise from Strip 3, place:

    • Strip 2 on the top right

    • Strip 1 on the top left

    • Strip 5 on the left vertical

  10. iMac Intel 21.5" Retina 4K Display (2017) Adhesive Strips Replacement: 手順 10、 3の画像 1 iMac Intel 21.5" Retina 4K Display (2017) Adhesive Strips Replacement: 手順 10、 3の画像 2 iMac Intel 21.5" Retina 4K Display (2017) Adhesive Strips Replacement: 手順 10、 3の画像 3
    • To avoid blocking the microphone port with adhesive, strip 4R must be modified before use. The strip must be shortened and aligned such that the adhesive extends to the right edge of the iMac, but stops short of the microphone port on the left.

    • Measure 1.5 inches (38 mm) from the right edge of strip 4R and mark it with a pen.

    • Cut the mark with a pair of scissors.

  11. iMac Intel 21.5" Retina 4K Display (2017) Adhesive Strips Replacement: 手順 11、 3の画像 1 iMac Intel 21.5" Retina 4K Display (2017) Adhesive Strips Replacement: 手順 11、 3の画像 2 iMac Intel 21.5" Retina 4K Display (2017) Adhesive Strips Replacement: 手順 11、 3の画像 3
    • The two remaining strips (4L and 4R) do not have guide holes and are more difficult to place than the previous ones. Before sticking them down, we recommend first setting them in their respective places on the iMac to get comfortable with their placement.

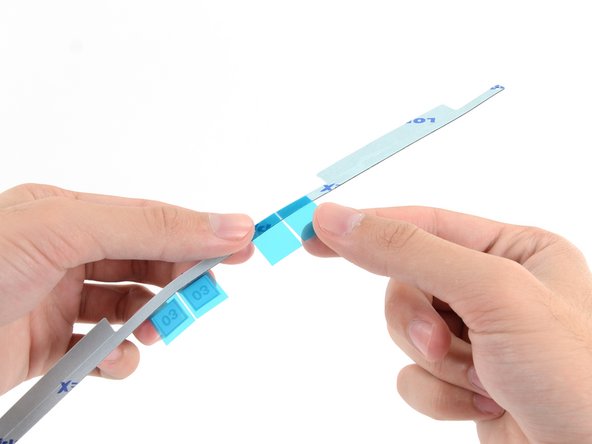
    • Grasp the red film pull tab on the 4R adhesive strip and pull to remove the backing from the strip.

    • Align the strip on the bottom edge of the rear enclosure such that the strip begins right after the microphone holes. The right end of the strip should terminate at the edge of the frame.

    • Run your finger along the length of the adhesive strip to ensure it is straight and unwrinkled, pressing down as you go to adhere the strip to the iMac.

  12. iMac Intel 21.5" Retina 4K Display (2017) Adhesive Strips Replacement: 手順 12、 2の画像 1 iMac Intel 21.5" Retina 4K Display (2017) Adhesive Strips Replacement: 手順 12、 2の画像 2
    • Repeat the previous step for the 4L adhesive strip, placing it along the left half of the bottom edge of the iMac.

    • Once you've applied all the adhesive strips, the iMac should look as shown in the photo.

  13. iMac Intel 21.5" Retina 4K Display (2017) Adhesive Strips Replacement: 手順 13、 2の画像 1 iMac Intel 21.5" Retina 4K Display (2017) Adhesive Strips Replacement: 手順 13、 2の画像 2
    • Gently lay the display in place over the iMac, and align it carefully.

  14. iMac Intel 21.5" Retina 4K Display (2017) Adhesive Strips Replacement: 手順 14、 2の画像 1 iMac Intel 21.5" Retina 4K Display (2017) Adhesive Strips Replacement: 手順 14、 2の画像 2
    • Use painter's tape or masking tape to temporarily secure the bottom edge of the display to the iMac's enclosure.

    • The tape preserves the display's alignment, and allows you to safely swing the top edge of the display open to access the display cables.

  15. iMac Intel 21.5" Retina 4K Display (2017) Adhesive Strips Replacement: 手順 15、 2の画像 1 iMac Intel 21.5" Retina 4K Display (2017) Adhesive Strips Replacement: 手順 15、 2の画像 2
    • At this point it's a good idea to test your repair, in order to make sure your iMac works properly before you seal it back up. Follow the next three steps to temporarily reconnect the display cables and boot up your iMac prior to pulling the protective film off the adhesive strips.

    • If you've already verified that your iMac is working correctly and are ready to seal it up, skip to Step 17.

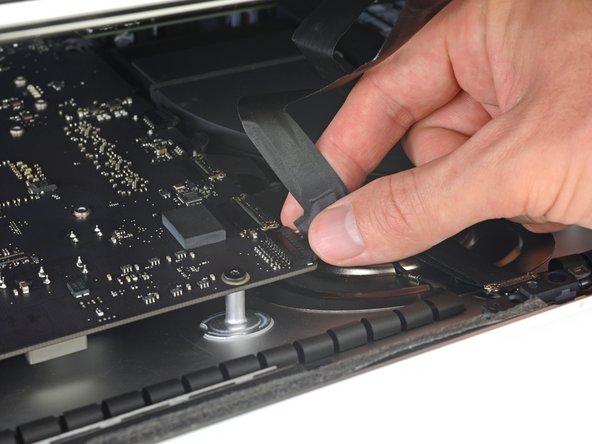
    • Insert the display power cable into its socket on the logic board.

  16. iMac Intel 21.5" Retina 4K Display (2017) Adhesive Strips Replacement: 手順 16、 3の画像 1 iMac Intel 21.5" Retina 4K Display (2017) Adhesive Strips Replacement: 手順 16、 3の画像 2 iMac Intel 21.5" Retina 4K Display (2017) Adhesive Strips Replacement: 手順 16、 3の画像 3
    • Use a pair of tweezers or your other hand to gently insert the display data cable connector into its socket on the logic board.

    • Be sure to press it straight into the socket, and insert it completely.

    • Secure the metal retaining bracket on the display data cable downwards towards the logic board.

  17. iMac Intel 21.5" Retina 4K Display (2017) Adhesive Strips Replacement: 手順 17、 2の画像 1 iMac Intel 21.5" Retina 4K Display (2017) Adhesive Strips Replacement: 手順 17、 2の画像 2
    • Set the display back on the iMac's rear enclosure.

    • At this time, plug in your iMac, power it on, and test your repair before moving on to actually sealing up the computer. Be sure to check for full functionality of any hardware you removed or disconnected.

    • When you are finished, shut the iMac down and unplug the power cord before you continue.

  18. iMac Intel 21.5" Retina 4K Display (2017) Adhesive Strips Replacement: 手順 18、 3の画像 1 iMac Intel 21.5" Retina 4K Display (2017) Adhesive Strips Replacement: 手順 18、 3の画像 2 iMac Intel 21.5" Retina 4K Display (2017) Adhesive Strips Replacement: 手順 18、 3の画像 3
    • Verify that your iMac is turned off and unplugged from power before you continue.

    • After confirming that your iMac functions properly, disconnect the display cables and carefully lean the display forward.

    • Remove the film from the 4R strip by reaching in from above and pulling the tab straight up from the bottom edge of the display.

  19. iMac Intel 21.5" Retina 4K Display (2017) Adhesive Strips Replacement: 手順 19、 1の画像 1
    • Repeat the previous step for the 4L strip.

  20. iMac Intel 21.5" Retina 4K Display (2017) Adhesive Strips Replacement: 手順 20、 3の画像 1 iMac Intel 21.5" Retina 4K Display (2017) Adhesive Strips Replacement: 手順 20、 3の画像 2 iMac Intel 21.5" Retina 4K Display (2017) Adhesive Strips Replacement: 手順 20、 3の画像 3
    • Reconnect the display power and data cables for the final time.

    • Remember to secure the metal retaining bracket on the display data cable.

  21. iMac Intel 21.5" Retina 4K Display (2017) Adhesive Strips Replacement: 手順 21、 3の画像 1 iMac Intel 21.5" Retina 4K Display (2017) Adhesive Strips Replacement: 手順 21、 3の画像 2 iMac Intel 21.5" Retina 4K Display (2017) Adhesive Strips Replacement: 手順 21、 3の画像 3
    • Check the glass directly in front of the webcam for dust and other contaminants. If necessary, wipe it down with a microfiber cloth before you seal up the display.

    • Steady the display with one hand as you remove the adhesive liners in the following steps, or rest it lightly against the iMac's enclosure.

  22. iMac Intel 21.5" Retina 4K Display (2017) Adhesive Strips Replacement: 手順 22、 3の画像 1 iMac Intel 21.5" Retina 4K Display (2017) Adhesive Strips Replacement: 手順 22、 3の画像 2 iMac Intel 21.5" Retina 4K Display (2017) Adhesive Strips Replacement: 手順 22、 3の画像 3
    • Remove the protective film from Strip 1 by pulling its tab straight up.

  23. iMac Intel 21.5" Retina 4K Display (2017) Adhesive Strips Replacement: 手順 23、 2の画像 1 iMac Intel 21.5" Retina 4K Display (2017) Adhesive Strips Replacement: 手順 23、 2の画像 2
    • Likewise, remove the protective film from the strip that was paired with Strip 1.

  24. iMac Intel 21.5" Retina 4K Display (2017) Adhesive Strips Replacement: 手順 24、 1の画像 1
    • Repeat the previous two steps to remove the protective film from all the remaining adhesive strip pairs (labeled 2, 3, and 5).

  25. iMac Intel 21.5" Retina 4K Display (2017) Adhesive Strips Replacement: 手順 25、 3の画像 1 iMac Intel 21.5" Retina 4K Display (2017) Adhesive Strips Replacement: 手順 25、 3の画像 2 iMac Intel 21.5" Retina 4K Display (2017) Adhesive Strips Replacement: 手順 25、 3の画像 3
    • Remove the tape securing the display to the rear enclosure.

    • To ensure a strong bond, carefully tip the iMac flat on its back (with the screen facing straight up) and press carefully but firmly around all four edges of the display.

ゴール

45 の人々がこのガイドを完成させました。

作成者

7人の作成者と共同で作成されました。

Adam O'Camb

メンバー登録日: 04/11/15

196,293 ポイント

416のガイドは作成済み

10 件のコメント

Merci pour l’indication du micro en bas…..

Picard - 返信

Sorry ifixit but you made a big mistake! if you install the stripes like you the microphone quality will be very bad because the mic must be covered AROUND the holes. otherwise the mic is not shield from the inside and your voice is bad!

Simon - 返信

HI,

How did you solve it?

Rafael -

I have spotlights bleeding from the bottom of the screen after opening. Could this be a tape issue on the screen itself?

Adam Dziuba - 返信

Correction it’s a stage light issue for the post above. Any recs?

Adam Dziuba - 返信

コメントを追加

統計データ:

過去 24時間: 9

過去 7 日: 52

過去 30 日: 264

今までの合計 25,386