はじめに
ハードドライブを交換するにはこのガイドを参照してください。
必要な工具と部品
-
-
iFixitの梱包用ボックスを使ってウェッジ用サポートを作ることができます。こちらから組み立てガイドを参照してください。
-
iMacの作業を始める前に、コンピューターの電源を外して電源のキャパシタを放電するため約10秒間電源を押し続けてください。
-
-
-
ディスプレイの左側の電源付近から、iMac開口ツールをガラスパネルと背面エンクロージャーの間に差し込みます。
Don’t get too worried about starting exactly where the picture says. The glue is stronger in some parts so just start wherever is easier and then work slowly and patiently around in the direction shown.
As this guide doesn’t cover replacing the adhesive strips, I found referring to the following was useful (noting that it’s not for the same model of iMac, so the modification they mention wasn’t necessary): iMac Intel 21.5インチ EMC 2544の接着ストリップの交換
Alan Digby - 返信
This part of the exercise should be done with extreme patience. I took my sweet time with the opening tool, rolling it through the entire panel and enclosure gap over and over again, until I was very sure no parts were sticking together anymore. And when I thought I was I done, I decided to do it over again.
You can "warm up" the adhesive before try to cut it with the tool using a hair dryer. Heat the edges for about a minute, keep moving it so you don't cause stress in the glass. Also the above note.. use the tool and then the cards. Do not use a guitar pick or other objects as the thickness will cause you to break the front glass, which is a bonded part of the display (expensive).
Merci pour ce conseil
-
-
-
ピザカッターのようにツールを使いますー隙間に沿ってスライスしながら、フォーム製接着剤を切り込んでください。
-
ツールをディスプレイの左側に沿って下側から上部に向けてスライスします。
If re-opening a screen that was opened and re-attached using iFixit’s adhesive strips, I would strongly recommend heating it first with an iOpener, heat gun or hair dryer. 20 minutes after attaching with the iFixit adhesive I tried to open it again with the pizza slicer to fix something and cracked the screen on the left-hand side.
-
-
-
ディスプレイ上部に沿って開口ツールをスライスします。
In this step can I cut along the display without make any damage to the front camera?
Hi! Actually - there is no need to cut the tape around the camera area - there is no tape to cut at all! And so, the way go is easy - just pass 10 mm to the left and to the right from camera and start cutting!
P.S. Just did the whole procedure to replace a RAM and to add SSD on PSIe an hour ago! Seems to be different reading the instructions... you know - 2/10 and so on. But it's really not that hard, trust me. I'll give it 5/10.
P.P.S. By the way there is one trick to pass the difficult steps. Any action which requires pulling smth (motherboard, speaker, power supply unit) from the narrow crack (or should i say - slit?) at the bottom of your Imac is really not so easy.
And the trick is to first remove a thin metal stripe with some kind of insulation on it which held by 5 small (very small!!) screws at the bottom of your Imac. After you done it - it's easy to pull everything! Pay attention to the fact that one of this 5 screws at the center are more shortly than others.
If you're changing cracked EMC 2638 display to new assembly, there's two more steps:
Step 24: Use the tip of a spudger to flip up the metal retaining bracket on the display data cable.
Carefully pull the display data cable from its socket on the display assembly.
Step 25: Use the tip of a spudger to unplug bracket of the thermal sensor small cable near display data cable.
Carefully remove scotch tape covering thermal sensor. Using iSesamo or flat tip of the spudger carefully peel the thermal sensor away.
omg - forgot to switch the termal sensor from the old display...
now fan runs like crazy...
-
-
-
ディスプレイ右側の下部まで開口ツールをスライドさせて、ここで作業を終えます。
Yes, do it many times to loosen the adhesive.
Would be good data to show the 3 areas (wifi antennas where the "tape" is larger and covers them. The rest of the "tape" is 1.4" and easy. Also after removing the display, be sure to remove the old "tape" from both the display and the rubber parts of the case. Use the spudger to start an end and it should pull off easily. Careful on the baackside of the display as you can scratch off the black paint/covering.
-
-
-
iMac右側の上部から、ディスプレイとフレームの間にプラスチックカードを差し込みます。
this step is extremely important NOT to stick in the cards too far….. doing so, you risk a 600 euro replacement as I experienced………
I drew a 3/8” line on my cards with a marker first.
Max Romano - 返信
I’m reading this on the EU store, please change all measurements to cm/mm.
@ifixit The next batch of cards you create should have a line printed on the card 3/8” in from the edges. Would make a nice reference.
Better to remove stand wedge at this point? Can’t see from pics
-
-
-
-
ディスプレイとフレームの間に隙間を作るように、丁寧にプラスチックを外側に向けてひねります。
-
ディスプレイのガラスに圧力がかからないように注意しながら、ゆっくりと動かします。約6mm程度の隙間ができれば十分です。
This part must be done very carefully or you can damage the flat cable from display, despite it was under a iron cover.
-
-
-
残りの接着剤を乖離させながら、iMacの上部右側コーナーからディスプレイ中央に向けてプラスチックカードをスライドします。
-
-
-
ピンセットを使ってディスプレイデータケーブル上のメタル製固定ブラケットを掴んで持ち上げます。
-
丁寧に基板上のソケットからディスプレイデータケーブルを引っ張ります。
Does anyone know where to find a replacement display cable for the 2014?
PN: 923-00047
PBMedic is out of stock
-
-
-
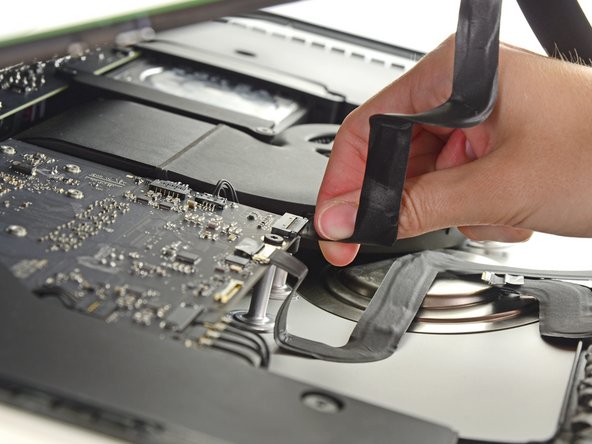
下端ディスプレイの接着ストリップ片側の端にある小さなタブをつかみ、接着剤をiMacの上部に引き寄せて剥がします。
-
この手順をもう一方の接着ストリップにも同じ作業を繰り返して、取り除きます。
Anyone else notice this iMac is different than the one in Step 20. The cables are in different places. I just saw one on YT like this, in a different country.
-
-
-
リア筐体にハードドライブブラケットを固定している次のネジを外します。
-
左側ハードドライブブラケットから21 mm T10トルクスネジー2本
-
9 mm T10トルクスネジー1本
-
27 mm T10 トルクスネジー1本
Pay attention to this photo and where the fan is. It is 180° from where the previous step shows it is oriented to you.
Max Romano - 返信
-
-
-
ロジックボードに最も近い端からハードドライブを持ち上げ、わずかに引き出します。
During the reassembly process I found it very difficult to plug the power/data cable on to the new hard drive. On my machine it’s very short and the fact that the cable comes into the plug from below at 90 degrees means it’s hard to keep straight on to the drive. I found this process could be made much easier by undoing 2 x T10 screws and CAREFULLY (there are cables attached) moving the adjacent speaker assembly a little away from the drive, reattaching once done. Hope this helps
Moving the speaker helped tremendously! Thanks
lucas -
-
-
-
iMacからハードドライブを取り出します。
I found that there is one more torx screw underneath the hdd when you take it out. If you remove this it seems to be easier to reattach the SATA cable to the new drive.
-
-
-
続けてハードドライブに留められた接着剤をハードドライブのスリーブから剥がします。
-
ハードドライブからスリーブを取り出します。
-
ハードドライブのみが残ります。
Followed the instructions in this guide using the included tool that I got with the strips. Everything worked great. Put in a brand new Samsung 850 Evo 250GB Drive. The guide makes it sound a little bit more complicated but everything went pretty smooth. Just took it slow and easy.
About torx is this good or what should I buy? https://www.amazon.it/gp/product/B00CIIM...=oh_aui_search_detailpage?ie=UTF8&psc=1
If replacing with an SSD, do you just use a mount? (I’ve don't this replacement in 27” models and the hard drive doesn’t have a silicone casing so I’m wondering how to get around this)
Great guide. I wanted to upgrade my late 2012 as much as I could to accommodate my large iTunes library. So with a little bit of cutting on the rubber hard drive cushion, I put a 15mm 5 TB hard drive and replaced the 120GB blade SSD with OWC’s 1 TB blade SSD. Now have 5.95 TB of fast usable space with my fusion drive.
No temperature sensor issues on this? I know the 27” needs a temperature sensor adapter.
I couldn’t get the SATA cable connected again with the rubber sleeve on. Luckily my iMac had it in two separate pieces to stick to the long sides only, so I plugged it in first and carefully attached the bumpers after.
Max Romano - 返信
What’s the trick to connect the SATA cable to the disk?? There’s very little play in the connector. Am unable to position it properly to get a connection. Maybe my fingers are too large.
Also, the photos are a bit misleading with regard to disconnecting the data display cable - show tweezers pulling on the distal end of the cable, which, is very fragile. Pictures should be improved and better description of that step added.
Success! For those contemplating this, it takes some persistence and a perfect diagonal positioning of the SATA cable connector to attach the hard drive. Geez - Apple always seems to make things so easy for us average joes and janes.
I was very impressed with the instructions above, took my time and was patient all through. I had to spend some time in the installation of the OS, care is required and attention to restoring a good backup is necessary. I had great success and would recommend undertaking this task. Many thanks IFIXIT.
Successfully replaced harddrive when original crashed in Big Sur upgrade. Excellent instructions.
The IFIXIT kit I bought included a SATA case, which I used to pull the data off the old hard drive which was on its last legs. Thank you, IFIXIT!
This was my first attempt at opening an iMac for anything but RAM upgrade (when it was possible easily on older iMacs). I too took it easy and slow. Replacing the hard drive was the easiest part of all this! The hardest part, which I'm still struggling with, was unplugging and replugging the display data and power cables. I was able to install an OS on the new SSD but in order to close the machine I had to unplug the display cables, and it seems that one of them did not seat properly, since the computer starts up but the display is black. Sigh. I will have to do the cutting and pasting of the glue strips all over again. Apple really doesn't want us doing these repairs.
-


デバイスを再組み立てするには、これらのガイドを逆の順番に従って作業を進めてください。ディスプレイガラスを再装着するには、 接着ストリップの装着ガイドを参照してください。
デバイスを再組み立てするには、これらのガイドを逆の順番に従って作業を進めてください。ディスプレイガラスを再装着するには、 接着ストリップの装着ガイドを参照してください。
70 の人々がこのガイドを完成させました。
以下の翻訳者の皆さんにお礼を申し上げます:
100%

Midori Doiさんは世界中で修理する私たちを助けてくれています! あなたも貢献してみませんか?
翻訳を始める ›

19 件のコメント
is there a solution about the termal sensor and the kernel_task issue?
I’ve run into the same thing: fans are running constantly with a new 1 TB 2.5” drive that I pulled from a 2012 iMac. I can use MacsFanControl as a 3rd party fix, but if anyone has a better (command line?) solution, I would be grateful!
SSD Fan Control is doing the job perfectly !
Thank you for posting this. Awesome! I am an IT Admin at a school and have Techie Students that help with the smaller things. One of the iMacs went bad. I had him follow this guide and he was able to replace the hard drive successfully!! Thank you!
What do you have to do with the temp sensor to make the fans behave normally after installing a SSD in an originally hard drive based iMac?
Install the SSD into the HD bay and download the SSD Fan Control application to avoid fan noise (easier, but less legitimate)
Install the SSD into the HD bay with the OWC thermal sensor (Extremely difficult, considerably more expensive, but works properly). Link for thermal sensor: https://eshop.macsales.com/item/OWC/DIDI.... Link for SSD Fan Control: http://exirion.net/ssdfanctrl/
Also this link: https://eshop.macsales.com/item/OWC/DIDI.... and this: https://eshop.macsales.com/item/OWC/DIDI...
You should have installed the OWC inline thermal sensor.
MacFans is the only other solution.
This guide is for the Mid-2014 21.5” 2808 machine, which does not have any thermal sensor on the STANDARD 2.5’” HDD. I just completed mine, and it’s totally silent, no fan issues as I’m typing this. I suggest some of the peeps above are posting in the wrong guide, and may have 27” machines with 3.5” HDD with the thermal sensor issue. A great guide, well written and illustrated, excellent 10/10.
Exactly. I just replaced my HD with an SSD and absolutely no fan noice.
Also a 21.5” imac a1418 emc 2805.
Pretty straight forward repair.
I’ve just replaced the internal HDD by a Samsung 850 Pro SSD 256 GB. There is no need for any special cable, thermal sensor or additional software, the SSD runs fine. Model is a Mid 2014 iMac 21.5”, EMC 2805, 1.4 GHz i5, no Fusion Drive.
kriechel -
Outstanding kit by iFixit for replacing the HHD.
Great guide, I followed it step by step and had no problem but one: when reinserting the cable into the new SSD, I had no room for my fingers. I had to loose the black plastic cover to the left in order to have a bit more room and succeeded.
Then, I added an extra check before sealing the screen, powering on the Mac just to be sure I reconnected correctly the screen cables.
Now the Mac is super fast!
Aran Banjo - 返信
Thanks for the manual and the parts/tools to do this repair. It took me a lot more time than listed though :-)
Pour faciliter le décollage, après avoir passé la roulette, j'insére tout autour des bandes de plastique dur de 2cm de large découpées sans un classeur en plastique. Ceci évite que ca recolle et l'écran se lève sans difficulté
Ordysouris - 返信
The wedge is an extremely tight fit for this model. I was worried that the amount of force needed to use it as shown might damage the stand, so I used it with the long side down instead. It worked fine that way and didn’t need anywhere near as much force to insert.
roberttrevellyan - 返信
Here’s a good YouTube vid on upgrading the RAM: Can a Normal Person Upgrade the RAM in the 2017 21.5" iMac?
Dan - 返信
Here are a couple tips from me:
1) Expose the adhesive to extreme temperatures. I did this by transporting my iMac in my car, screen-down on a piece of cardboard on a cold February morning (in Chicago). When I went to pick up the iMac, the screen practically fell off the chassis. I would have been distraught by this if I hadn’t already planned this replacement. So it was a happy accident.
2) Remember to expell the residual power from the power supply by pushing the power button while the iMac is unplugged. This does NOT guarantee it’s safe to touch, but when I accidentally brushed the solder and exposed capacitors, I didn’t get shocked.
jerrid_foiles - 返信
Instead of using the wedge, I placed the iMac faced up with the top side (web cam) facing me while I ran the pizza roller around. It worked out great!
Sam Fung - 返信
“All iMacs also come with a traditional hard drive” mine doesn’t!! it’s HDD bay is completely empty, no SATA cable or anything. I guess I’ll have to upgrade the PCIe SSD instead.
Chris Hughes - 返信
There is no replacement glass for this model, it is part of the LCD and impossible to remove or replace- the entire LCD has to be replaced unfortunately if the glass is cracked or damaged. You will have to Google search for a replacement. Also be careful with some of the lock tight tork screws as I broke one of my screw mounts taking one out.
Phil Tesone - 返信
I used this service wedge but also found it a very tight fit. The same stabilization can be achieved by using a big rolled up towel.
Ernst - 返信
While this is a good instruction guide, I recommend to also look at OWC’s instruction video about drive installation, before starting the exercise. Those install videos are very detailed and useful.
Ernst - 返信
Main advice: TAKE YOUR TIME with the pizza roller.
Make several passes, until you really feel like there's no more sticker in the way. Stay away from the camera though (approx. 1inch / 2.5cm on both sides). This will reduce the work left with the plastic card. Adhesive is really on the edge of the screen so there is absolutely no need to go any further than the recommended 1cm / 3/8inch depth.
Where are the sensitive parts?
Facing your iMac, imagine you're looking at a watch. There are antennas on 1, 2 and 4 o'clock. Do not insert any metal piece there (nor anywhere else, btw). Other than that AND the screen cables underneath the camera, not much danger.
Froggy Manny - 返信