はじめに
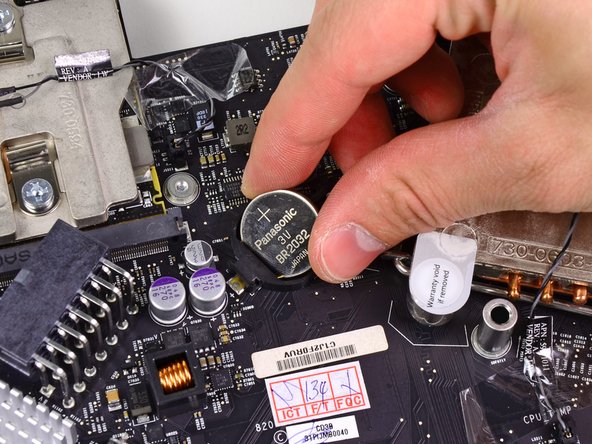
PRAMバッテリーの交換をするには、このガイドを参照してください。
必要な工具と部品
-
-
iMacのACコードを周辺機器と一緒に抜きます。
-
画像のように、iMacを柔らかく清潔な場所に裏返して置きます。
-
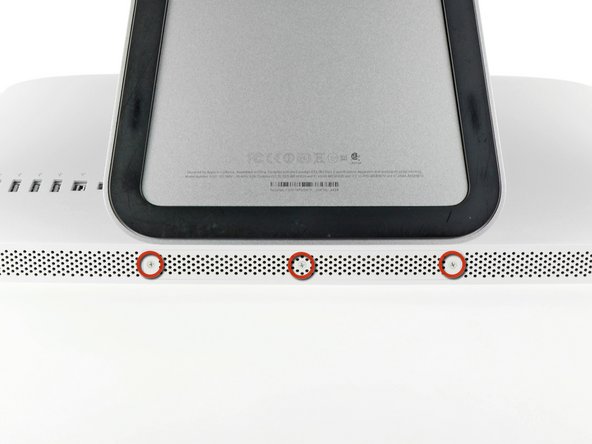
iMacの下側端とアクセスドアを固定している3本のプラスネジを緩めます。
-
アクセスドアを取り出します。
-
-
-
ガラスパネルの上部コーナーの2箇所に吸盤カップを取り付けます。
-
吸盤カップがうまく装着しない場合は、ガラスパネルと吸盤カップを中性洗剤などで綺麗に拭き取ってください。
-
-
-
-
この作業では、次のケーブルの接続を外します。
-
SDボードとマイク
-
左右のスピーカー
-
WiFiアンテナ
-
Bluetooth/環境光センサ/カメラ/左側温度センサ、ハードドライブ温度センサとハードドライブファン
-
CPIファン/環境温度と電源ボタン
-
IRセンサ
-


このデバイスを再組み立てするには、インストラクションを逆の順番に従って作業を進めてください。
このデバイスを再組み立てするには、インストラクションを逆の順番に従って作業を進めてください。
17 の人々がこのガイドを完成させました。
以下の翻訳者の皆さんにお礼を申し上げます:
100%

Midori Doiさんは世界中で修理する私たちを助けてくれています! あなたも貢献してみませんか?
翻訳を始める ›

12 件のコメント
I can’t believe Apple put the PRAM battery there! Prior iMac models had them very easily accessible just behind the LCD screen. I just did a SSD install for someone and was going to replace the battery while I was at it. Not going to take a chance of breaking something in the process.
amiller770 - 返信
Me either. It’s ridiculous. Insures business at the repair center.
Plus it looks like they didn’t even put any testing points on the front of the mainboard. You have to pull the whole mainboard out just to measure the voltage? How do Apple techs deal with a PRAM battery issue? There’s got to be a hidden point somewhere to put a multi-meter on.