メインコンテンツにスキップ

このバージョンは誤った内容を含んでいる可能性があります。最新の承認済みスナップショットに切り替えてください。

必要な工具と部品

  1. この手順は未翻訳です。 翻訳を手伝う。

    : 手順 1、 1の画像 1
    • Unplug all the cables from the computer, including the power cable. Lay the computer face-down, supporting the neck and base with a soft cloth under the screen.

  2. この手順は未翻訳です。 翻訳を手伝う。

    : 手順 2、 1の画像 1
    • Loosen the four Phillips #0 screws.

  3. この手順は未翻訳です。 翻訳を手伝う。

    : 手順 3、 1の画像 1
    • Carefully remove the base access panel.

  4. この手順は未翻訳です。 翻訳を手伝う。

    : 手順 4、 2の画像 1 : 手順 4、 2の画像 2
    • Remove the four 25mm T-15 screws.

  5. この手順は未翻訳です。 翻訳を手伝う。

    : 手順 5、 2の画像 1 : 手順 5、 2の画像 2
    • Open the housing plate.

    • Be gentle with the wires still connected to the logic board so as not to ruin the cables.

    • A fixed plug connector between the logic board and upper unit will cause some resistance. Pull gently but firmly.

  6. この手順は未翻訳です。 翻訳を手伝う。

    : 手順 6、 3の画像 1 : 手順 6、 3の画像 2 : 手順 6、 3の画像 3
    • Remove the 2 torx 10mm screws on the EMI shield

    • Carefully remove shield and copper tape

  7. この手順は未翻訳です。 翻訳を手伝う。

    : 手順 7、 2の画像 1 : 手順 7、 2の画像 2
    • Remove the 4 10mm torx screws attatched to the drive carrier.

    • The drive carrier includes optical drive and hard drive.

  8. この手順は未翻訳です。 翻訳を手伝う。

    : 手順 8、 1の画像 1
    • Grasp the carrier with both hands on each side.

    • Remove the carrier by lifting up and out.

    • Pull gently but firmly. The carrier is meant to fit snugly.

  9. この手順は未翻訳です。 翻訳を手伝う。

    : 手順 9、 1の画像 1
    • Flip the removed carrier to the right and pull out power cables.

  10. この手順は未翻訳です。 翻訳を手伝う。

    : 手順 10、 3の画像 1 : 手順 10、 3の画像 2 : 手順 10、 3の画像 3
    • Peel back the white paper, revealing the screws that connect the hard drive to the carrier.

    • Remove the 4 T-10 5mm screws connecting the hard drive and frame. (There are 2 screws on each side)

  11. この手順は未翻訳です。 翻訳を手伝う。

    : 手順 11、 1の画像 1
    • Slide the hard drive out from the frame and optical drive.

  12. この手順は未翻訳です。 翻訳を手伝う。

    : 手順 12、 1の画像 1
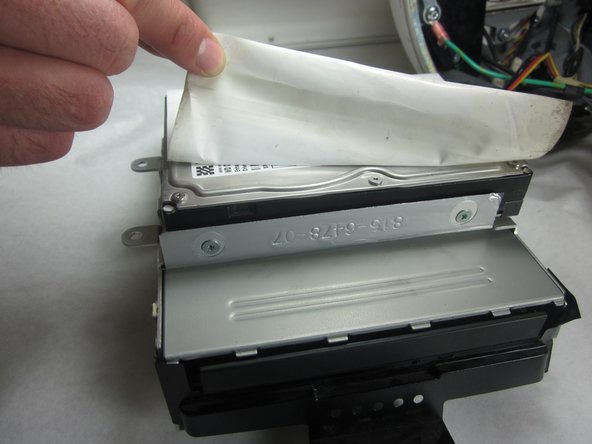
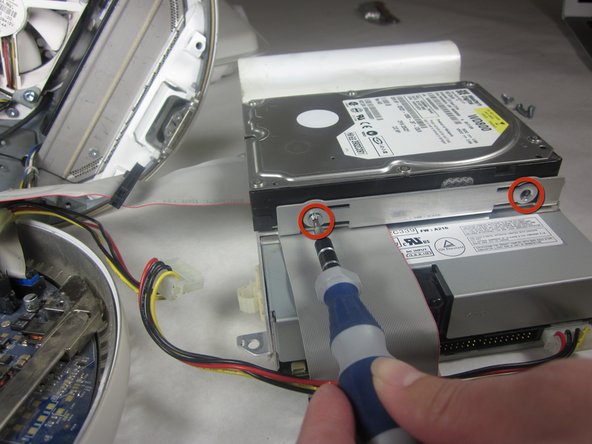
    • Before you reassemble the computer, double check that your new hard drive has the same jumper configuration as the old one. This ensures the IDE "Master-Slave" protocol isn't interrupted. Some systems do not require this, but if you are having issues booting up afterwards with the storage or the disc drive, this could be the source of the problem.

ゴール

26 の人々がこのガイドを完成させました。

作成者

4人の作成者と共同で作成されました。

Courtney

メンバー登録日: 10/06/11

1,076 ポイント

3のガイドは作成済み

チーム

Cal Poly, Team 21-22, Maness Fall 2011 Cal Poly, Team 21-22, Maness Fall 2011人のメンバー

CPSU-MANESS-F11S21G22

4 メンバー

13のガイドは作成済み

コメント 1 件

It is important to apply thermal paste to the heat pipe when re-joining the bottom and top of the case. Otherwise, the iMac will overheat.

dagent23 - 返信

コメントを追加

統計データ:

過去 24時間: 3

過去 7 日: 19

過去 30 日: 60

今までの合計 10,302