メインコンテンツにスキップ

このバージョンは誤った内容を含んでいる可能性があります。最新の承認済みスナップショットに切り替えてください。

必要な工具と部品

  1. この手順は未翻訳です。 翻訳を手伝う。

    : 手順 1、 1の画像 1
    • The iMac G3. This was a great computer for the time, and had plenty of features.

  2. この手順は未翻訳です。 翻訳を手伝う。

    : 手順 2、 1の画像 1
    • Start by flipping the iMac upside-down. It may help to lay it on a towel, so you don't damage the screen, or scratch the face.

  3. この手順は未翻訳です。 翻訳を手伝う。

    : 手順 3、 3の画像 1 : 手順 3、 3の画像 2 : 手順 3、 3の画像 3
    • Remove this Phillips screw.

    • Using a flathead screwdriver, work your way around the bottom cover, until it comes off.

    • Then, lift the bottom cover up and out, and set it aside.

  4. この手順は未翻訳です。 翻訳を手伝う。

    : 手順 4、 3の画像 1 : 手順 4、 3の画像 2 : 手順 4、 3の画像 3
    • Now, remove the DB-15 Video connector from the logic board.

    • It may be helpful to use a Phillips screwdriver to remove the thumbscrews.

  5. この手順は未翻訳です。 翻訳を手伝う。

    : 手順 5、 3の画像 1 : 手順 5、 3の画像 2 : 手順 5、 3の画像 3
    • Remove the power cable from the logic board assembly.

  6. この手順は未翻訳です。 翻訳を手伝う。

    : 手順 6、 2の画像 1 : 手順 6、 2の画像 2
    • Remove the front panel connector. (You may also need to remove an additional screw that connects the front panel connector to the logic board assembly).

  7. この手順は未翻訳です。 翻訳を手伝う。

    : 手順 7、 3の画像 1 : 手順 7、 3の画像 2 : 手順 7、 3の画像 3
    • Now, remove these Phillips screws.

    • Now, grab the logic board assembly by the piece of plastic, and lift it out.

  8. この手順は未翻訳です。 翻訳を手伝う。

    : 手順 8、 1の画像 1
    • The logic board assembly. This is the heart of the computer, it contains the motherboard, CPU, RAM, V-RAM, PRAM battery, the hard drive, and the optical drive.

  9. この手順は未翻訳です。 翻訳を手伝う。

    : 手順 9、 1の画像 1
    • Now, it's time to remove the RAM.

  10. この手順は未翻訳です。 翻訳を手伝う。

    : 手順 10、 3の画像 1 : 手順 10、 3の画像 2 : 手順 10、 3の画像 3
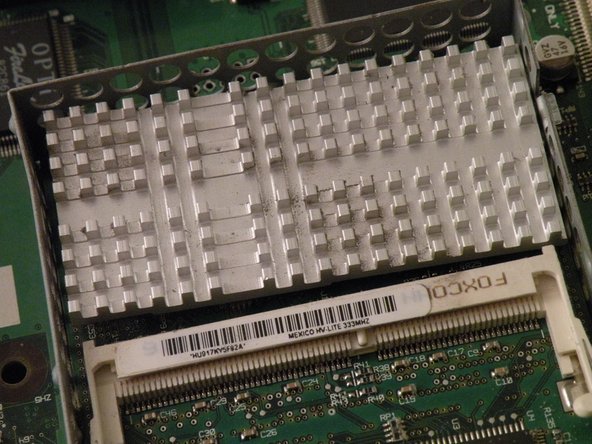
    • Remove the CPU shield, this will reveal the "top slot". This is the user-serviceable RAM slot, though there is a a second slot of RAM under the CPU card.

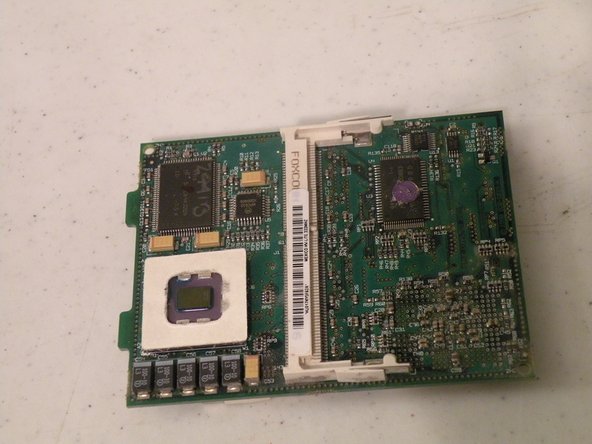
    • The iMac uses PC100 Laptop Ram, and according to Apple, it supports up to 256MB RAM (2X128MB) but unofficially. Some later models can support 512MB (2X256MB).

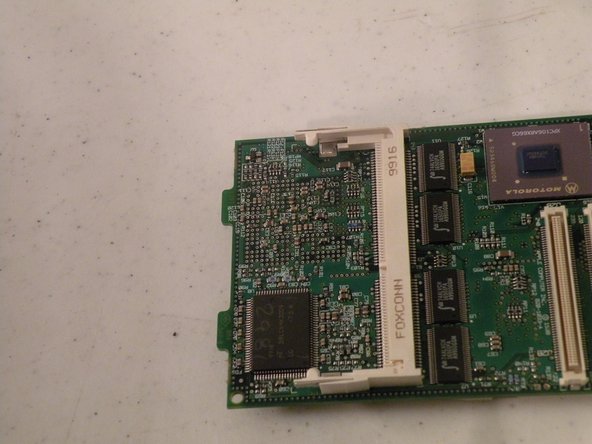
    • Push the tabs out, and the RAM should pop up, then pull the ram out.

  11. この手順は未翻訳です。 翻訳を手伝う。

    : 手順 11、 2の画像 1 : 手順 11、 2の画像 2
    • RAM (bottom slot).

    • Remove the CPU Heatsink.

    • Use a flathead screwdriver. Remove the heatsink clip, it will pop off, and may get lost if you don't keep track of it.

    • Remove the heatsink revealing the CPU, then lift the CPU card up, and it should come free with a little tug.

  12. この手順は未翻訳です。 翻訳を手伝う。

    : 手順 12、 3の画像 1 : 手順 12、 3の画像 2 : 手順 12、 3の画像 3
    • Removing the CPU Card:

    • Lift the card out by this end!

  13. この手順は未翻訳です。 翻訳を手伝う。

    : 手順 13、 3の画像 1 : 手順 13、 3の画像 2 : 手順 13、 3の画像 3
    • Now, flip the card over.

    • This will reveal another stick of laptop PC66.

    • This is most likely a 32MB Stick, because the iMac shipped standard with only 32MB of RAM.

    • Now, remove it by pushing the tabs, it should pop up, and you can set it aside.

  14. この手順は未翻訳です。 翻訳を手伝う。

    : 手順 14、 1の画像 1
    • The RAM.

    • The iMac supports two pieces of PC66 laptop RAM, though it can use PC100 and PC133 (laptop size of course).

ゴール

23 の人々がこのガイドを完成させました。

作成者

3人の作成者と共同で作成されました。

Chris Green

メンバー登録日: 10/11/09

37,014 ポイント

49のガイドは作成済み

チーム

Master Techs Master Techs人のメンバー

Community

321 メンバー

1,466のガイドは作成済み

0 件のコメント

コメントを追加

統計データ:

過去 24時間: 2

過去 7 日: 25

過去 30 日: 84

今までの合計 22,240