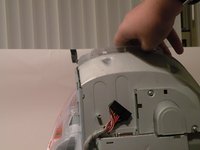
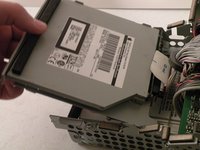
メインコンテンツにスキップ

iMac G3 Model M4984 Optical Drive Replacement

必要な工具と部品

  1. iMac G3 Model M4984 Optical Drive Replacement, Logic Board: 手順 1、 1の画像 1
    • The iMac G3. This was a great computer for the time, and had plenty of features.

  2. iMac G3 Model M4984 Optical Drive Replacement: 手順 2、 1の画像 1
    • Start by flipping the iMac upside-down. It may help to lay it on a towel, so you don't damage the screen, or scratch the face.

  3. iMac G3 Model M4984 Optical Drive Replacement: 手順 3、 3の画像 1 iMac G3 Model M4984 Optical Drive Replacement: 手順 3、 3の画像 2 iMac G3 Model M4984 Optical Drive Replacement: 手順 3、 3の画像 3
    • Remove this Phillips screw.

    • Using a flathead screwdriver, work your way around the bottom cover, until it comes off.

    • Then, lift the bottom cover up and out, and set it aside.

  4. iMac G3 Model M4984 Optical Drive Replacement: 手順 4、 3の画像 1 iMac G3 Model M4984 Optical Drive Replacement: 手順 4、 3の画像 2 iMac G3 Model M4984 Optical Drive Replacement: 手順 4、 3の画像 3
    • Now, remove the DB-15 Video connector from the logic board.

    • It may be helpful to use a Phillips screwdriver to remove the thumbscrews.

  5. iMac G3 Model M4984 Optical Drive Replacement: 手順 5、 3の画像 1 iMac G3 Model M4984 Optical Drive Replacement: 手順 5、 3の画像 2 iMac G3 Model M4984 Optical Drive Replacement: 手順 5、 3の画像 3
    • Remove the power cable from the logic board assembly.

  6. iMac G3 Model M4984 Optical Drive Replacement: 手順 6、 2の画像 1 iMac G3 Model M4984 Optical Drive Replacement: 手順 6、 2の画像 2
    • Remove the front panel connector. (You may also need to remove an additional screw that connects the front panel connector to the logic board assembly).

  7. iMac G3 Model M4984 Optical Drive Replacement: 手順 7、 3の画像 1 iMac G3 Model M4984 Optical Drive Replacement: 手順 7、 3の画像 2 iMac G3 Model M4984 Optical Drive Replacement: 手順 7、 3の画像 3
    • Now, remove these Phillips screws.

    • Now, grab the logic board assembly by the piece of plastic, and lift it out.

  8. iMac G3 Model M4984 Optical Drive Replacement: 手順 8、 1の画像 1
    • The logic board assembly. This is the heart of the computer, it contains the motherboard, CPU, RAM, V-RAM, PRAM battery, the hard drive, and the optical drive.

  9. iMac G3 Model M4984 Optical Drive Replacement, Optical Drive: 手順 9、 1の画像 1
    • Now to remove the optical drive!

  10. iMac G3 Model M4984 Optical Drive Replacement: 手順 10、 1の画像 1
    • The optical drive is located near the front of the assembly.

  11. iMac G3 Model M4984 Optical Drive Replacement: 手順 11、 3の画像 1 iMac G3 Model M4984 Optical Drive Replacement: 手順 11、 3の画像 2 iMac G3 Model M4984 Optical Drive Replacement: 手順 11、 3の画像 3
    • To remove the drive, push it in, lift up, and then pull forward.

    • As you pull the drive forward, disconnect the ribbon cable and set it aside.

  12. iMac G3 Model M4984 Optical Drive Replacement: 手順 12、 3の画像 1 iMac G3 Model M4984 Optical Drive Replacement: 手順 12、 3の画像 2 iMac G3 Model M4984 Optical Drive Replacement: 手順 12、 3の画像 3
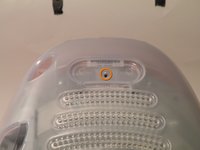
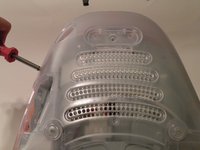
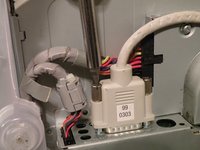
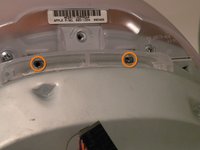
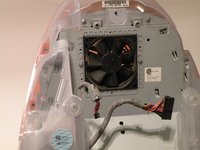
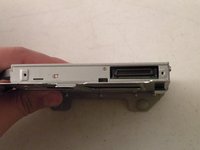
    • Remove the two phillips #00 screws.

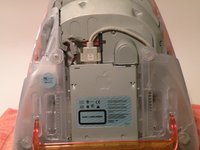
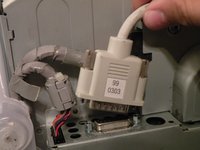
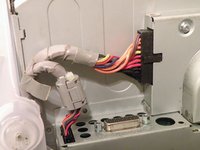
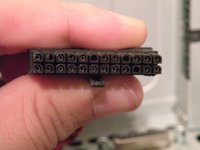
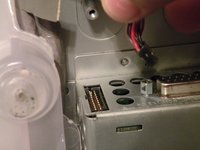
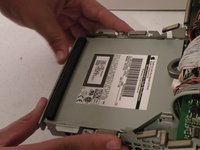
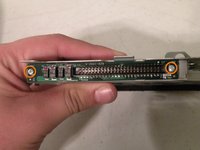
    • Then remove the board. This will reveal that it is a standard PATA drive.

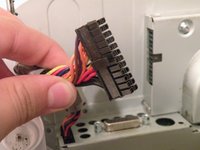
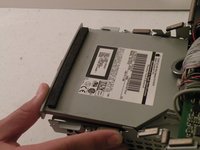
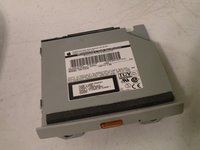
    • Congrats, the drive is free! You can use any PATA-tray loading drive in the iMac G3 which means you can install a CDRW to burn CDs in OS9 or X(if using OSX,install that DVD writer) but, of course only original drives will match the great look of the iMac).

終わりに

To reassemble your device, follow these instructions in reverse order.

14 の人々がこのガイドを完成させました。

作成者

4人の作成者と共同で作成されました。

Chris Green

メンバー登録日: 10/11/09

36,876 ポイント

49のガイドは作成済み

チーム

Master Techs Master Techs人のメンバー

Community

322 メンバー

2,506のガイドは作成済み

0 件のコメント

コメントを追加

統計データ:

過去 24時間: 3

過去 7 日: 31

過去 30 日: 119

今までの合計 16,395