メインコンテンツにスキップ

このバージョンは誤った内容を含んでいる可能性があります。最新の承認済みスナップショットに切り替えてください。

必要な工具と部品

  1. この手順は未翻訳です。 翻訳を手伝う。

    : 手順 1、 1の画像 1
    • Orient the iHome upside down with the speakers facing you.

  2. この手順は未翻訳です。 翻訳を手伝う。

    : 手順 2、 1の画像 1
    • Remove the two 9.5 mm Phillips #1 screws from the dock cover.

  3. この手順は未翻訳です。 翻訳を手伝う。

    : 手順 3、 3の画像 1 : 手順 3、 3の画像 2 : 手順 3、 3の画像 3
    • Remove the dock cover by grabbing its sides and pulling it up and away from the faceplate.

  4. この手順は未翻訳です。 翻訳を手伝う。

    : 手順 4、 1の画像 1
    • Orient the iHome upside down with the speakers facing away from you.

  5. この手順は未翻訳です。 翻訳を手伝う。

    : 手順 5、 2の画像 1 : 手順 5、 2の画像 2
    • Remove the four 9.5 mm Phillips #2 screws located on each of the four corners of the iHome's back cover.

  6. この手順は未翻訳です。 翻訳を手伝う。

    : 手順 6、 1の画像 1
    • Remove the back cover by grabbing its sides and lifting it off the iHome.

  7. この手順は未翻訳です。 翻訳を手伝う。

    : 手順 7、 1の画像 1
    • Rotate the iHome so that the speakers are facing you.

    • Disconnect the silver ribbon cable connected to the 30-pin connector (the middle one) by pulling it directly up.

  8. この手順は未翻訳です。 翻訳を手伝う。

    : 手順 8、 3の画像 1 : 手順 8、 3の画像 2 : 手順 8、 3の画像 3
    • Rotate the iHome so that the speakers are once again facing away from you and the motherboard is still exposed.

    • Unplug the wide red/white/black wire bundle from the lower right-hand corner of the motherboard by pulling it out of their connection.

  9. この手順は未翻訳です。 翻訳を手伝う。

    : 手順 9、 3の画像 1 : 手順 9、 3の画像 2 : 手順 9、 3の画像 3
    • Rotate the iHome iP1 so that the speakers are now facing you.

    • Remove both of the speaker covers by pulling them off of the faceplate.

  10. この手順は未翻訳です。 翻訳を手伝う。

    : 手順 10、 1の画像 1
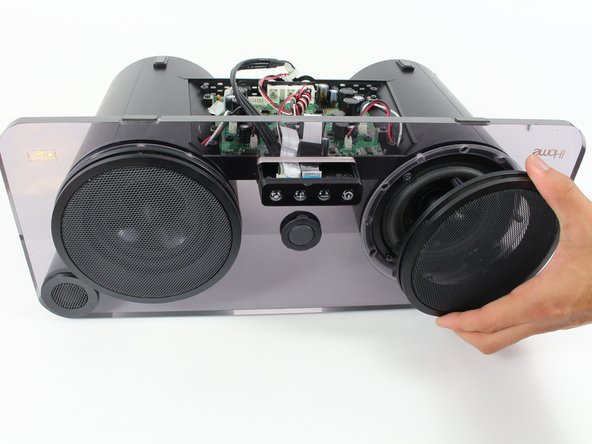
    • Unscrew the twelve 14.5 mm Phillips #2 screws holding the faceplate to the speaker housing. (There are six screws connecting the faceplate to each speaker.)

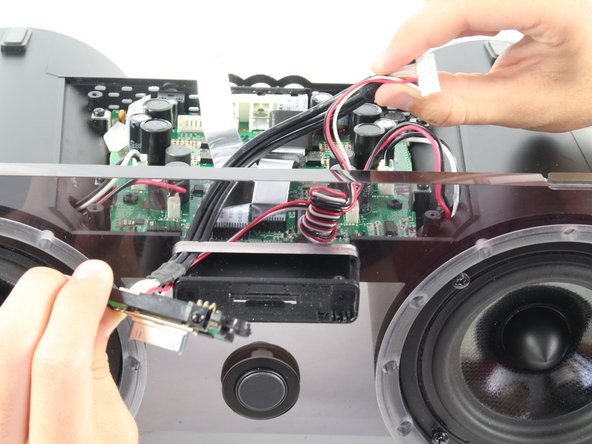
    • Completing this step will loosen the faceplate enough to pull the bundle of cables attached to the 30-pin connector through a hole in the faceplate, allowing the 30-pin connector to be removed from the iHome.

  11. この手順は未翻訳です。 翻訳を手伝う。

    : 手順 11、 3の画像 1 : 手順 11、 3の画像 2 : 手順 11、 3の画像 3
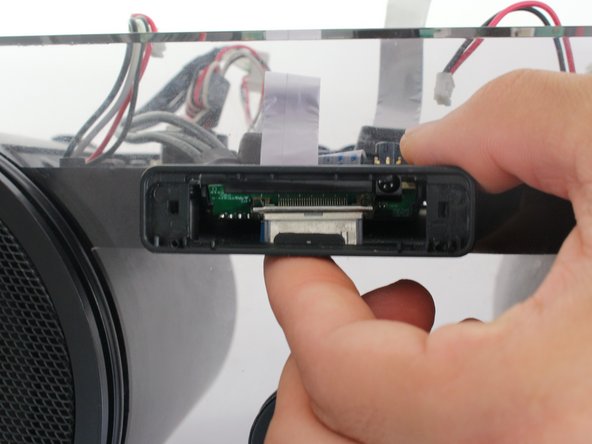
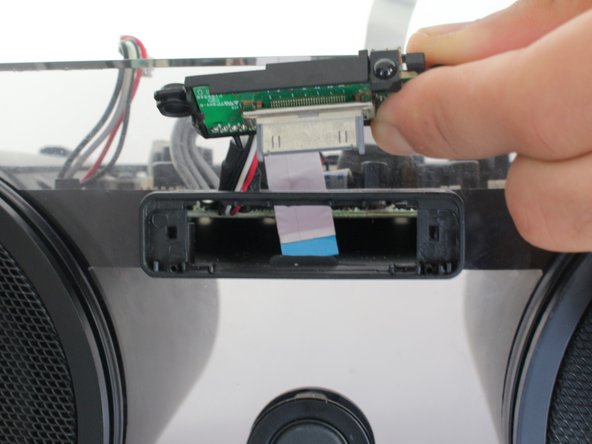
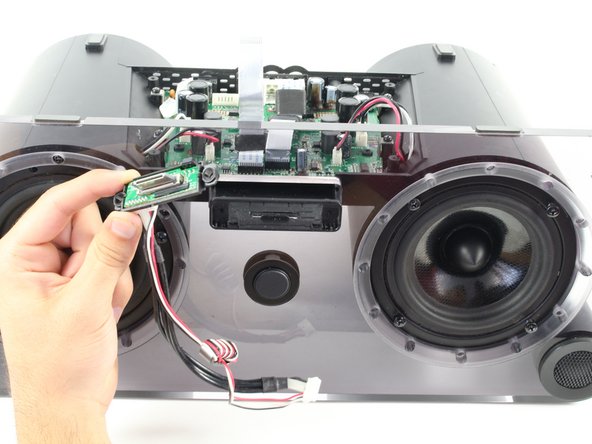
    • Detach the 30-pin connector from the dock housing by pushing it through the slot which it sticks out of.

    • Sometimes the 30-pin connector can get stuck in the dock housing, making it difficult to push through. To prevent this, push each side of the 30-pin connector evenly. This step can be accomplished without the use of any additional tools.

    • The command buttons have been shown as removed to show how to detach the 30-pin connector. However, it is not necessary to remove the command buttons in order to remove the 30-pin connector.

  12. この手順は未翻訳です。 翻訳を手伝う。

    : 手順 12、 3の画像 1 : 手順 12、 3の画像 2 : 手順 12、 3の画像 3
    • Remove the 30-pin connector from the iHome by pulling the bundle of cables attached to it through the center hole in the faceplate.

    • You may have to wiggle the faceplate to be able to pull the bundle of cables through its center hole.

ゴール

ある他の人がこのガイドを完成しました。

作成者

4人の作成者と共同で作成されました。

Wen Sullivan

メンバー登録日: 10/06/16

518 ポイント

4のガイドは作成済み

チーム

Cal Poly, Team 20-1, Livingston Fall 2016 Cal Poly, Team 20-1, Livingston Fall 2016人のメンバー

CPSU-LIVINGSTON-F16S20G1

4 メンバー

7のガイドは作成済み

4 件のコメント

Where can you buy a new pin connector?

shoreman19 - 返信

Where can I buy a new pin connector?

shoreman19 - 返信

Where can you buy a new pin connector?

Edward Voermans - 返信

where can i buy new Board

Riyu PC - 返信

コメントを追加

統計データ:

過去 24時間: 2

過去 7 日: 3

過去 30 日: 20

今までの合計 2,482