メインコンテンツにスキップ

iHome iBT84 Light Fixture Replacement

必要な工具と部品

  1. iHome iBT84 Light Fixture Replacement, Motherboard: 手順 1、 2の画像 1 iHome iBT84 Light Fixture Replacement, Motherboard: 手順 1、 2の画像 2
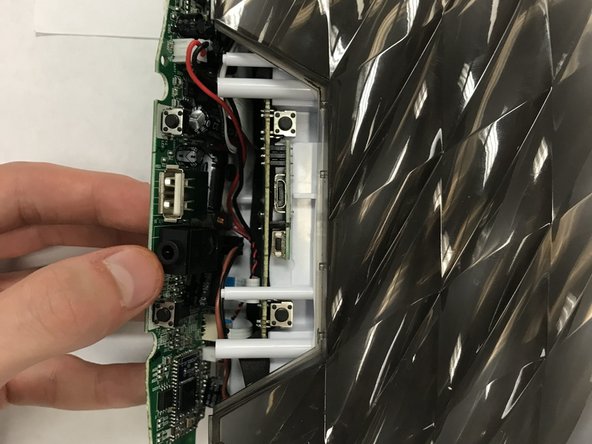
    • On the opposite side of the speaker should be a sticker, remove it with your fingers or the flat plastic iFIxit tool.

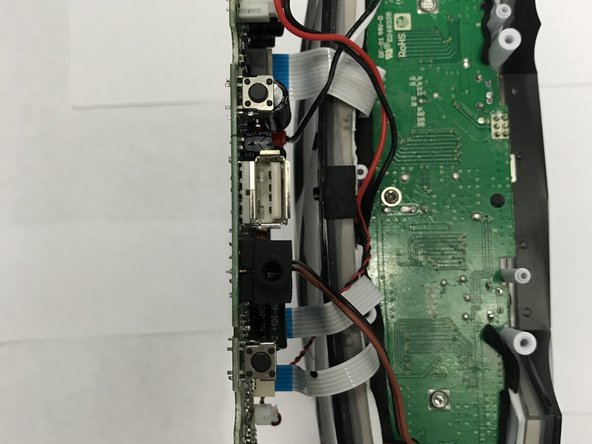
    • Use a Philip's screwdriver to take the screws out of the cover.

  2. iHome iBT84 Light Fixture Replacement: 手順 2、 2の画像 1 iHome iBT84 Light Fixture Replacement: 手順 2、 2の画像 2
    • Once the screws are all out, the cover should come off revealing the motherboard.

  3. iHome iBT84 Light Fixture Replacement: 手順 3、 3の画像 1 iHome iBT84 Light Fixture Replacement: 手順 3、 3の画像 2 iHome iBT84 Light Fixture Replacement: 手順 3、 3の画像 3
    • You will notice that the triangular black volume piece is loose, make sure to take that off revealing the buttons.

    • Once that is done, the motherboard can be taken out. May require some wiggling.

    • Make sure none of the wires are damaged and that they are all connected.

  4. iHome iBT84 Light Fixture Replacement: 手順 4、 1の画像 1
    • The connections shown here can be taken off by pulling on the white plastic connector piece.

    • The same can be said about the white, paper like, connectors. Pull on them gently.

    • Once all connections are apart, the motherboard is safe to be replaced.

  5. iHome iBT84 Light Fixture Replacement, Light Fixture: 手順 5、 1の画像 1
    • Use the screwdriver to unscrew the screws on the left and right sides.

  6. iHome iBT84 Light Fixture Replacement: 手順 6、 1の画像 1
    • Once unscrewed, use the metal spudge to lift the base of the light fixture.

  7. iHome iBT84 Light Fixture Replacement: 手順 7、 2の画像 1 iHome iBT84 Light Fixture Replacement: 手順 7、 2の画像 2
    • Lift the base of the light fixture out with the lights.

    • Be careful. The light fixture's can be easily bent.

  8. iHome iBT84 Light Fixture Replacement: 手順 8、 2の画像 1 iHome iBT84 Light Fixture Replacement: 手順 8、 2の画像 2
    • Pull gently on the individual light fixture that needs to be replaced.

    • Place new individual LED light strip.

終わりに

To reassemble your device, follow these instructions in reverse order.

作成者

3人の作成者と共同で作成されました。

Joshua Lopez

メンバー登録日: 09/25/17

101 ポイント

1ガイドが承認済み

チーム

University of North Texas, Team S1-G3, Thompson Fall 2017 University of North Texas, Team S1-G3, Thompson Fall 2017人のメンバー

UNT-THOMPSON-F17S1G3

4 メンバー

2のガイドは作成済み

0 件のコメント

コメントを追加

統計データ:

過去 24時間: 0

過去 7 日: 0

過去 30 日: 2

今までの合計 569