メインコンテンツにスキップ

iHome iBN97 Display Screen Replacement

必要な工具と部品

  1. iHome iBN97 Display Screen Replacement, Bottom Plate Screws: 手順 1、 3の画像 1 iHome iBN97 Display Screen Replacement, Bottom Plate Screws: 手順 1、 3の画像 2 iHome iBN97 Display Screen Replacement, Bottom Plate Screws: 手順 1、 3の画像 3
    • This disassembly involves the removal of many components and screws. Be sure to remember which screws go where, and not to lose any parts.

    • All the screws are size 2 except for the ones in Step 9.

    • Flip the iHome upside down.

    • You should see six pocketed Phillip's head screws.

    • You should also see 2 visible Phillip head screws.

    • Using a long neck Phillips head screwdriver, remove the screws.

    • The long neck screwdriver is only necessary for this step. If it works well in the following steps, that is fine; just be sure to use the right tool for the right job.

  2. iHome iBN97 Display Screen Replacement, Bottom Plate Removal: 手順 2、 3の画像 1 iHome iBN97 Display Screen Replacement, Bottom Plate Removal: 手順 2、 3の画像 2 iHome iBN97 Display Screen Replacement, Bottom Plate Removal: 手順 2、 3の画像 3
    • Slightly lift the front end with the support.

    • Insert the flat end of the spudger and slide it along the edge.

    • The case should pop out easily. Remove the piece by lifting it straight out.

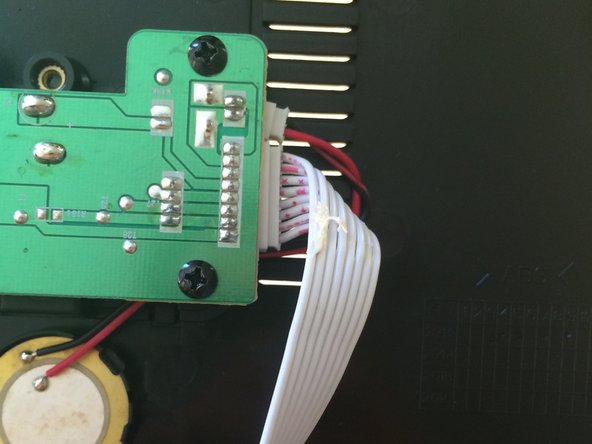
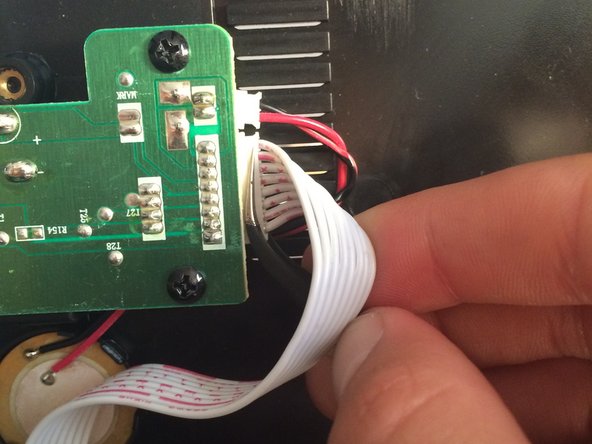
  3. iHome iBN97 Display Screen Replacement, Backup Battery Disconnection: 手順 3、 3の画像 1 iHome iBN97 Display Screen Replacement, Backup Battery Disconnection: 手順 3、 3の画像 2 iHome iBN97 Display Screen Replacement, Backup Battery Disconnection: 手順 3、 3の画像 3
    • Using a pair of tweezers, remove the ribbon cable connector at the backup battery.

    • Be sure not to tug on the cables themselves. This could result in damaging the cables.

    • If tweezers are too difficult to use, it is ok to use your fingers, just so long as you don't put a lot of tension on the cables.

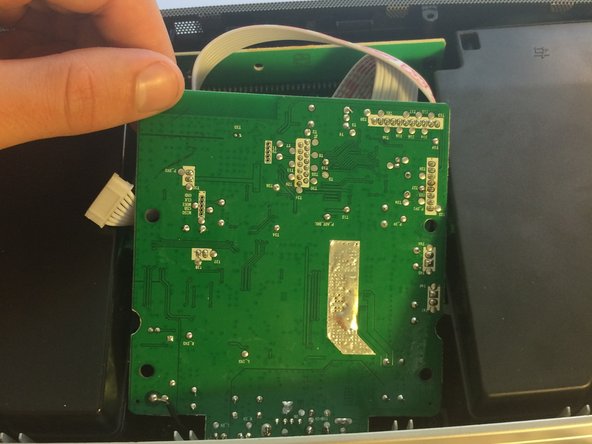
  4. iHome iBN97 Display Screen Replacement, Logic Board Removal: 手順 4、 2の画像 1 iHome iBN97 Display Screen Replacement, Logic Board Removal: 手順 4、 2の画像 2
    • Remove the 4 screws located on the logic board.

    • Gently lift the front side of the board towards you

    • Careful not to pull it out forcefully, there are still many cables attached to the logic board.

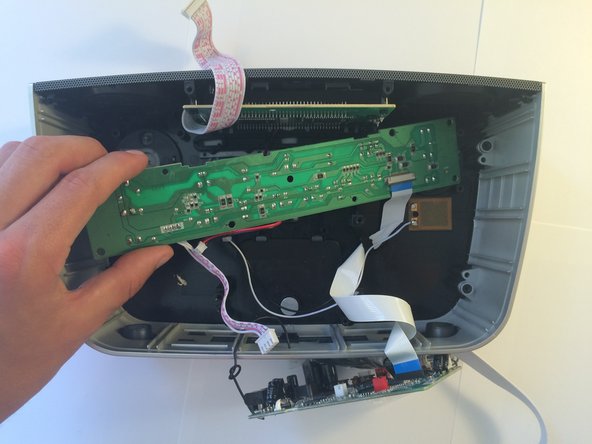
  5. iHome iBN97 Display Screen Replacement, Logic Board Connections Removal: 手順 5、 2の画像 1 iHome iBN97 Display Screen Replacement, Logic Board Connections Removal: 手順 5、 2の画像 2
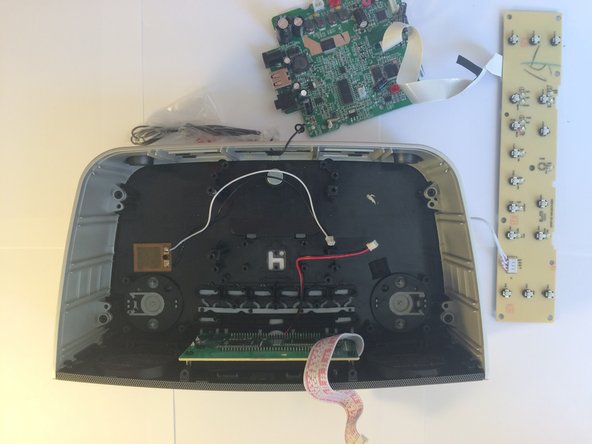
    • Remove the 4 two-wire extension cables and the ribbon cable connected to the unit.

    • The logic board will still be attached to the unit by a flat ribbon cable and a radio wire.

    • Set the logic board next to the unit.

  6. iHome iBN97 Display Screen Replacement, Speaker Removal: 手順 6、 3の画像 1 iHome iBN97 Display Screen Replacement, Speaker Removal: 手順 6、 3の画像 2 iHome iBN97 Display Screen Replacement, Speaker Removal: 手順 6、 3の画像 3
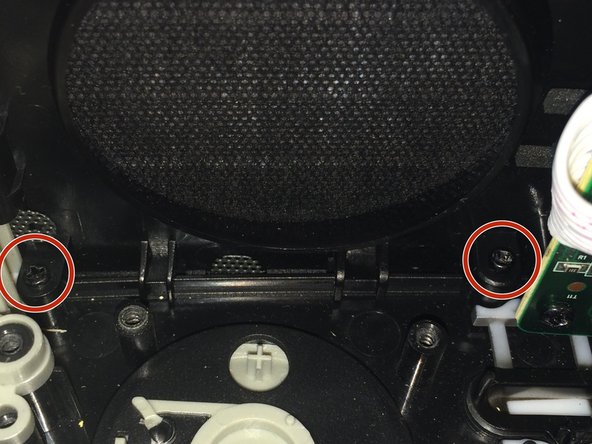
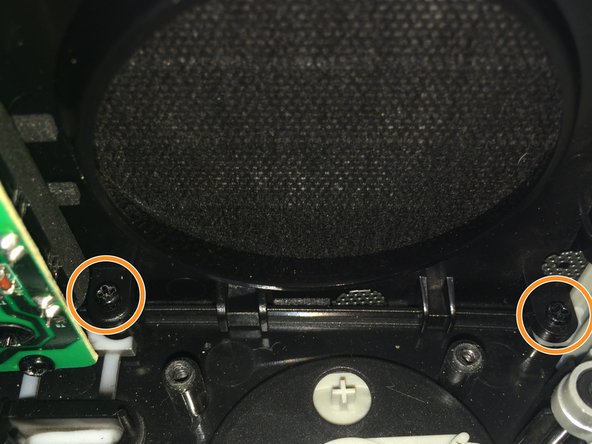
    • Remove the 4 Phillips head screws that attach the speakers to the unit.

    • There are 2 more screws for each speaker. The speakers are symmetrical. Remove the 4 screws to free both speakers.

    • Gently lift each speaker out of the unit and set aside.

  7. iHome iBN97 Display Screen Replacement, Bluetooth Removal: 手順 7、 3の画像 1 iHome iBN97 Display Screen Replacement, Bluetooth Removal: 手順 7、 3の画像 2 iHome iBN97 Display Screen Replacement, Bluetooth Removal: 手順 7、 3の画像 3
    • Remove the 4 Phillips head screws belonging to the small bluetooth circuit board.

    • Using tweezers, remove the ribbon cable connection.

    • Set the bluetooth circuit board aside.

  8. iHome iBN97 Display Screen Replacement, Switch Board Removal: 手順 8、 3の画像 1 iHome iBN97 Display Screen Replacement, Switch Board Removal: 手順 8、 3の画像 2 iHome iBN97 Display Screen Replacement, Switch Board Removal: 手順 8、 3の画像 3
    • Remove the 9 Phillips screws that fasten the switch board to the unit.

    • Remove the switch board and place it outside of the unit, out of the way.

    • The switch board is attached by a flat ribbon cable to the logic board, which is tethered to the unit by a radio wire. It shouldn't get in the way, however.

  9. iHome iBN97 Display Screen Replacement, Dismantling the Case: 手順 9、 3の画像 1 iHome iBN97 Display Screen Replacement, Dismantling the Case: 手順 9、 3の画像 2 iHome iBN97 Display Screen Replacement, Dismantling the Case: 手順 9、 3の画像 3
    • If your screwdriver is small enough to fit inside the width of the case, this step is not necessary. Skip ahead to Step 11 and perform the step inside the case.

    • Using the size 1 Phillips screwdriver, remove the 4 Phillips head screws that hold the different parts of the case together.

  10. iHome iBN97 Display Screen Replacement, Screen Removal: 手順 10、 3の画像 1 iHome iBN97 Display Screen Replacement, Screen Removal: 手順 10、 3の画像 2 iHome iBN97 Display Screen Replacement, Screen Removal: 手順 10、 3の画像 3
    • Slide the screen up and out of the unit.

    • This part is attached in a tongue and groove fashion. It should come out without any snapping.

  11. iHome iBN97 Display Screen Replacement, Time Screen Display Removal: 手順 11、 3の画像 1 iHome iBN97 Display Screen Replacement, Time Screen Display Removal: 手順 11、 3の画像 2 iHome iBN97 Display Screen Replacement, Time Screen Display Removal: 手順 11、 3の画像 3
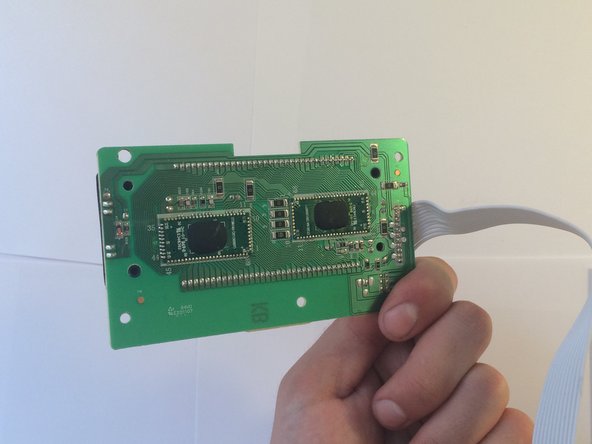
    • Remove the 8 Phillips screws and remove the time display screen.

    • These screws are size 2 again.

  12. iHome iBN97 Display Screen Replacement, Finished!: 手順 12、 2の画像 1 iHome iBN97 Display Screen Replacement, Finished!: 手順 12、 2の画像 2
    • Now this component is either repaired or replaced.

終わりに

Follow these steps backwards to reassemble the device. The reassembly is straightforward; it should all fit well again.

ある他の人がこのガイドを完成しました。

作成者

2人の作成者と共同で作成されました。

Luke Williams

メンバー登録日: 09/29/15

473 ポイント

2のガイドは作成済み

チーム

Cal Poly, Team 10-1, Green Fall 2015 Cal Poly, Team 10-1, Green Fall 2015人のメンバー

CPSU-GREEN-F15S10G1

4 メンバー

6のガイドは作成済み

コメント 1 件

Where did you find iHome iBN97 Display Screen Replacement?

Angelo Mastrella - 返信

コメントを追加

統計データ:

過去 24時間: 0

過去 7 日: 1

過去 30 日: 7

今までの合計 1,020