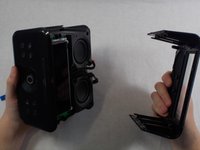
メインコンテンツにスキップ

iHome iAVS16 Speakers Replacement

必要な工具と部品

  1. iHome iAVS16 Speakers Replacement, Power Board: 手順 1、 3の画像 1 iHome iAVS16 Speakers Replacement, Power Board: 手順 1、 3の画像 2 iHome iAVS16 Speakers Replacement, Power Board: 手順 1、 3の画像 3
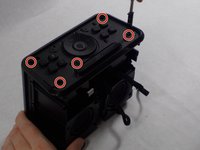
    • Remove the four 1.7 mm Phillips #0 screws located on the bottom of the device.

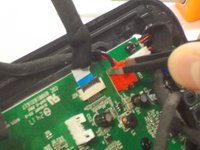
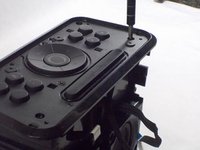
    • Lift up the bottom of the device.

    • Carefully lift the bottom of the device up as to not damage the ribbon cable connecting it.

  2. iHome iAVS16 Speakers Replacement: 手順 2、 3の画像 1 iHome iAVS16 Speakers Replacement: 手順 2、 3の画像 2 iHome iAVS16 Speakers Replacement: 手順 2、 3の画像 3
    • Remove the two 1.7 mm Phillips #0 screws holding the white face place onto the inside of the device's bottom.

    • Using an iFixit opening tool on the side without the black adhesive, carefully lift up the white face plate.

    • Lifting too quickly could damage the ribbon cable still attached.

  3. iHome iAVS16 Speakers Replacement: 手順 3、 2の画像 1 iHome iAVS16 Speakers Replacement: 手順 3、 2の画像 2
    • Using the tweezers, lift up on the black tab holding the ribbon cable down.

    • Carefully pull the ribbon cable back and out of the slot.

  4. iHome iAVS16 Speakers Replacement: 手順 4、 3の画像 1 iHome iAVS16 Speakers Replacement: 手順 4、 3の画像 2 iHome iAVS16 Speakers Replacement: 手順 4、 3の画像 3
    • Remove the two 1.7 mm Phillips #0 screws holding the power board in.

    • Carefully flip the board over.

    • Remove the red connector from its socket with a pair of tweezers.

  5. iHome iAVS16 Speakers Replacement, LCD (Display): 手順 5、 3の画像 1 iHome iAVS16 Speakers Replacement, LCD (Display): 手順 5、 3の画像 2 iHome iAVS16 Speakers Replacement, LCD (Display): 手順 5、 3の画像 3
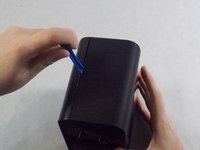
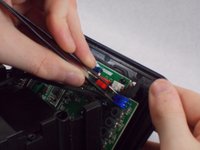
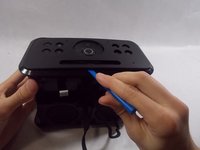
    • Insert an iFixit opening tool into the lining on the front casing and pry it apart. Do this for both sides.

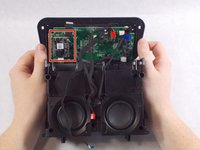
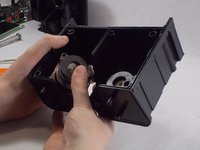
    • Further remove the front casing off from the device manually with your hands.

  6. iHome iAVS16 Speakers Replacement: 手順 6、 1の画像 1
    • Remove the four 1.7 mm Phillips #0 screws holding the LCD onto the front of the device.

  7. iHome iAVS16 Speakers Replacement: 手順 7、 3の画像 1 iHome iAVS16 Speakers Replacement: 手順 7、 3の画像 2 iHome iAVS16 Speakers Replacement: 手順 7、 3の画像 3
    • Carefully flip the LCD display over to expose the ribbon cable connecting it.

    • Lift the black tab holding the cable down, and carefully put it out of the socket.

  8. iHome iAVS16 Speakers Replacement, Motherboard: 手順 8、 1の画像 1
    • Flip up the back of the device encasing the motherboard.

  9. iHome iAVS16 Speakers Replacement: 手順 9、 3の画像 1 iHome iAVS16 Speakers Replacement: 手順 9、 3の画像 2 iHome iAVS16 Speakers Replacement: 手順 9、 3の画像 3
    • Using tweezers, unplug the white, red, and blue connectors from the motherboard by pulling each out.

  10. iHome iAVS16 Speakers Replacement: 手順 10、 1の画像 1
    • Carefully unplug the ribbon cable, making sure not to rip it.

  11. iHome iAVS16 Speakers Replacement, Wi-Fi Antenna: 手順 11、 3の画像 1 iHome iAVS16 Speakers Replacement, Wi-Fi Antenna: 手順 11、 3の画像 2 iHome iAVS16 Speakers Replacement, Wi-Fi Antenna: 手順 11、 3の画像 3
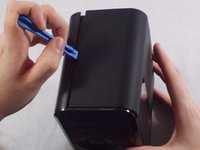
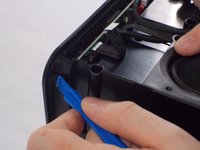
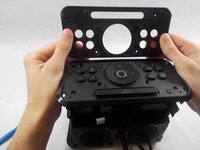
    • Using an iFixit opening tool, push the tab under the top of the device to create a gap.

    • Sometimes the top will pop off easily, and other times it will not. You may need to hold the tab up while you insert the iFixit opening tool under the top lining.

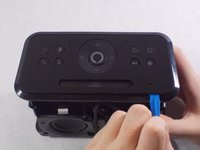
    • Insert the iFixit opening tool in the gap, and slide it across to remove the top casing.

  12. iHome iAVS16 Speakers Replacement: 手順 12、 3の画像 1 iHome iAVS16 Speakers Replacement: 手順 12、 3の画像 2 iHome iAVS16 Speakers Replacement: 手順 12、 3の画像 3
    • Remove the top cover of the device.

    • Remove the five 1.7 mm Phillips #0 screws on the top of the device.

  13. iHome iAVS16 Speakers Replacement: 手順 13、 3の画像 1 iHome iAVS16 Speakers Replacement: 手順 13、 3の画像 2 iHome iAVS16 Speakers Replacement: 手順 13、 3の画像 3
    • Remove the Wi-Fi antenna with tweezers.

    • You may wish to completely remove the motherboard for easier access to the Wi-Fi chip and antenna. Please refer to motherboard guide for instructions.

  14. iHome iAVS16 Speakers Replacement, Speakers: 手順 14、 2の画像 1 iHome iAVS16 Speakers Replacement, Speakers: 手順 14、 2の画像 2
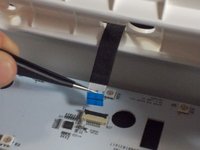
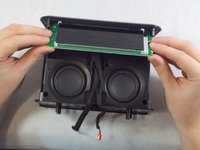
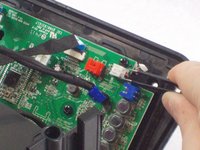
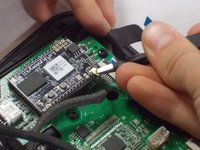
    • Remove the four Phillips screws on the back of the front half of the device holding the speakers in.

    • The speakers are magnetic so removing the screws can be challenging.

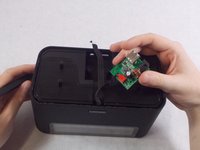
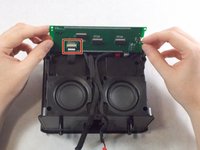
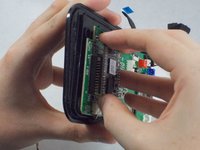
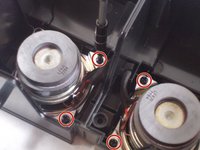
    • Push the speakers out of the back of the device.

  15. iHome iAVS16 Speakers Replacement: 手順 15、 2の画像 1 iHome iAVS16 Speakers Replacement: 手順 15、 2の画像 2
    • assemble it back together

終わりに

Thank you for using our guide, we hope that it helped you fix your project

作成者

5人の作成者と共同で作成されました。

Ashley Famularo

メンバー登録日: 10/25/19

181 ポイント

2のガイドは作成済み

チーム

UMass Dartmouth, Team S1-G7, O'Connell Fall 2019 UMass Dartmouth, Team S1-G7, O'Connell Fall 2019人のメンバー

UMASSD-O'CONNELL-F19S1G7

4 メンバー

5のガイドは作成済み

0 件のコメント

コメントを追加

統計データ:

過去 24時間: 0

過去 7 日: 3

過去 30 日: 3

今までの合計 166