メインコンテンツにスキップ

iBook G4 14" 1.42 GHz Rear Display Bezel Replacement

必要条件のみ
この修理ガイドは、他のガイドの前提条件として使用されます。それ自体は不完全で、単独で使用されることはありません。

必要な工具と部品

  1. iBook G4 14" 1.42 GHz Rear Display Bezel Replacement, Rear Display Bezel: 手順 1、 1の画像 1
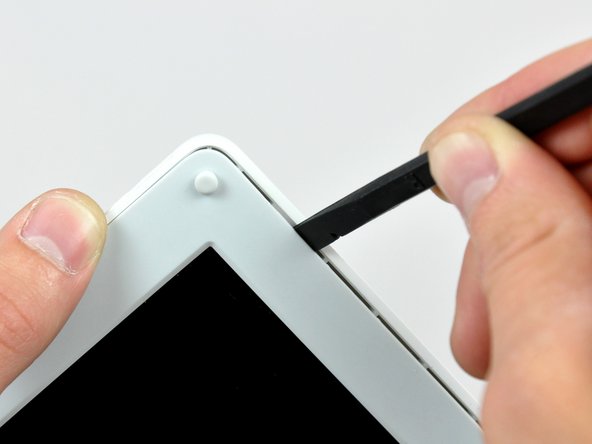
    • Use a 1.5 mm hex screwdriver to remove the two hex screws on either side of the display (four screws total).

    • If you don't have a 1.5 mm hex driver, you can probably get these screws out with a T6 Torx screwdriver. However, if you use a T6 Torx driver you'll be more likely to strip the screws.

  2. iBook G4 14" 1.42 GHz Rear Display Bezel Replacement: 手順 2、 1の画像 1
    • Use your thumbs to slightly separate the rear bezel from the front bezel.

    • It is helpful to hold the opposing corner of the display stationary to aid in flexing the rear bezel away from the display.

  3. iBook G4 14" 1.42 GHz Rear Display Bezel Replacement: 手順 3、 3の画像 1 iBook G4 14" 1.42 GHz Rear Display Bezel Replacement: 手順 3、 3の画像 2 iBook G4 14" 1.42 GHz Rear Display Bezel Replacement: 手順 3、 3の画像 3
    • Insert the flat end of a spudger into the gap between the front and rear bezels.

    • Rotate your spudger until it is parallel to the front face of the display.

    • Run the spudger around the perimeter of the display to separate the rear bezel from its retaining clips.

  4. iBook G4 14" 1.42 GHz Rear Display Bezel Replacement: 手順 4、 1の画像 1
    • Lift the rear bezel off the display.

終わりに

To reassemble your device, follow these instructions in reverse order.

作成者

3人の作成者と共同で作成されました。

Andrew Bookholt

586,200 ポイント

619のガイドは作成済み

0 件のコメント

コメントを追加

統計データ:

過去 24時間: 0

過去 7 日: 0

過去 30 日: 0

今までの合計 252