この翻訳は、ソースガイドの最新の更新を反映していない可能性があります。 翻訳の更新に協力してください。 または ソースガイドを参照してください。
必要な工具と部品
-
-
この手順は未翻訳です。 翻訳を手伝う。
-
Remove the two 3 mm Phillips screws inside the left edge of the battery tray.
-
Three 3 mm Phillips around the battery compartment.
-
Three 4.5 mm Phillips along the optical drive bezel. (a magnetic screwdriver may help to lift these screws out)
-
One 12 mm Phillips in the lower right corner.
-
Four 14.5 mm Phillips.
-
-
この手順は未翻訳です。 翻訳を手伝う。
-
Remove the following 7 screws from the edges of the keyboard area.
-
Three 2 mm Phillips along the right edge.
-
One 4.5 mm Phillips underneath where the magnet was.
-
One 6 mm Phillips with a small head in the lower left corner.
-
Two 6 mm Phillips with large heads, one in the upper left corner and one in the middle.
-
-
この手順は未翻訳です。 翻訳を手伝う。
-
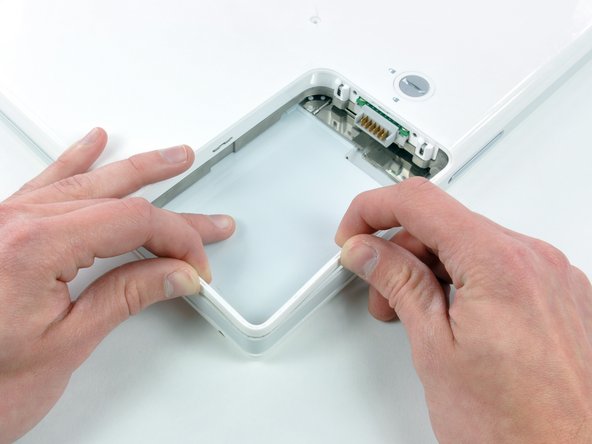
Carefully lift the upper case slightly and move it toward the front of the computer to reveal the trackpad connector. Use a spudger or your finger to disconnect the trackpad connector hidden beneath the white plastic tab.
-
After disconnecting the track pad connector, carefully rotate the upper case away from you and rest it against the display.
-


141 の人々がこのガイドを完成させました。
添付文書

11 件のコメント
I did this not just for upgrade but because G4 had been out of service for over 12mths due to what I believed was a faulty logic board. Attempted re-installs of OS (when I found the disc) suggested HDD failure so I ordered a 160Gb replacement from ebay for £40 and have just replaced original 30Gb HDD with a 160Gb following these instructions - I have no previous experience in this type of work but now have a working lap top with fully installed OS up and running and all at a total saving of at least £827 based on new MacBook prices!!!
Be SURE to read the comments on the more difficult parts (removing connectors, etc). The comments expound on the care needed in these areas to avoid damaging your iBook. Good luck!
CL Johnson - 返信
Next time I think I'll just use a crowbar or a drop saw to get the hard disk out for data recovery.
Hard disk is located in the front left hand side of the unit.
65+ screws of all shapes and sizes.
What a poorly designed notebook - that's putting it really, really, mildly.
It sucks.
I completely agree with joshAU. This design is the worst hardware I’ve ever had the displeasure of having to deal with.
36 %#*@ steps to CHANGE A HARD DRIVE?
WildBill -