メインコンテンツにスキップ

iBUYPOWER Trace 4 9310 M.2 NVMe Drive Replacement

必要な工具と部品

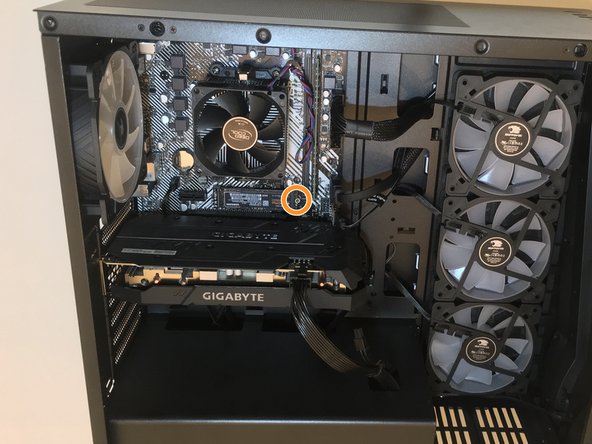
  1. iBUYPOWER Trace 4 9310 M.2 NVMe Drive Replacement, M.2 NVMe Drive: 手順 1、 2の画像 1 iBUYPOWER Trace 4 9310 M.2 NVMe Drive Replacement, M.2 NVMe Drive: 手順 1、 2の画像 2
    • Lay the desktop on its side with the glass panel facing up.

    • Remove the single screw.

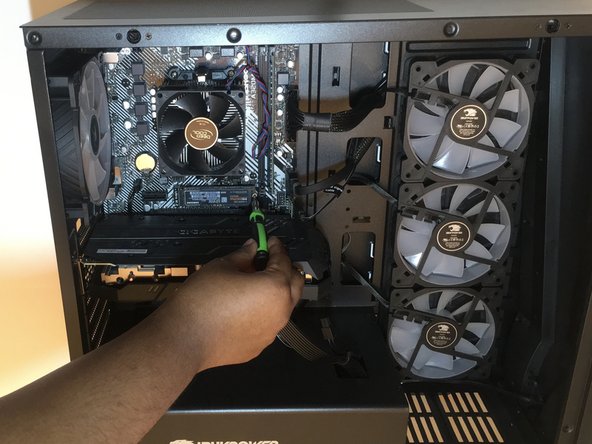
  2. iBUYPOWER Trace 4 9310 M.2 NVMe Drive Replacement: 手順 2、 2の画像 1 iBUYPOWER Trace 4 9310 M.2 NVMe Drive Replacement: 手順 2、 2の画像 2
    • Remove the glass side by pivoting it up with the bottom side still seated in the notches.

    • Lift the glass side out of the notches and set it to the side.

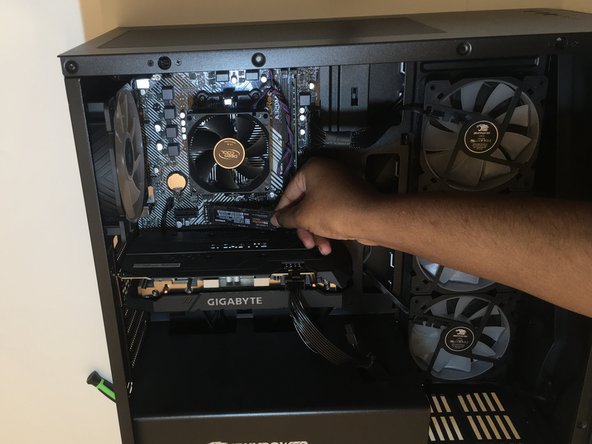
  3. iBUYPOWER Trace 4 9310 M.2 NVMe Drive Replacement: 手順 3、 3の画像 1 iBUYPOWER Trace 4 9310 M.2 NVMe Drive Replacement: 手順 3、 3の画像 2 iBUYPOWER Trace 4 9310 M.2 NVMe Drive Replacement: 手順 3、 3の画像 3
    • Locate the M.2 drive that is right above the CPU.

    • Remove the screw on the edge of the drive.

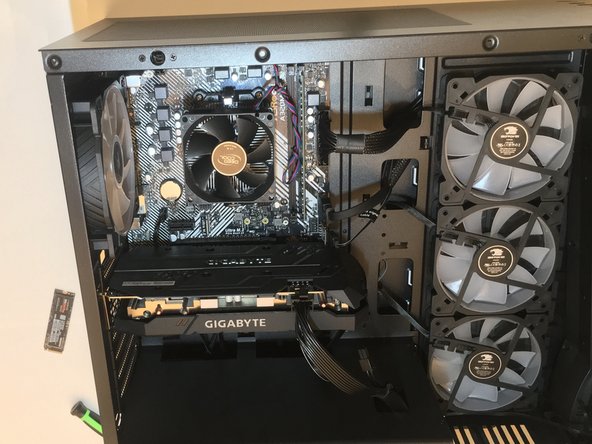
  4. iBUYPOWER Trace 4 9310 M.2 NVMe Drive Replacement: 手順 4、 2の画像 1 iBUYPOWER Trace 4 9310 M.2 NVMe Drive Replacement: 手順 4、 2の画像 2
    • The drive should lift up on the edge where the screw was.

    • Pull the drive out at an angle from the motherboard.

  5. iBUYPOWER Trace 4 9310 M.2 NVMe Drive Replacement: 手順 5、 2の画像 1 iBUYPOWER Trace 4 9310 M.2 NVMe Drive Replacement: 手順 5、 2の画像 2
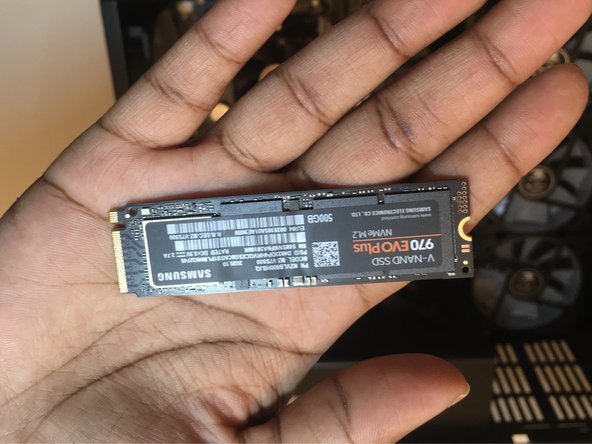
    • Line the new drive up with the slot and gently slide it in.

    • Use one finger to hold the drive down while you screw it back in.

終わりに

To reassemble your device, follow these instructions in reverse order.

2 の人々がこのガイドを完成させました。

作成者

2人の作成者と共同で作成されました。

Kylie F

メンバー登録日: 02/25/21

225 ポイント

1ガイドが承認済み

チーム

University of North Texas, Team S1-G14, Raign Spring 2021 University of North Texas, Team S1-G14, Raign Spring 2021人のメンバー

UNT-RAIGN-S21S1G14

2 メンバー

1のガイドは作成済み

コメント 1 件

Thank you, Kilie, for the clear step-by-step instructions, together with pictures, for NVMe SSD installation.

George

George Meier - 返信

コメントを追加

統計データ:

過去 24時間: 5

過去 7 日: 36

過去 30 日: 117

今までの合計 2,545