メインコンテンツにスキップ

eufy RoboVac 11 Front Cover and Motherboard Replacement

必要な工具と部品

  1. eufy RoboVac 11 Front Cover and Motherboard Replacement, Front Cover and Motherboard: 手順 1、 2の画像 1 eufy RoboVac 11 Front Cover and Motherboard Replacement, Front Cover and Motherboard: 手順 1、 2の画像 2
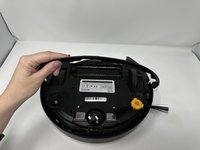
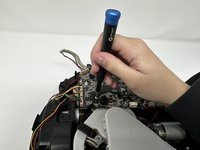
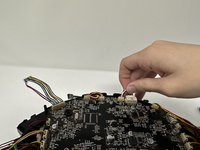
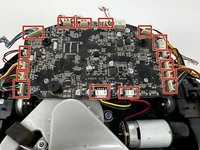
    • Remove the nine 10 mm screws with the Phillips #1 precision screwdriver.

    • Keep track of these screws. They are the same length as the interior screws but wider in diameter.

  2. eufy RoboVac 11 Front Cover and Motherboard Replacement: 手順 2、 2の画像 1 eufy RoboVac 11 Front Cover and Motherboard Replacement: 手順 2、 2の画像 2
    • Remove the six 7 mm screws on the bumper with the Phillips #1 screwdriver.

  3. eufy RoboVac 11 Front Cover and Motherboard Replacement: 手順 3、 3の画像 1 eufy RoboVac 11 Front Cover and Motherboard Replacement: 手順 3、 3の画像 2 eufy RoboVac 11 Front Cover and Motherboard Replacement: 手順 3、 3の画像 3
    • Remove the top plate from the body of the device.

    • Unplug the bumper from the motherboard.

  4. eufy RoboVac 11 Front Cover and Motherboard Replacement: 手順 4、 2の画像 1 eufy RoboVac 11 Front Cover and Motherboard Replacement: 手順 4、 2の画像 2
    • Remove the three 10 mm motherboard screws with a Phillips #1 screwdriver.

    • Cleaning the motherboard and inside of the device outdoors with a compressed air cleaner will help the robot last longer.

  5. eufy RoboVac 11 Front Cover and Motherboard Replacement: 手順 5、 2の画像 1 eufy RoboVac 11 Front Cover and Motherboard Replacement: 手順 5、 2の画像 2
    • Unplug the cables from the motherboard.

終わりに

To reassemble your device, follow these instructions in reverse order.

3 の人々がこのガイドを完成させました。

作成者

2人の作成者と共同で作成されました。

Kyleigh Hill

メンバー登録日: 09/27/22

277 ポイント

2のガイドは作成済み

チーム

Utah Tech University, Team 1-3, McMurrin Fall 2022 Utah Tech University, Team 1-3, McMurrin Fall 2022人のメンバー

UTAHTECH-MCMURRIN-F22S1G3

3 メンバー

6のガイドは作成済み

0件のガイドコメント

コメントを追加

統計データ:

過去 24時間: 0

過去 7 日: 8

過去 30 日: 22

今までの合計 1,425