メインコンテンツにスキップ

bObsweep Robotic Vacuum Battery Replacement

必要な工具と部品

ビデオの概要

  1. bObsweep Robotic Vacuum Battery Replacement, Battery: 手順 1、 3の画像 1 bObsweep Robotic Vacuum Battery Replacement, Battery: 手順 1、 3の画像 2 bObsweep Robotic Vacuum Battery Replacement, Battery: 手順 1、 3の画像 3
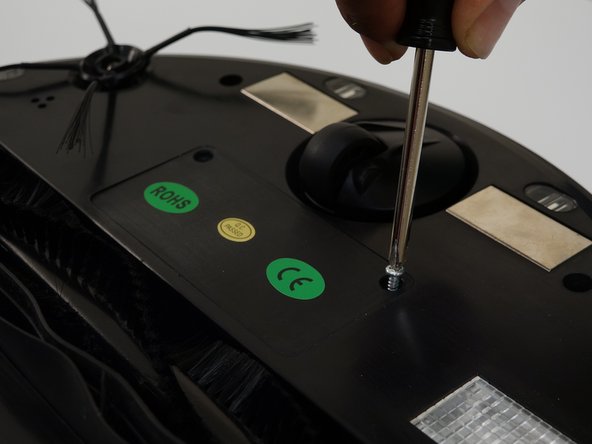
    • Unscrew the battery's cover plate on bObsweep's underside, above the main brush.

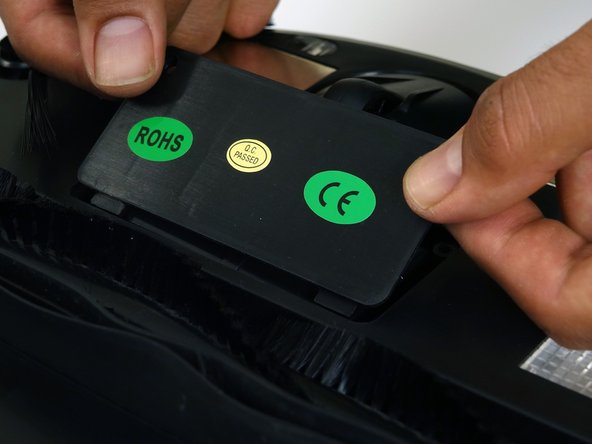
    • Lift the cover plate to expose the battery.

  2. bObsweep Robotic Vacuum Battery Replacement: 手順 2、 3の画像 1 bObsweep Robotic Vacuum Battery Replacement: 手順 2、 3の画像 2 bObsweep Robotic Vacuum Battery Replacement: 手順 2、 3の画像 3
    • Lift the battery up and out of its compartment.

    • Using both hands, pinch the plastic connector where the battery's wiring attaches to bObsweep and pull apart to disconnect.

  3. bObsweep Robotic Vacuum Battery Replacement: 手順 3、 3の画像 1 bObsweep Robotic Vacuum Battery Replacement: 手順 3、 3の画像 2 bObsweep Robotic Vacuum Battery Replacement: 手順 3、 3の画像 3
    • Connect the wires of the new battery. Push together tightly and it will lock in place.

    • Tuck the wires down inside the battery compartment on the right side.

    • Lower the battery down into bObsweep with the barcode facing up.

  4. bObsweep Robotic Vacuum Battery Replacement: 手順 4、 3の画像 1 bObsweep Robotic Vacuum Battery Replacement: 手順 4、 3の画像 2 bObsweep Robotic Vacuum Battery Replacement: 手順 4、 3の画像 3
    • Lower the cover down so it lies flat and the screw holes of the cover line up with those on bObsweep.

    • Reinstall the two screws removed in step one to secure the cover and battery in place.

終わりに

A quick fix for bObsweep's power supply. Changing an old lithium ion battery for a new one ensures the vacuum will work longer with fewer charging breaks.

ある他の人がこのガイドを完成しました。

作成者

2人の作成者と共同で作成されました。

Tatiana

メンバー登録日: 06/28/14

737 ポイント

17のガイドは作成済み

0 件のコメント

コメントを追加

統計データ:

過去 24時間: 1

過去 7 日: 2

過去 30 日: 7

今までの合計 2,769