はじめに
A working camera serves many functions such as capturing photos, scanning documents, and engaging in video calls. If the camera is faulty or damaged due to reasons such as water exposure and drop impact, replacing it will help restore these functionalities.
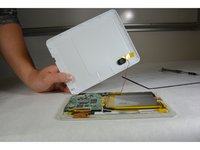
In this step-by-step guide, you will replace a damaged camera on a Zeki TBQG884B tablet. Perform each step with caution because fragile components are involved. No special skills are required to replace the camera.
必要な工具と部品
-
-
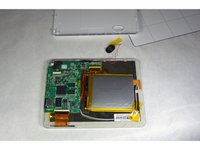
Remove the two screws from the end of the device where the ports are located using a Phillips #1 screwdriver.
-
-
-
この手順で使用する道具:Tweezers$4.99
-
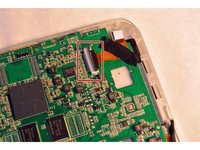
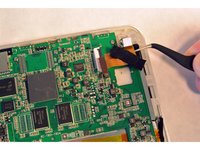
Open the ZIF connector, the black lock part over the wire ribbon in the motherboard, and remove the wire ribbon that connects the motherboard and the camera.
-


To reassemble your device, follow these instructions in reverse order.
3 の人々がこのガイドを完成させました。
チーム

IUPUI, Team 1-3, Harley Fall 2015 IUPUI, Team 1-3, Harley Fall 2015人のメンバー
IUPUI-HARLEY-F15S1G3
5 メンバー
5のガイドは作成済み